

Keywords: Information, Reports, Accrual, Quickbooks
Credit: Intuit- Quickbooks Online Photo By: FP
Struggling to Keep Your Books in Order? 📊📅
Let us handle the numbers while you focus on growing your business! Get expert bookkeeping support tailored to your needs.
👉 Click Here for a Free Consultation!
Converting sub-customers to projects
People in various sectors can benefit from using Projects in QuickBooks. Businesses in construction, consultancy, events management, nonprofit monitoring grant spending, and many more can use this feature to track income and costs against a job.
Using the project’s features.
Projects provides a dashboard view of the status of all of your projects, as well as more detailed data on individual projects. The feature enables you to:
- Keep track of multiple projects per customer
- Access active projects and add transactions to them
- Categorize each transaction to individual projects
- Track billable and nonbillable hours alongside other project expenses
- Quickly run key project reports
Using the Projects feature and Sub-customers feature
Using the sub-customers feature is helpful when the parent customer is paying all the invoices for all the sub-customers. Although projects don’t offer the same hierarchy, they provide a more holistic way of tracking jobs, and tend to be appropriate for more complex on Plus and Advanced plans. Because the Projects feature offers rich data on jobs, it can better inform deep advisory insights.
What’s more, the Projects feature and sub-customers feature can be used together. You can set up a hierarchy of sub-customers and allocate projects to each sub-customer.
Let’s get an overview of the three tasks for Projects before you dive into the details.
Creating a Project
Switching on the projects feature
Let’s look at the first task for Projects, and that’s how to create one. There are several options, but before you embark on any of them, you need to check a few settings, so let’s explore those now.
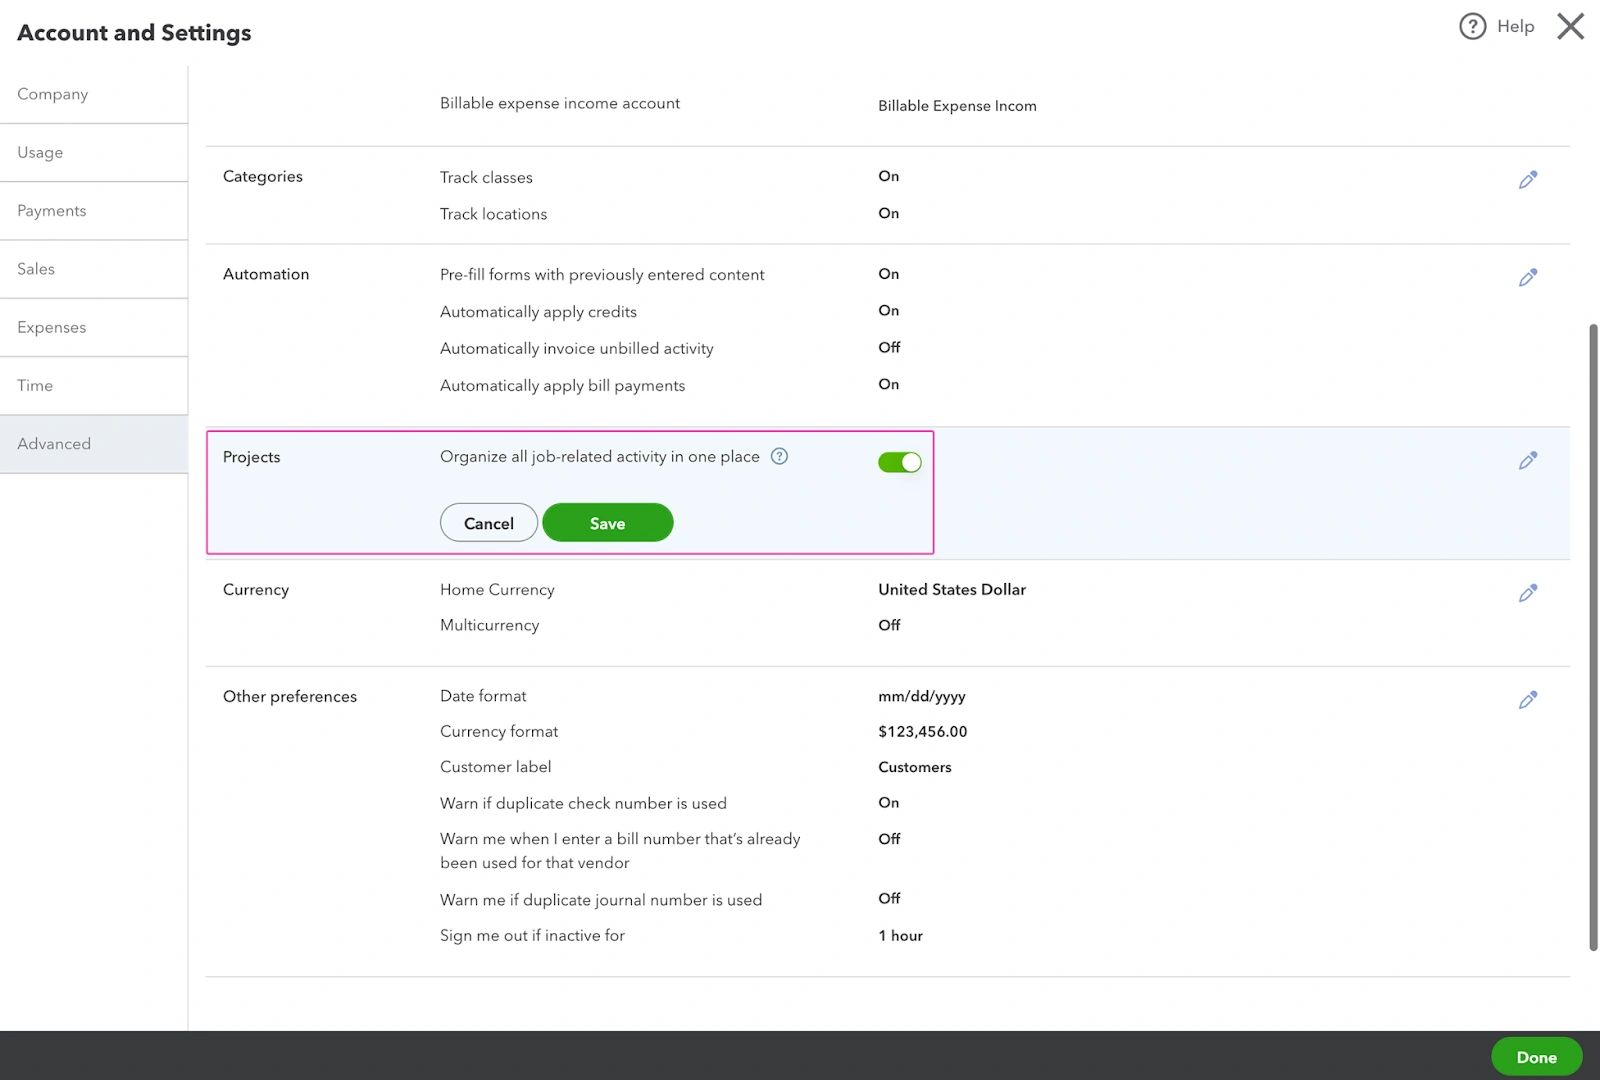
Step 1: Go to the General Settings gear and select Account and Settings. From the Advance tab, Expand Projects. Switch on the Organize all job- related activity in one place setting. Note that if you switch on the Projects feature in your Books in Quickbooks Online Accountant, you can’t turn it off again. Before you save the settings, you’ll see a warning that it’s permanent. There are few additional settings that are often used along with projects. Let’s take a look.
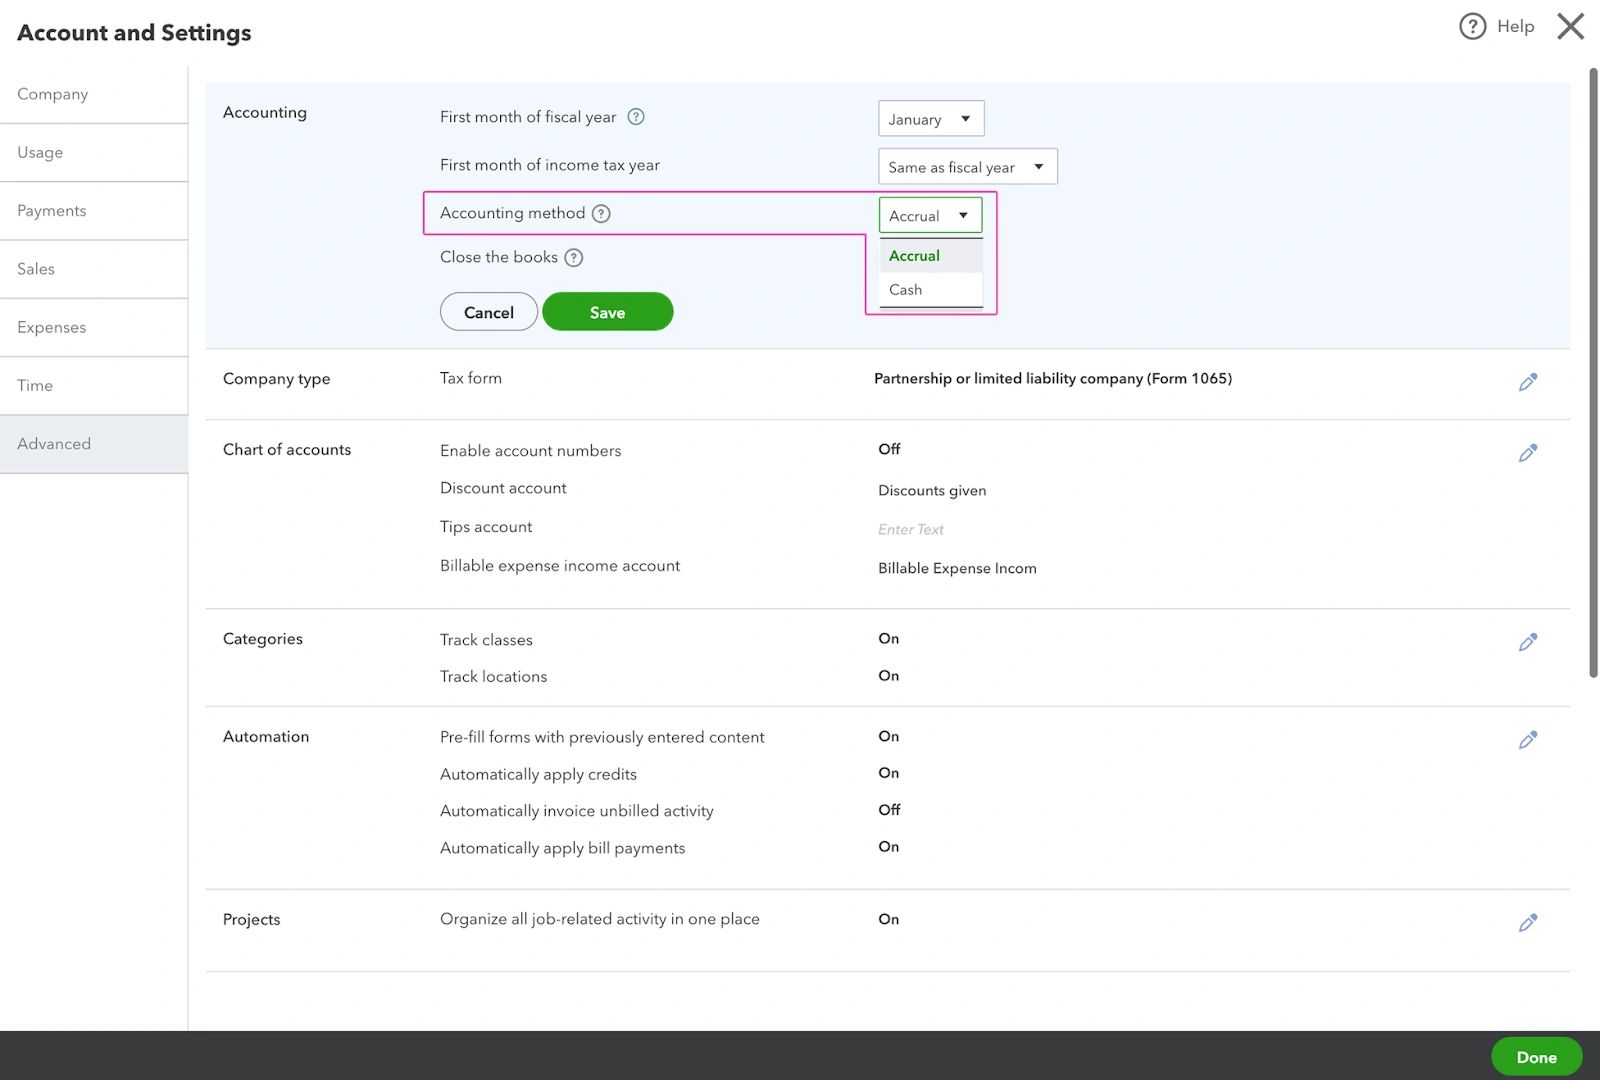
Step 2 : Still in the Advance tab, consider the accounting methods being used, as it will impact the values shown for projects. If using the Cash accounting method, income and expenses will be recorded at the time you actually receive a payment or pay a bill. If using the Accrual accounting method, income and expenses will be recorded when you send the invoice or receive the bill.
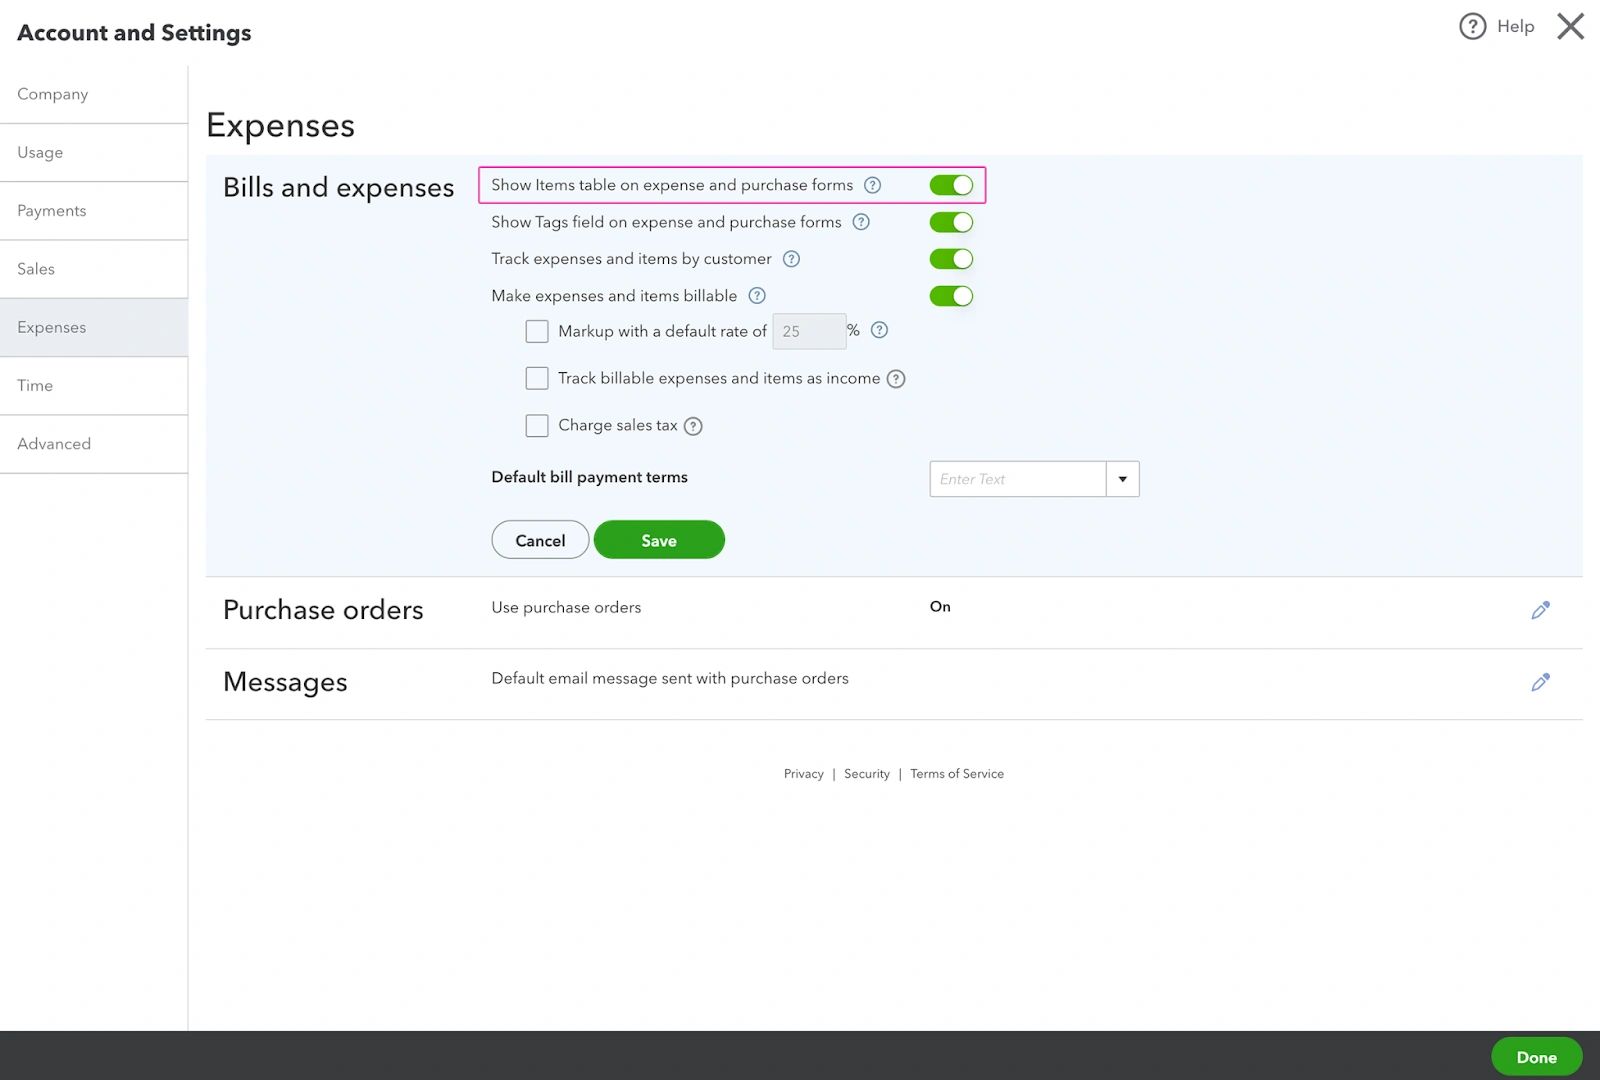
Step 3 : Go to the Expenses and expand the Bill and expenses section. Switch on Show Item Table on Expense and Purchase Forms to add the item details grid to purchase transactions. This setting helps to improve job costing and enables more detailed reports to be created.
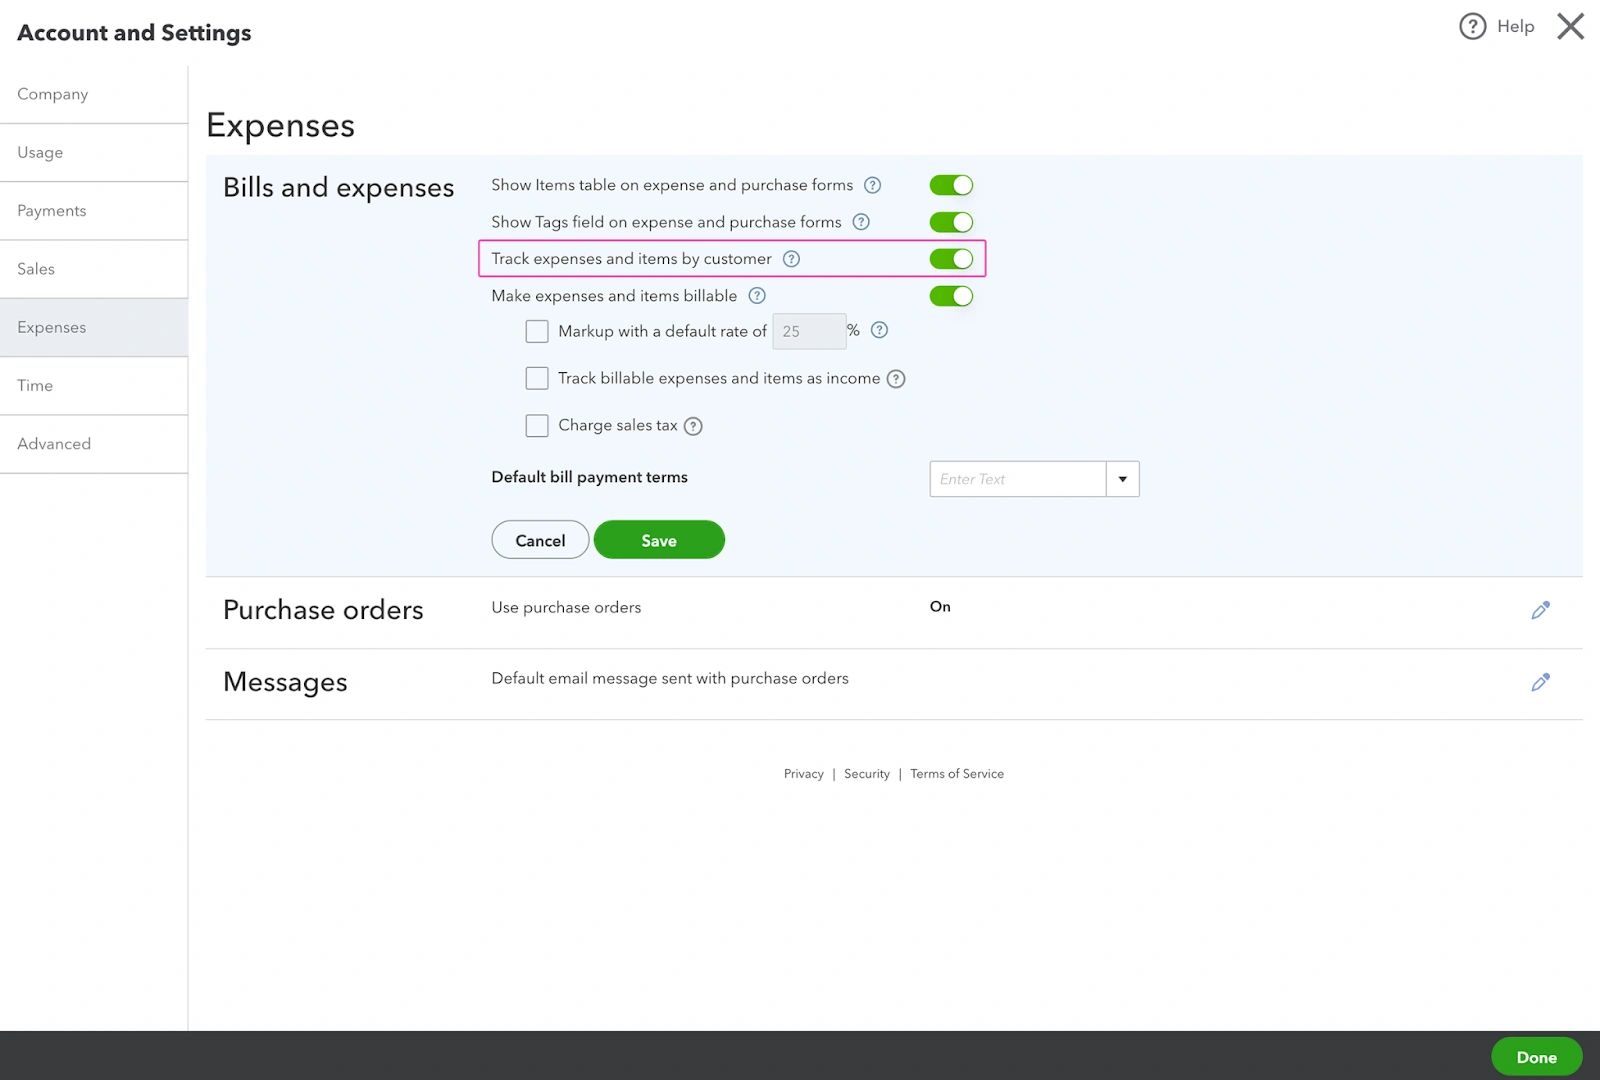
Step 4 : Switch on Track expenses and items by customer to add the customer column on purchase transactions (Projects and sub-customers will be included in the dropdown).
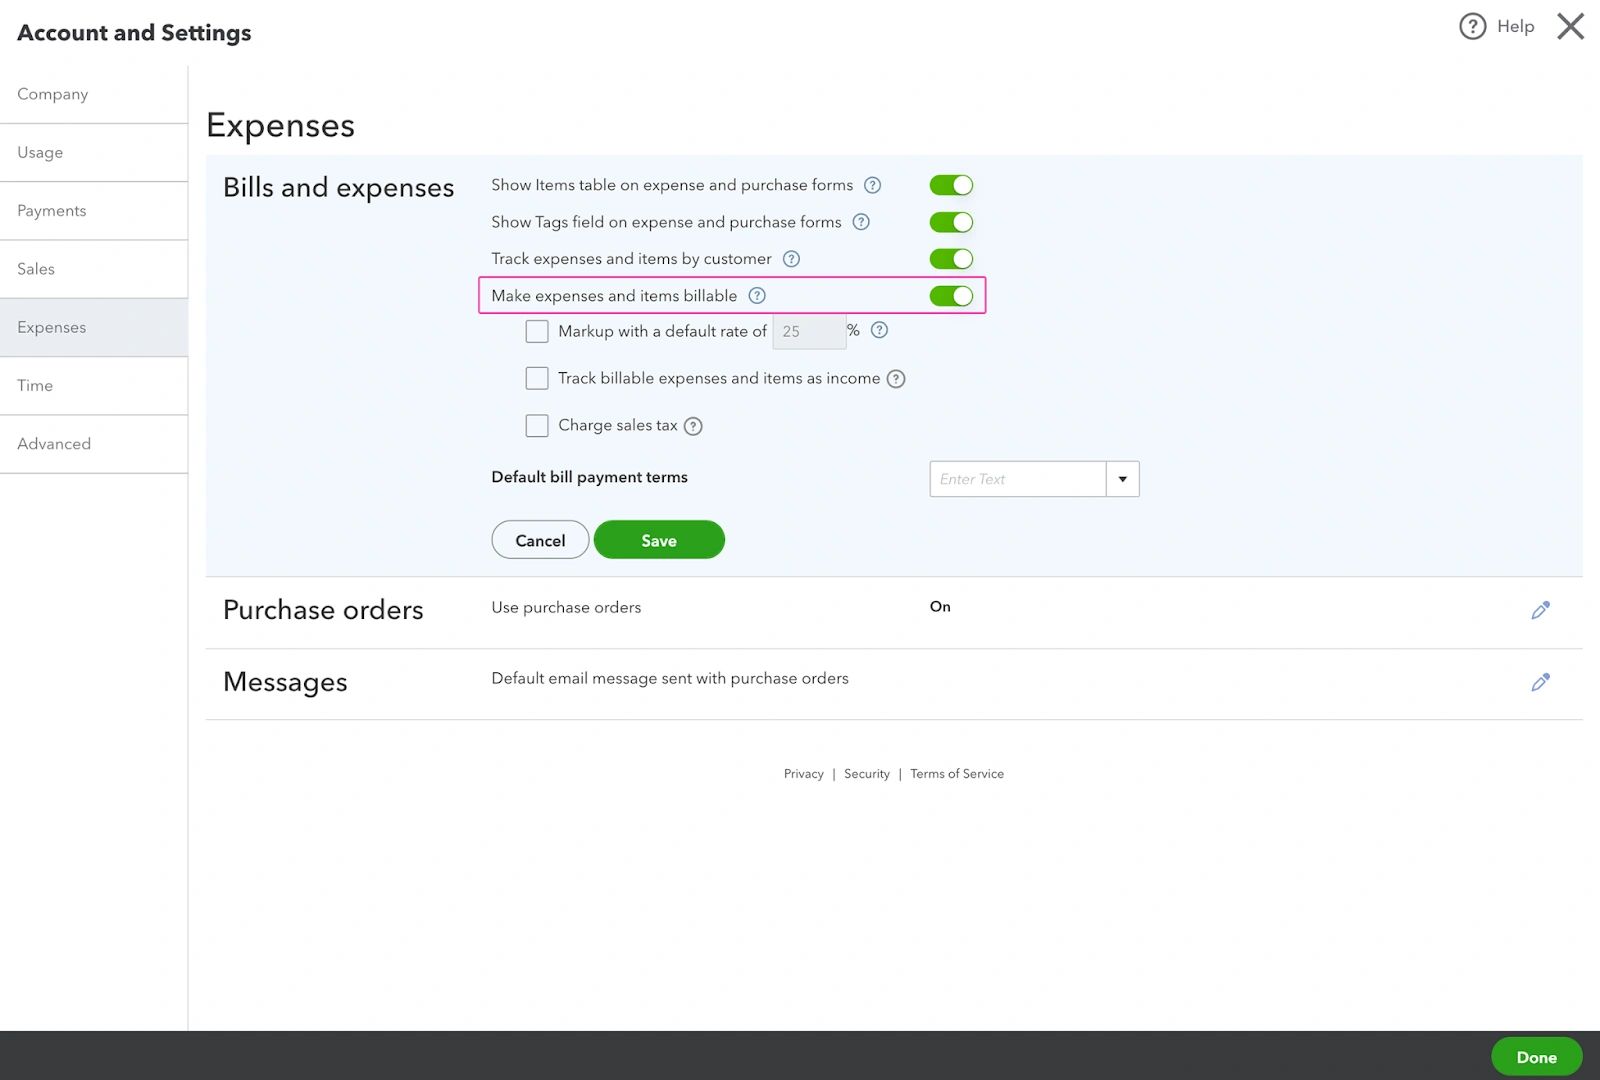
Step 5 : Switch on Make expenses and items billable if you are doing a time-and-materials job. They’ll want this column on the purchase form to mark them billable so that purchase transactions can be included on the invoice.
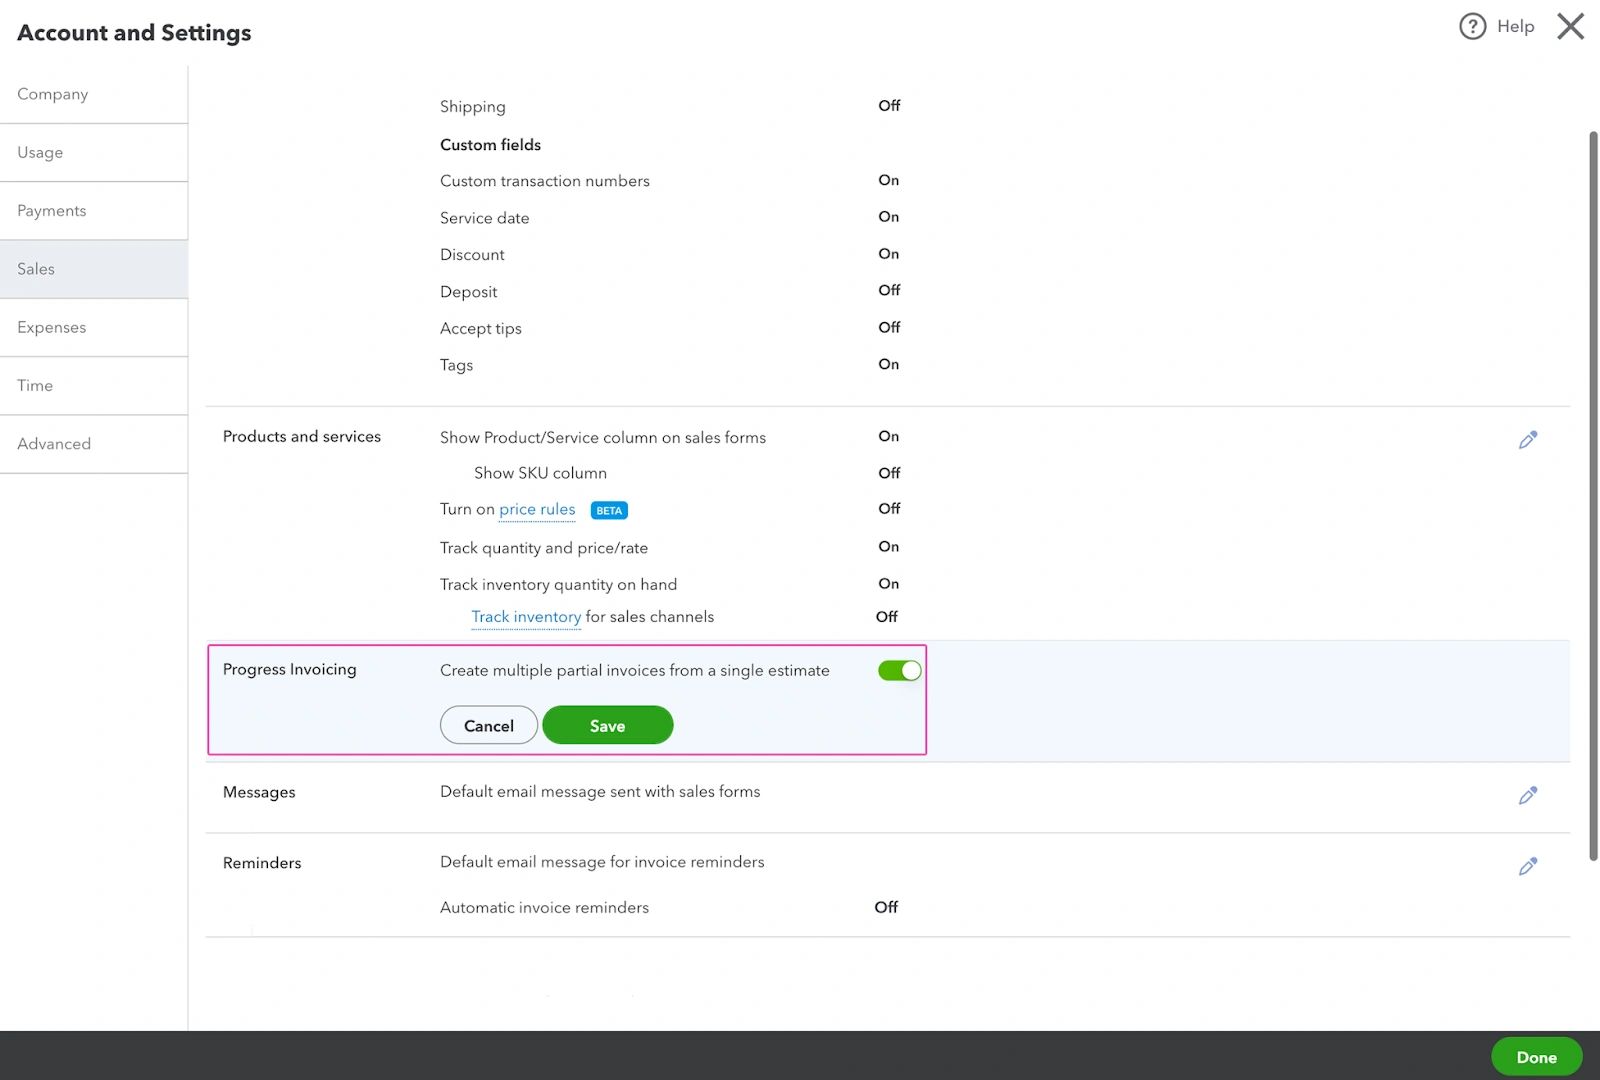
Step 6 : If you want to invoice at delivery points or regular intervals during a project, from the sales tab, expand Progress Invoicing and switch on Create multiple partial invoices from a single estimate. You’ll explore this in detail later in the course.
Setting up a new project
Now the settings are ready to go, let’s look at how to set up a new project from scratch. To begin, go to the Projects center in the left-hand menu and select New project. This opens the New project panel.
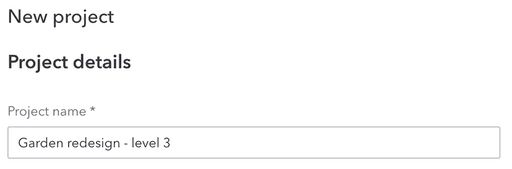
In the Project name field, enter the project name. Matching the project’s name to what is being performed, could help the entire team to classify expenses better. Depending on any third-party integrations, some may find that a number works well. Or, it might be helpful to include the customer’s initials as part of the project name—for example, a project for the customer Dukes Basketball Camp could be named DBC Garden Design.
Because QuickBooks uses a colon to show the hierarchy of sub-customers and projects, colons can’t be used when naming projects.
Select a customer from the Customer dropdown. This automatically adds the customer’s email, as well as their billing address and shipping address further down—these can be changed, if needed). Make sure you have address information recorded for the customer profile. If needed, you can change or add an email specific to this project.
Enter a Start date and End date (optional) for the project. Select a project status from the Project Status dropdown.
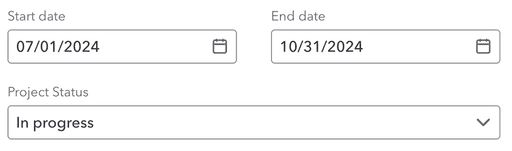
Note: You can also add more project details in the Notes field.
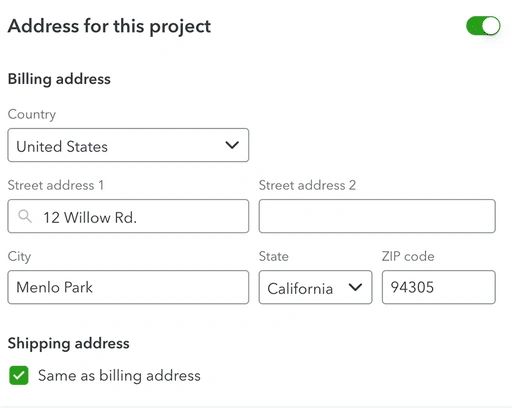
In the Billing address section, you can change or add billing details specific to this project.
If the shipping address is different from your billing address, uncheck the Same as billing address box. Then, enter the correct shipping details for this project. When you’re done, select Save.
Converting sub-customers to projects
As well as setting up new projects, you can convert existing sub-customers to projects.
How should the sub-customer be set up ready for conversion?
A sub-customer that is to be converted to a project should be active and set to bill the parent customer. It should not be a sub-sub-customer and it shouldn’t have any sub-sub-customers linked to it.
What sub-customer information is carried over?
When a sub-customer is converted to a project, only the sub-customer display name carries over. Addresses, tax codes, and terms revert to the parent customer settings.
This means that the following information isn’t transferred:
- Addresses
- Contacts
- Phone numbers
- Tax codes
- Terms
- Payment and billing information attachments
How do you carry out the conversion?
There are two places you can start the conversion—they give the same result:
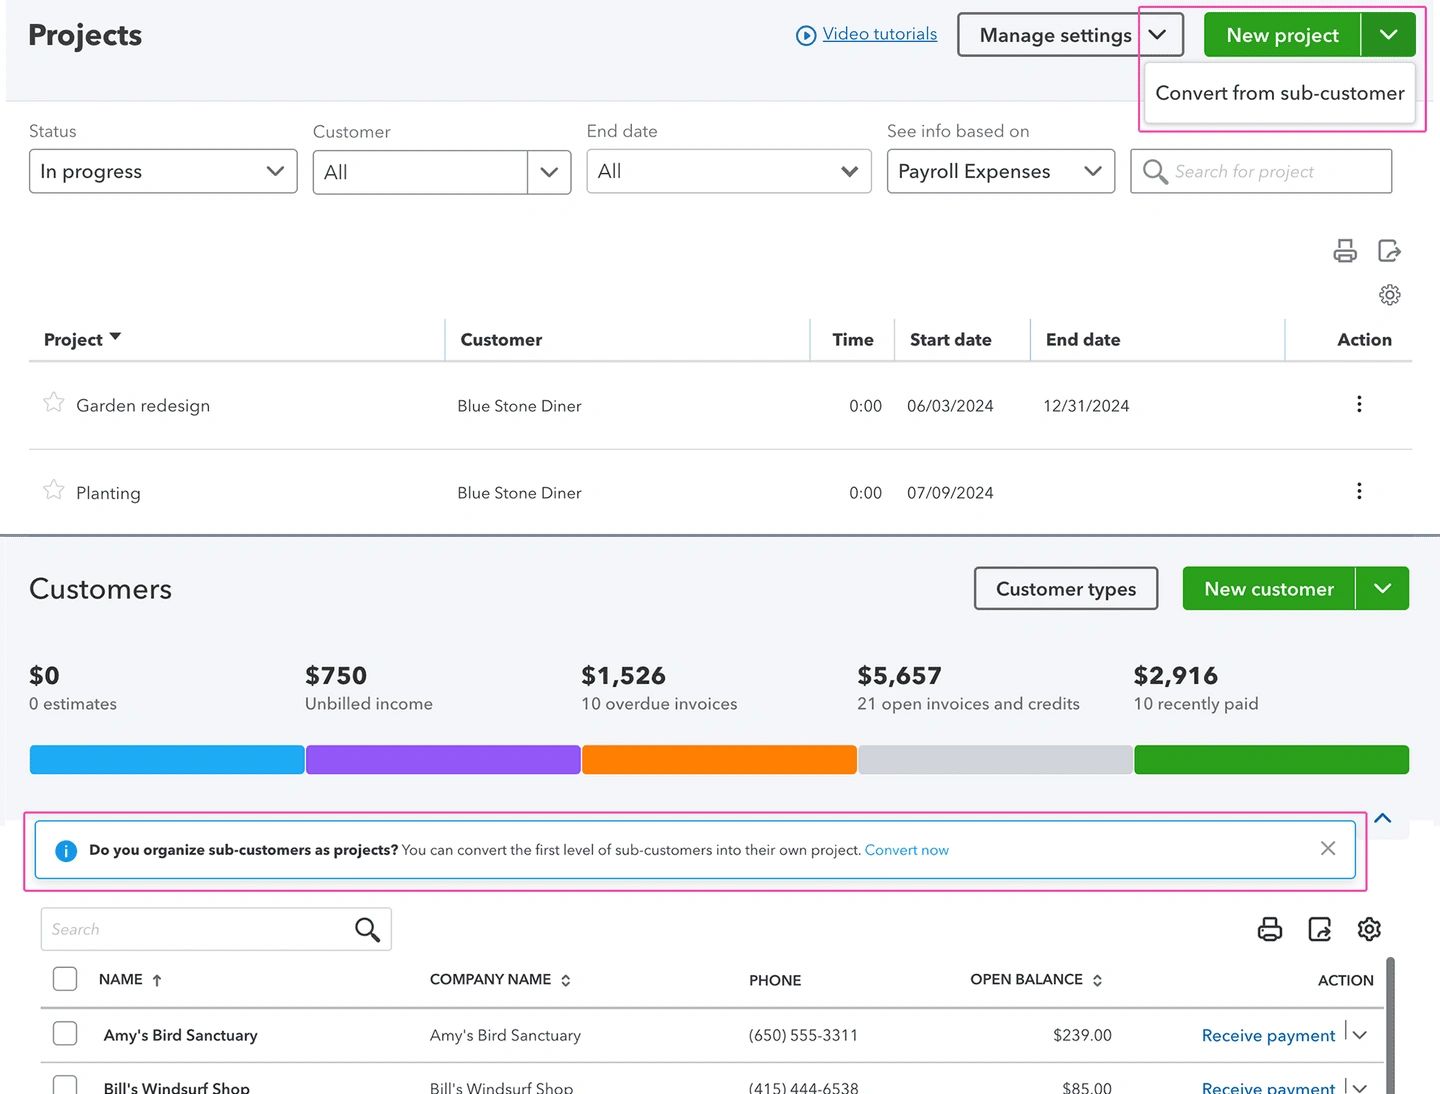
- From the Projects center, go to the dropdown next to New project and select Convert from sub-customer
- From the Customers tab in the Sales center, select Convert now in the popup message box
Viewing Projects
One of the big advantages of projects over sub-customers, is the dashboard view of the status of all of your projects, as well as more detailed data on each individual project.
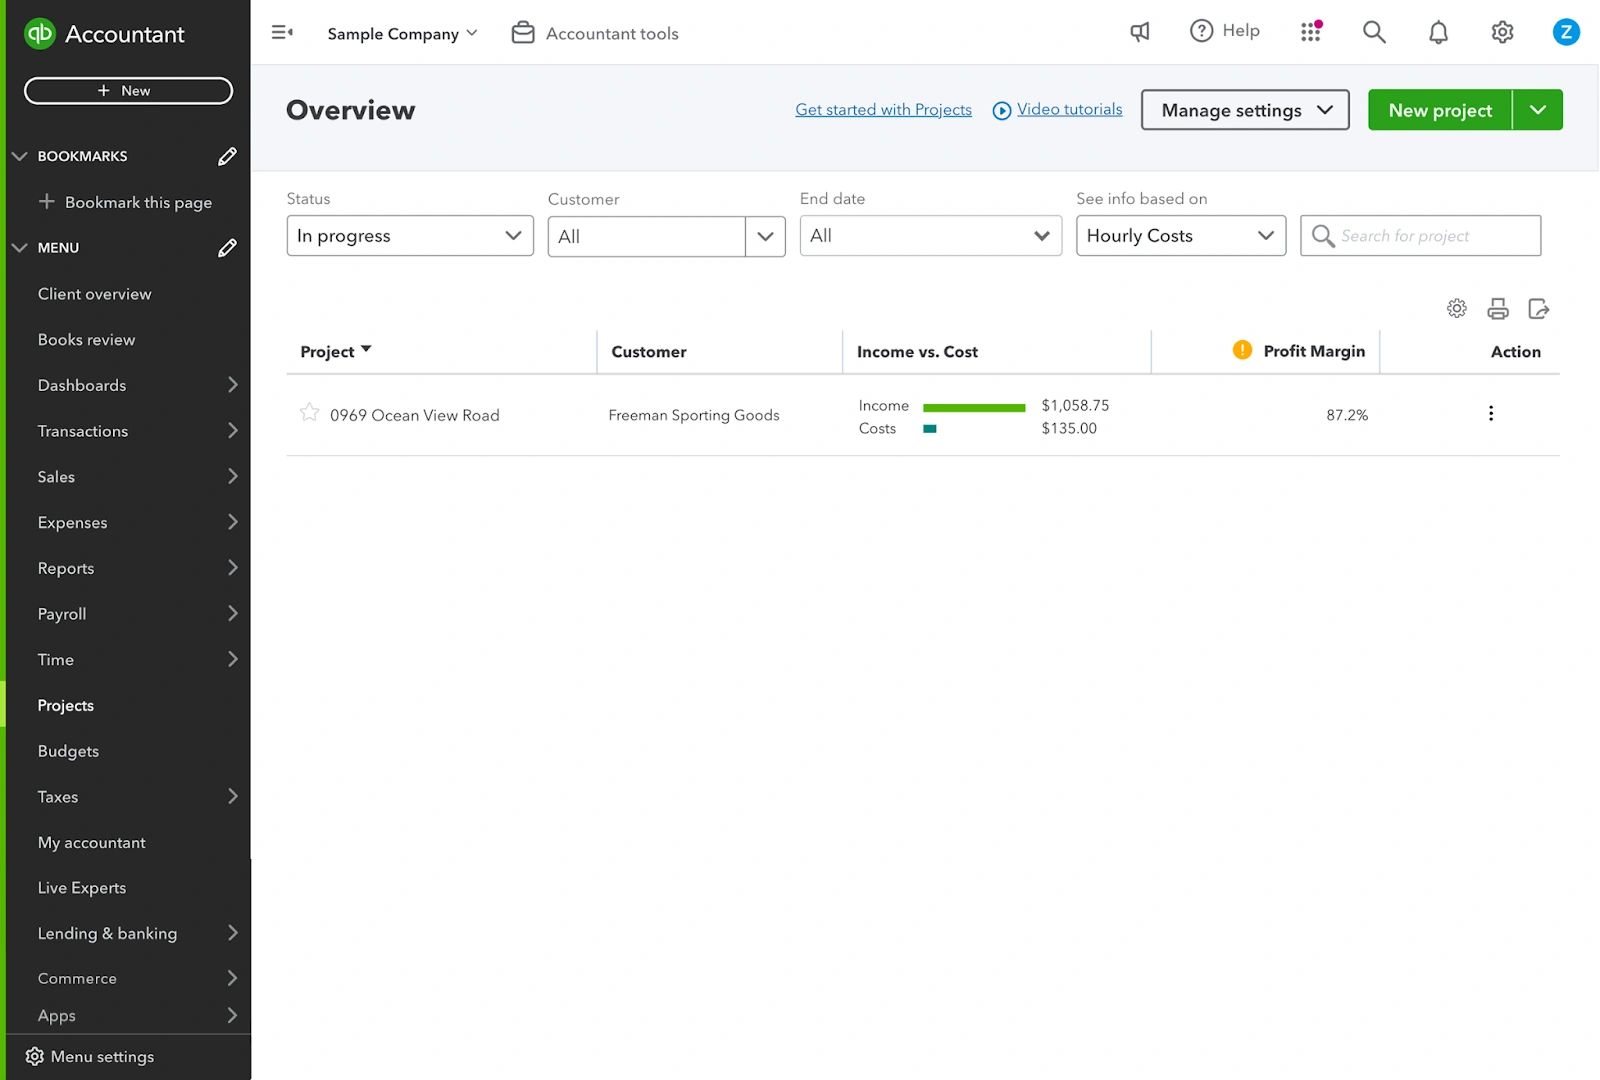
Step 1 : The main area of the dashboard lists all your projects, with a simple status of each one’s current income, costs and profit margin. Note that only the values tied to profit and loss accounts show up on the dashboard. This means that if a customer makes a prepayment and it’s recorded properly (as not earned) it wont show up here.
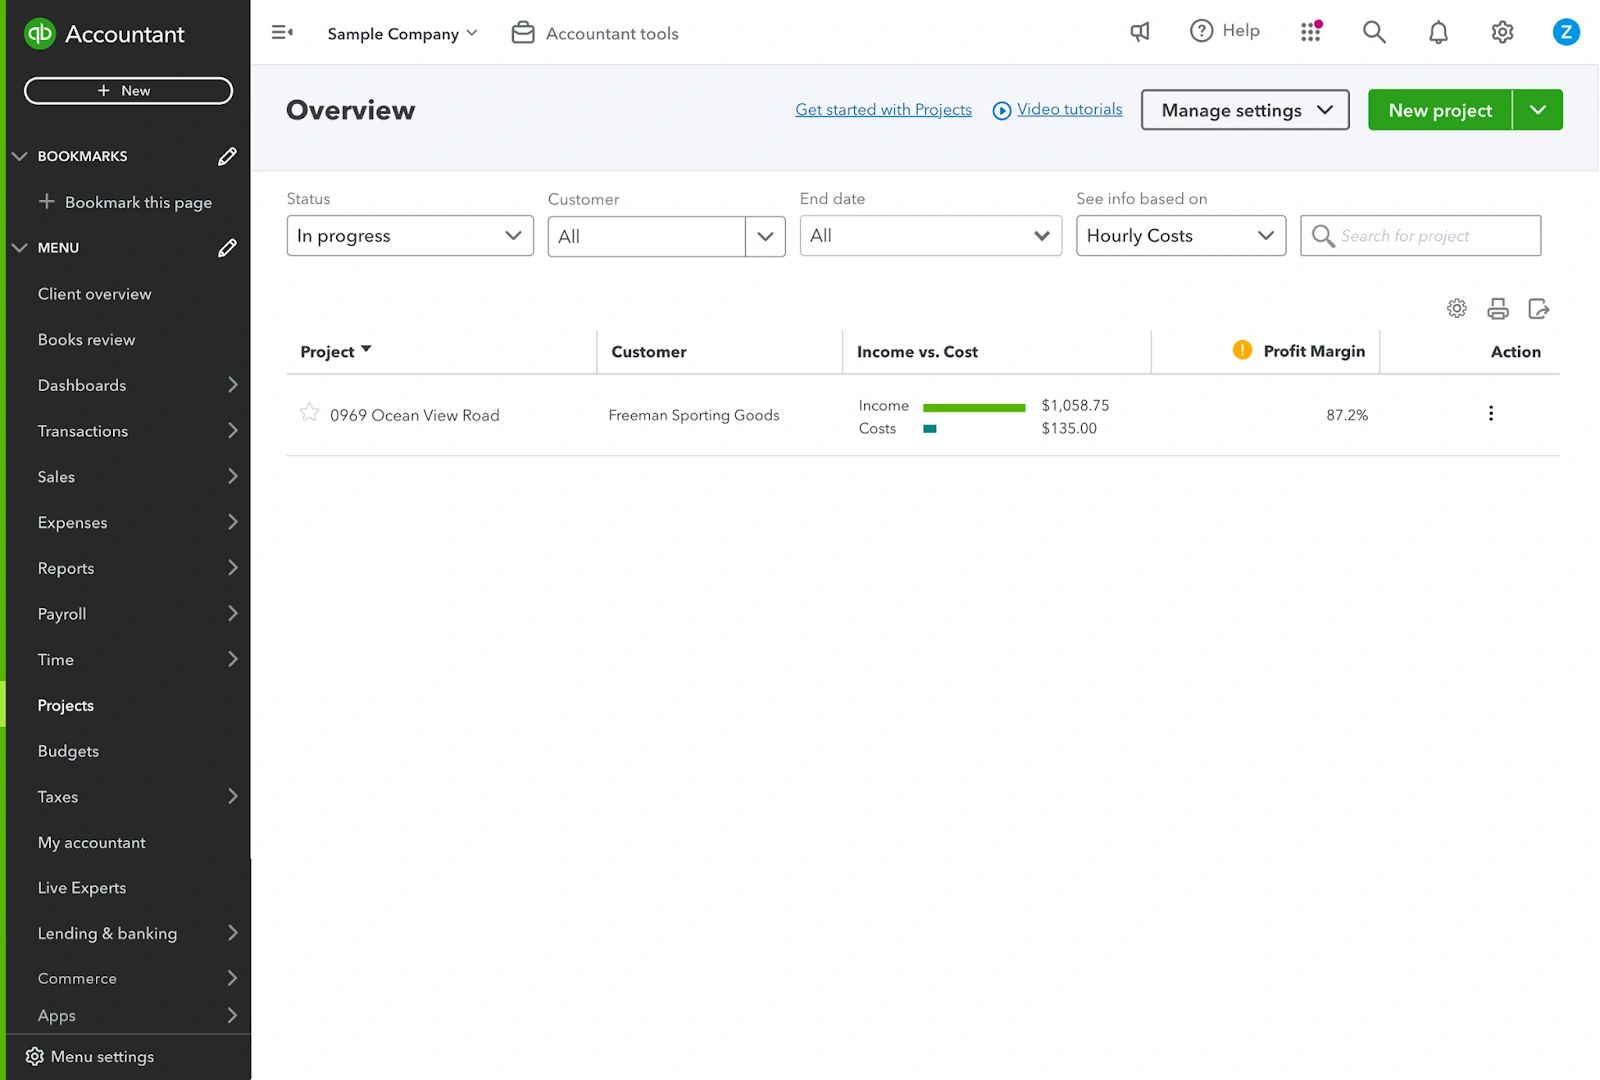
Step 2 : The Action column on the right allows you to edit the project, mark it completed, mark it canceled and delete the project. Selecting a project from the list enables you to view more detailed information and run reports on the project costs, expenses, and profitability.
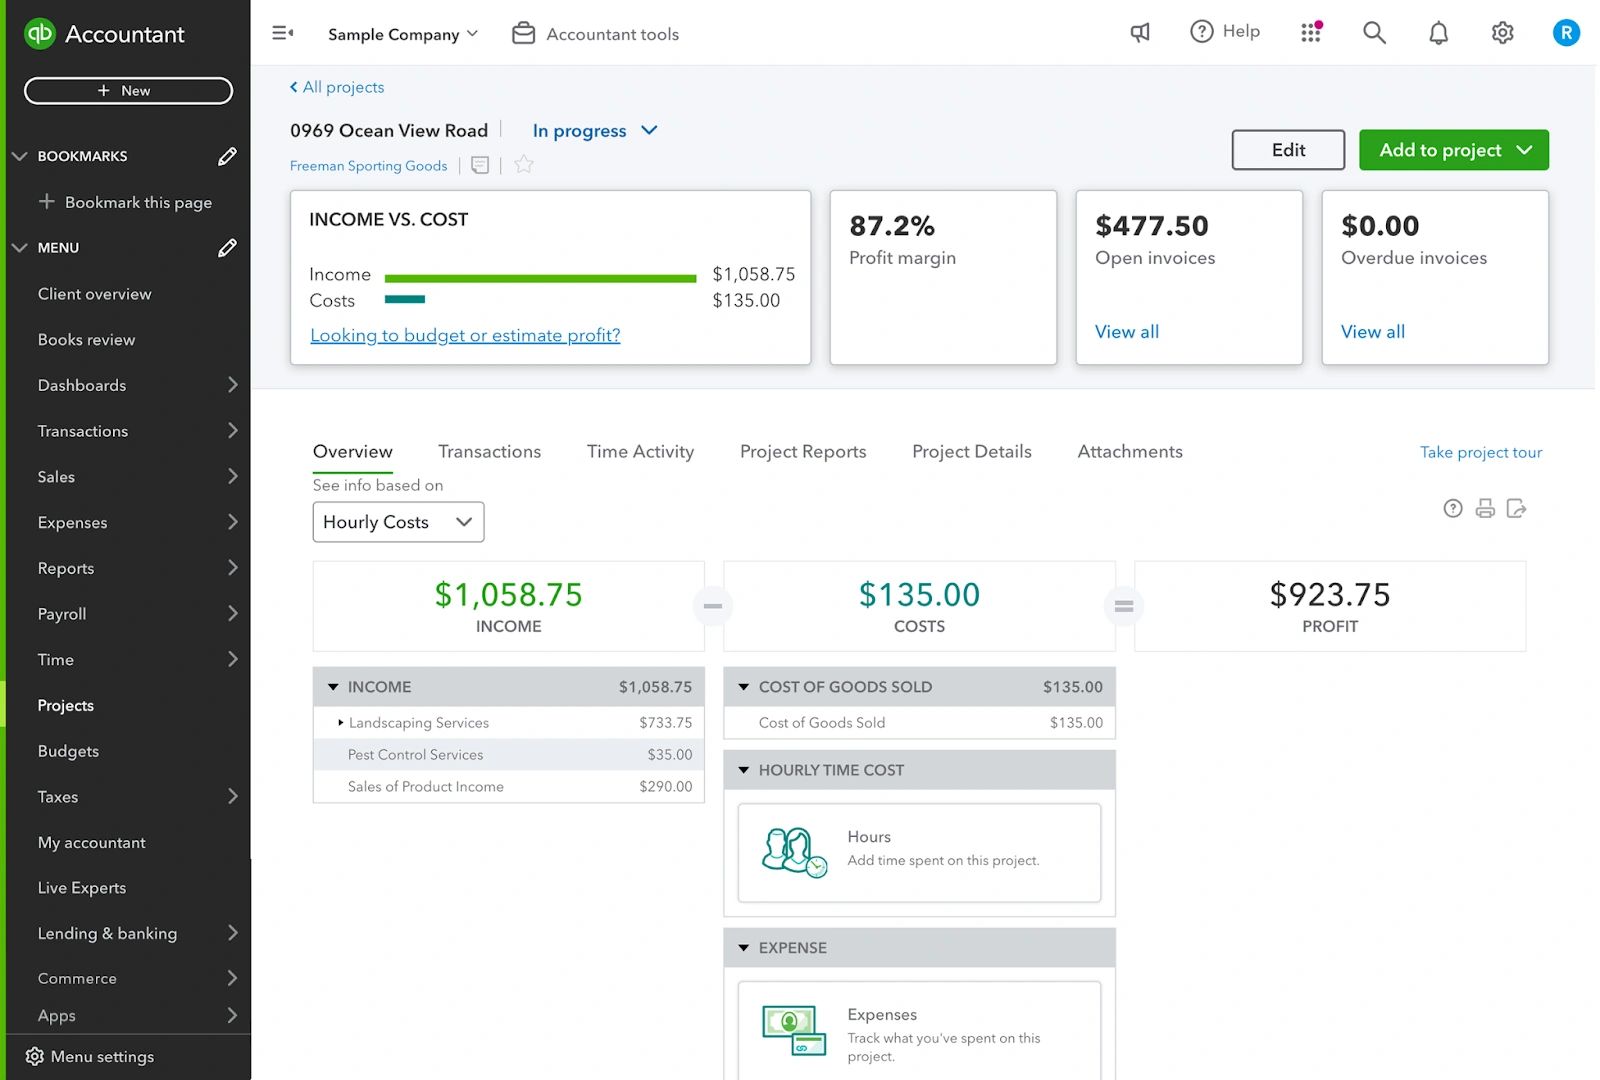
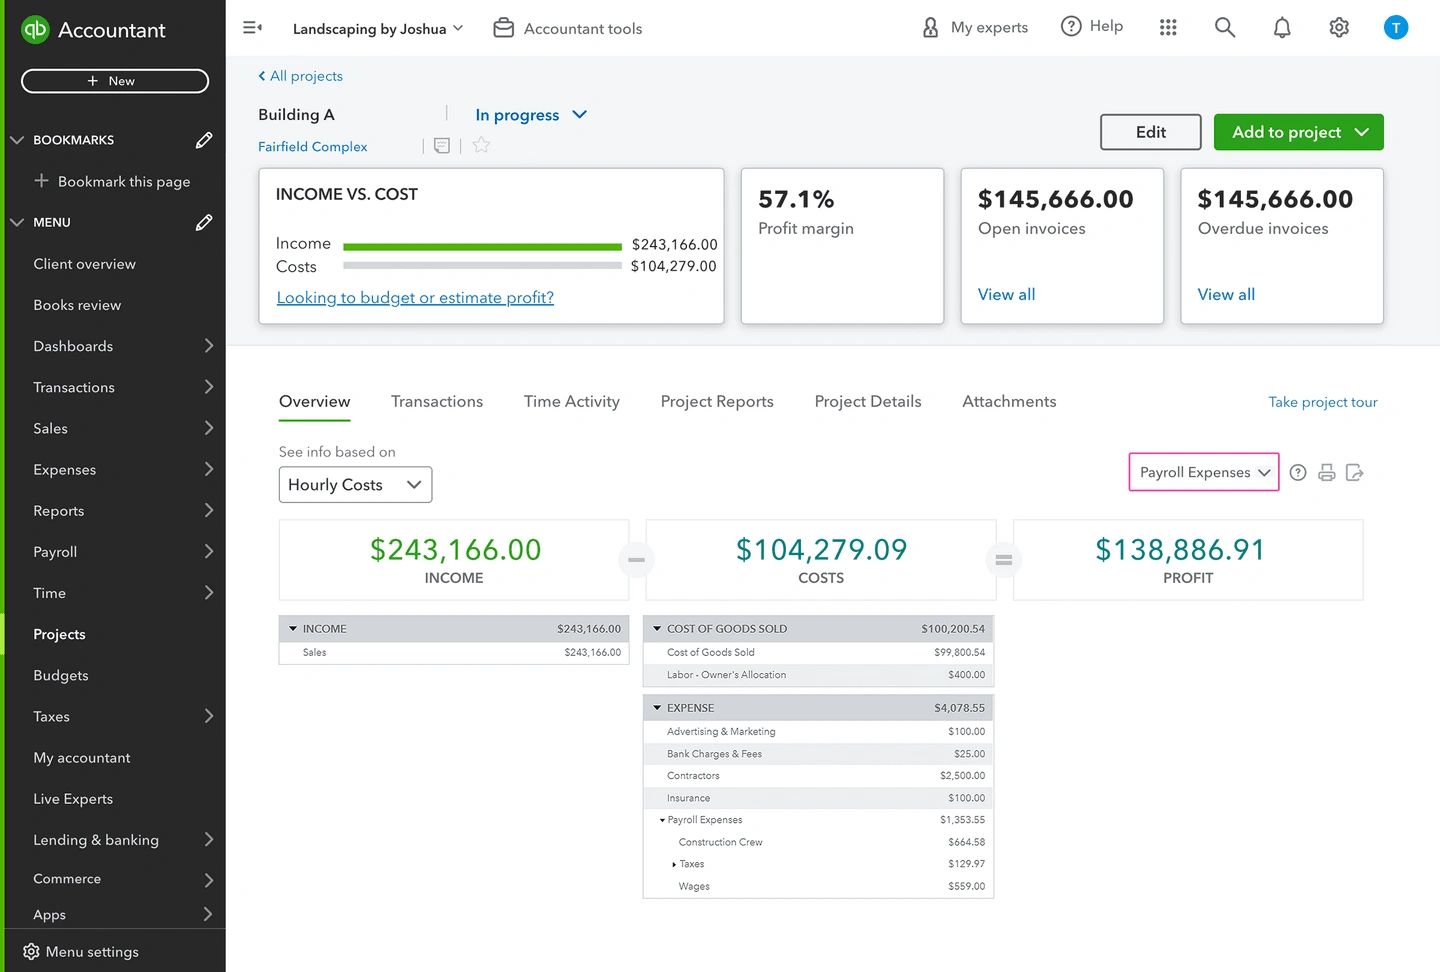
Step 3 : When the project has been selected in the dashboard, you’ll see that its details are organized into six tabs. The first is the Overview tab. Here you can immediately view the profitability of the project shown as Income minus Costs. Use the dropdown to change the view to be based on Hourly costs or Payroll Expenses.
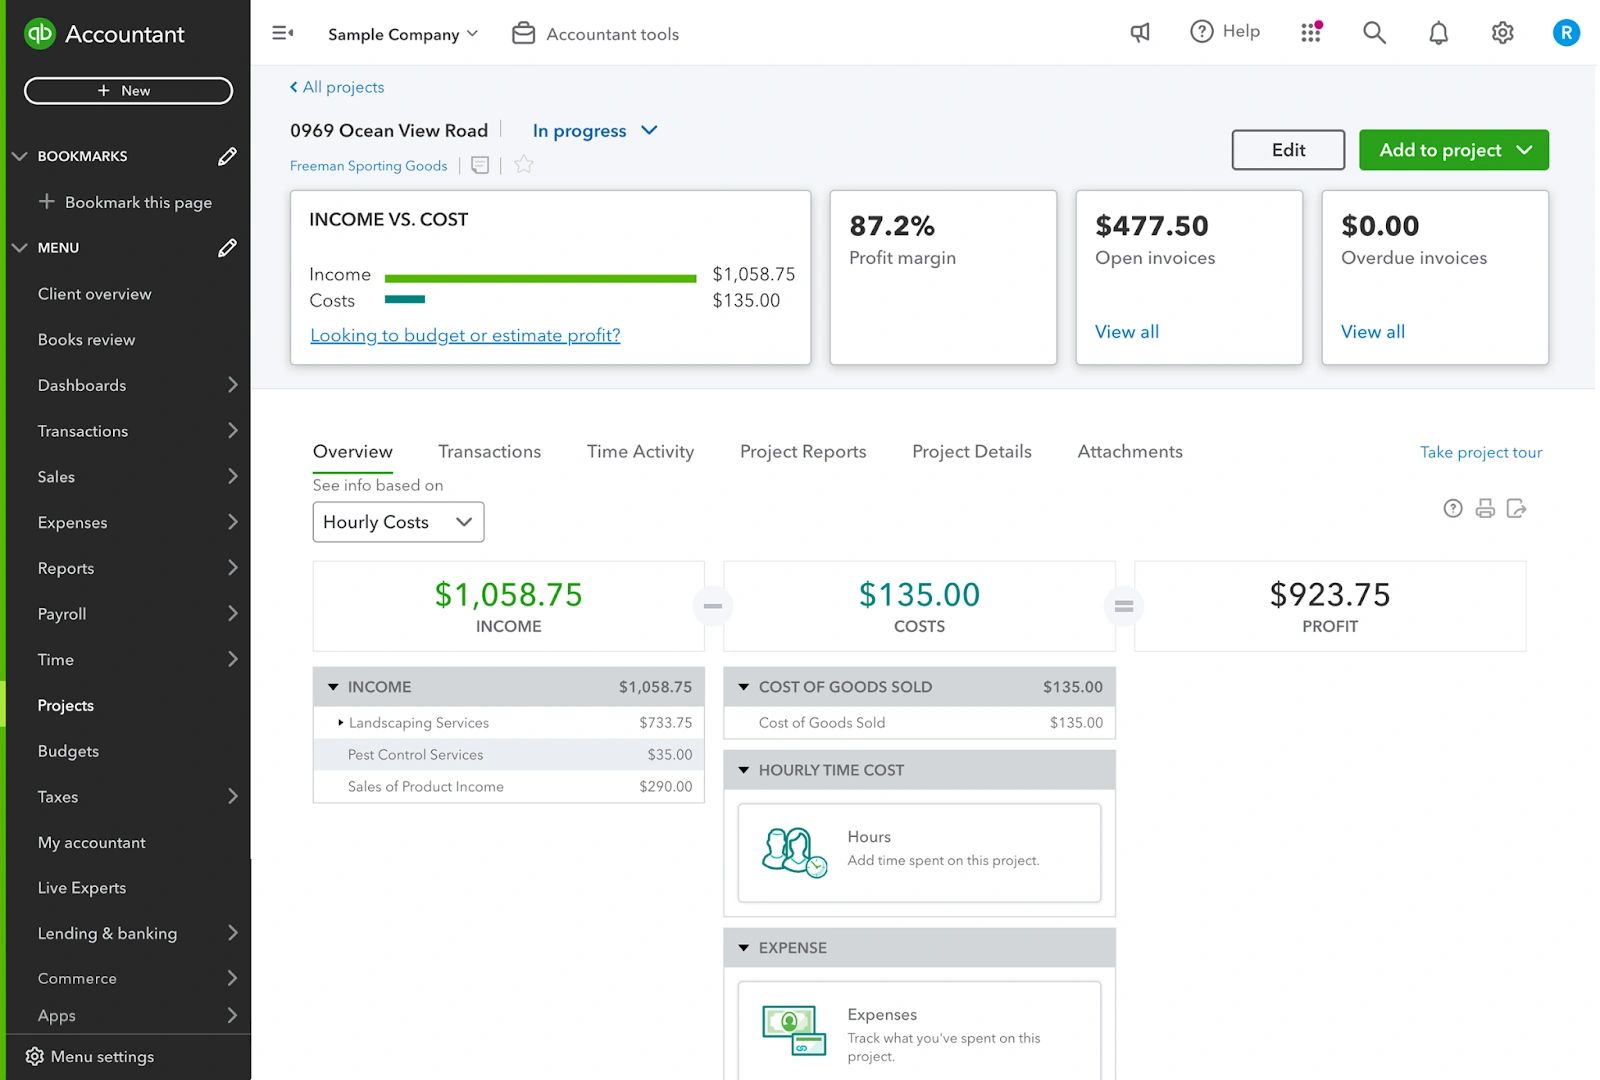
Step 4 : The section under the Income and the Costs value give a more detailed breakdown of how each total is calculated. Select each account( for example, Costs of Goods Sold) to run a report showing all the relevant transactions.
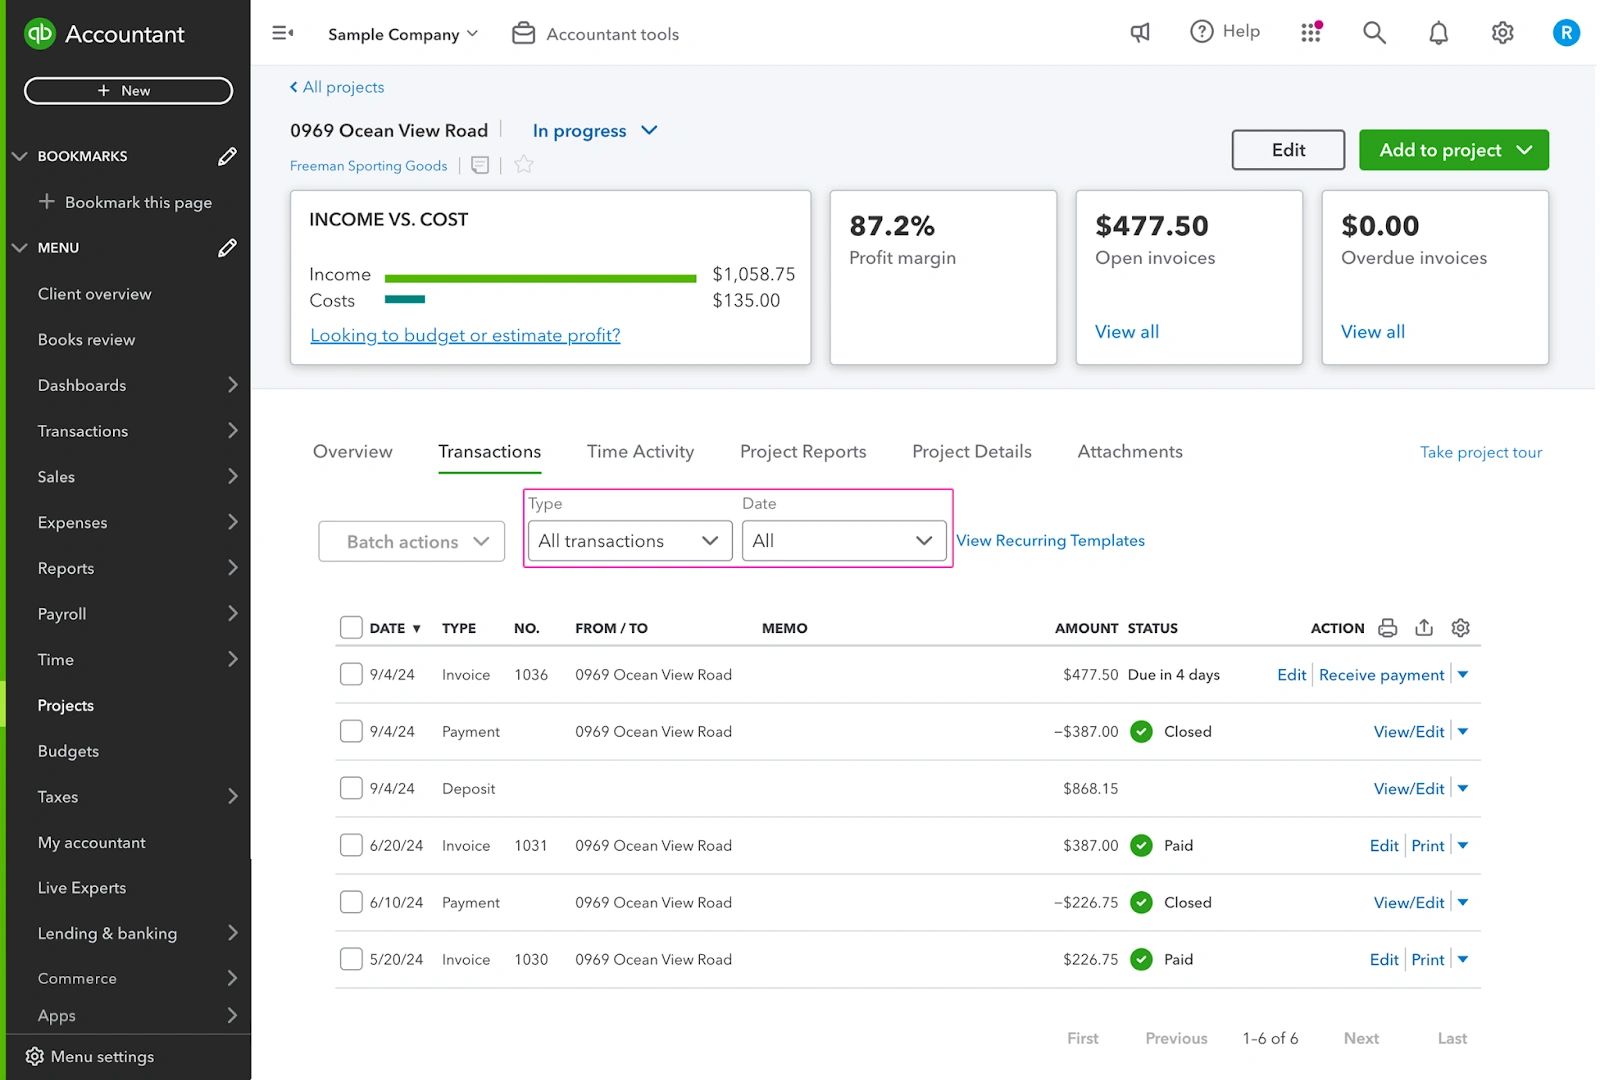
Step 5 : The Transactions tab, shows all transactions associated with the project in one place. These include any transaction to which the project is assigned, including accounting transactions ( such as invoices and expenses) and nonaccounting transactions ( such as estimates and purchase orders), and billable and nonbillable transactions. You can filter this list for type and date, you can see-for example- all open invoices for last month.
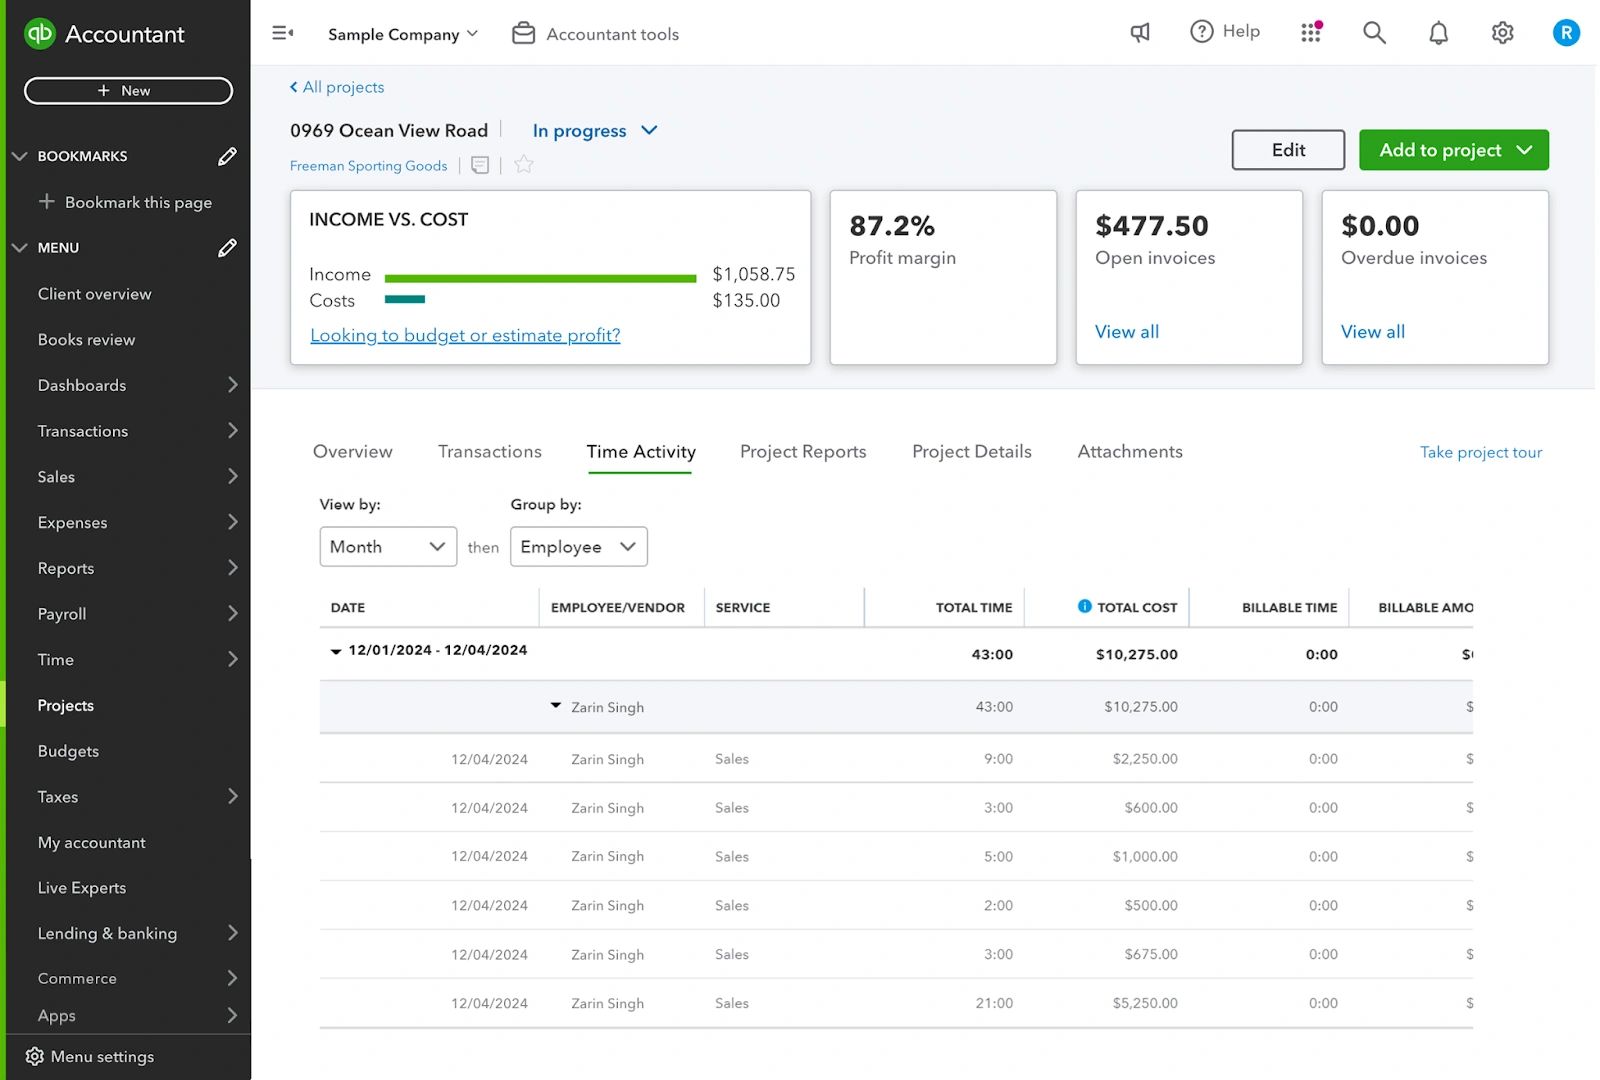
Step 6 : The Time Activity tab provides details of work done on the project. You can drill down to see just who did what and when, how much it cost- and how this affects the project profitability.
The View by and Group by dropdowns change the arrangement of the data. Viewing by service, for example, means the time can be grouped by week, month,or employee, enabling you to see how much an employee contributes to the cost of the project, as well as how much a particular service costs, no matter who provides it.
The values in the Total Costs column come from the hourly cost assigned to the employee. Data will only be shown here if you are using time tracking and the hourly cost Rate feature and- time is entered for the project.
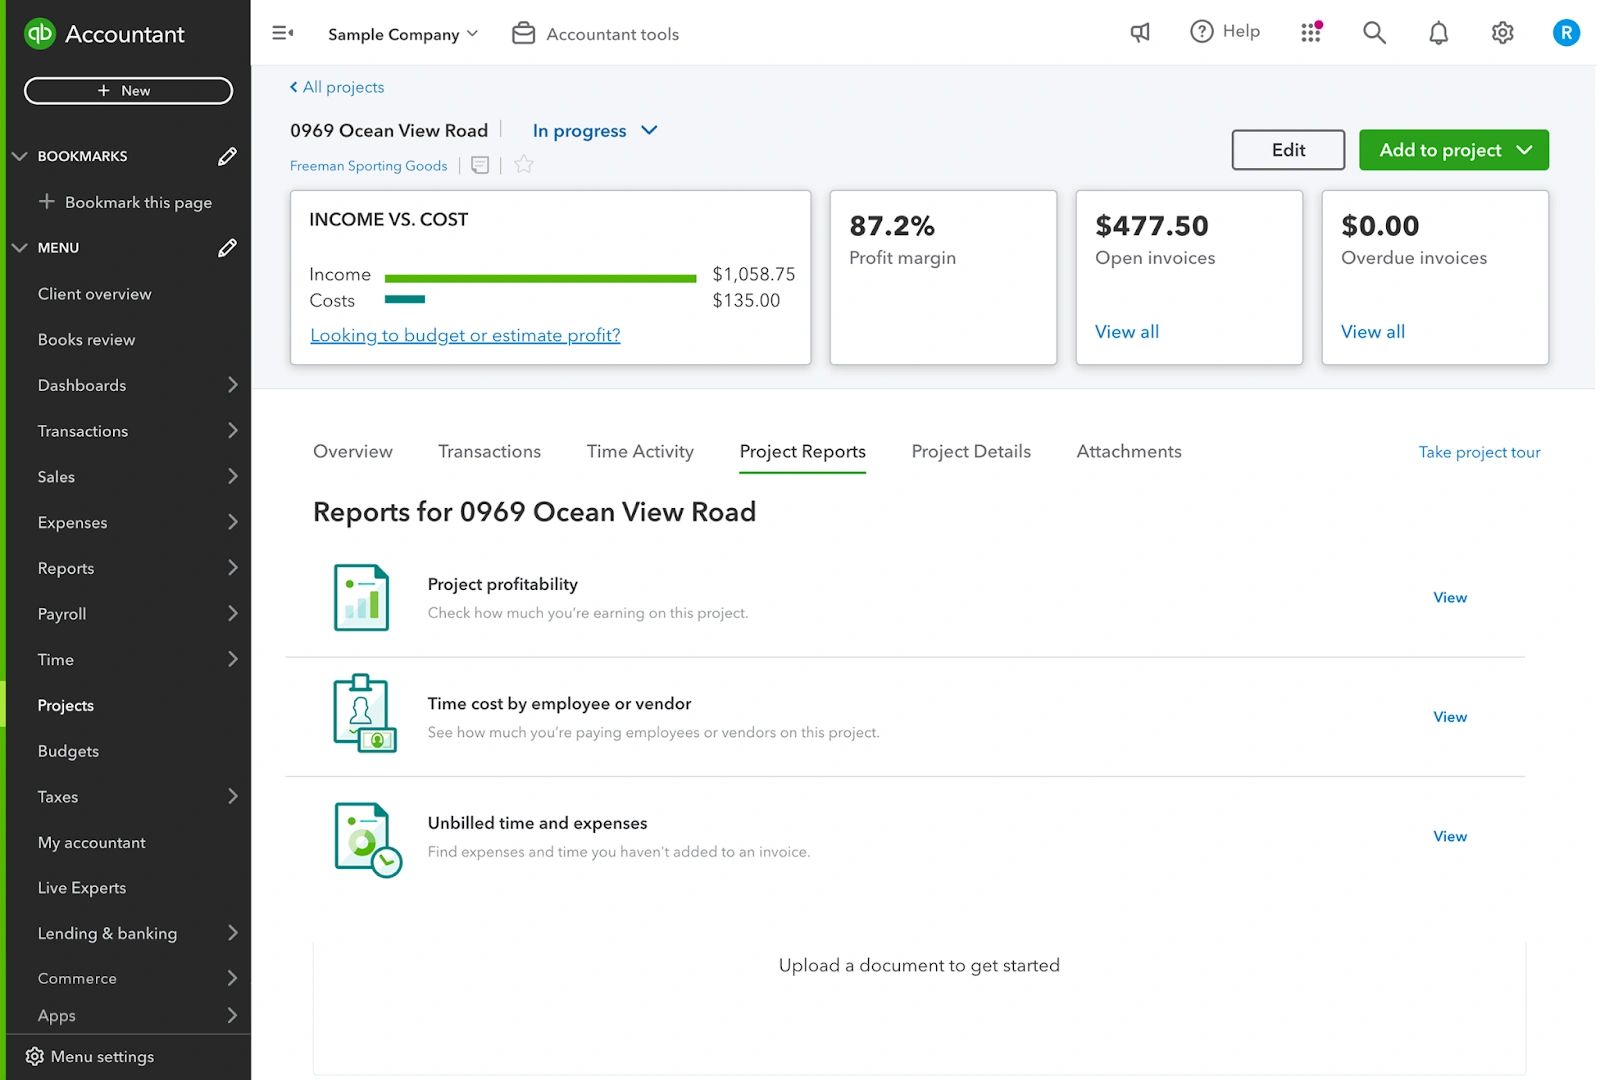
Step 7 : The Project Reports tab is the only place you can get detailed project-specific reports, which can quickly provide information and insights to manage a project. You’ll explore these more in a moment.
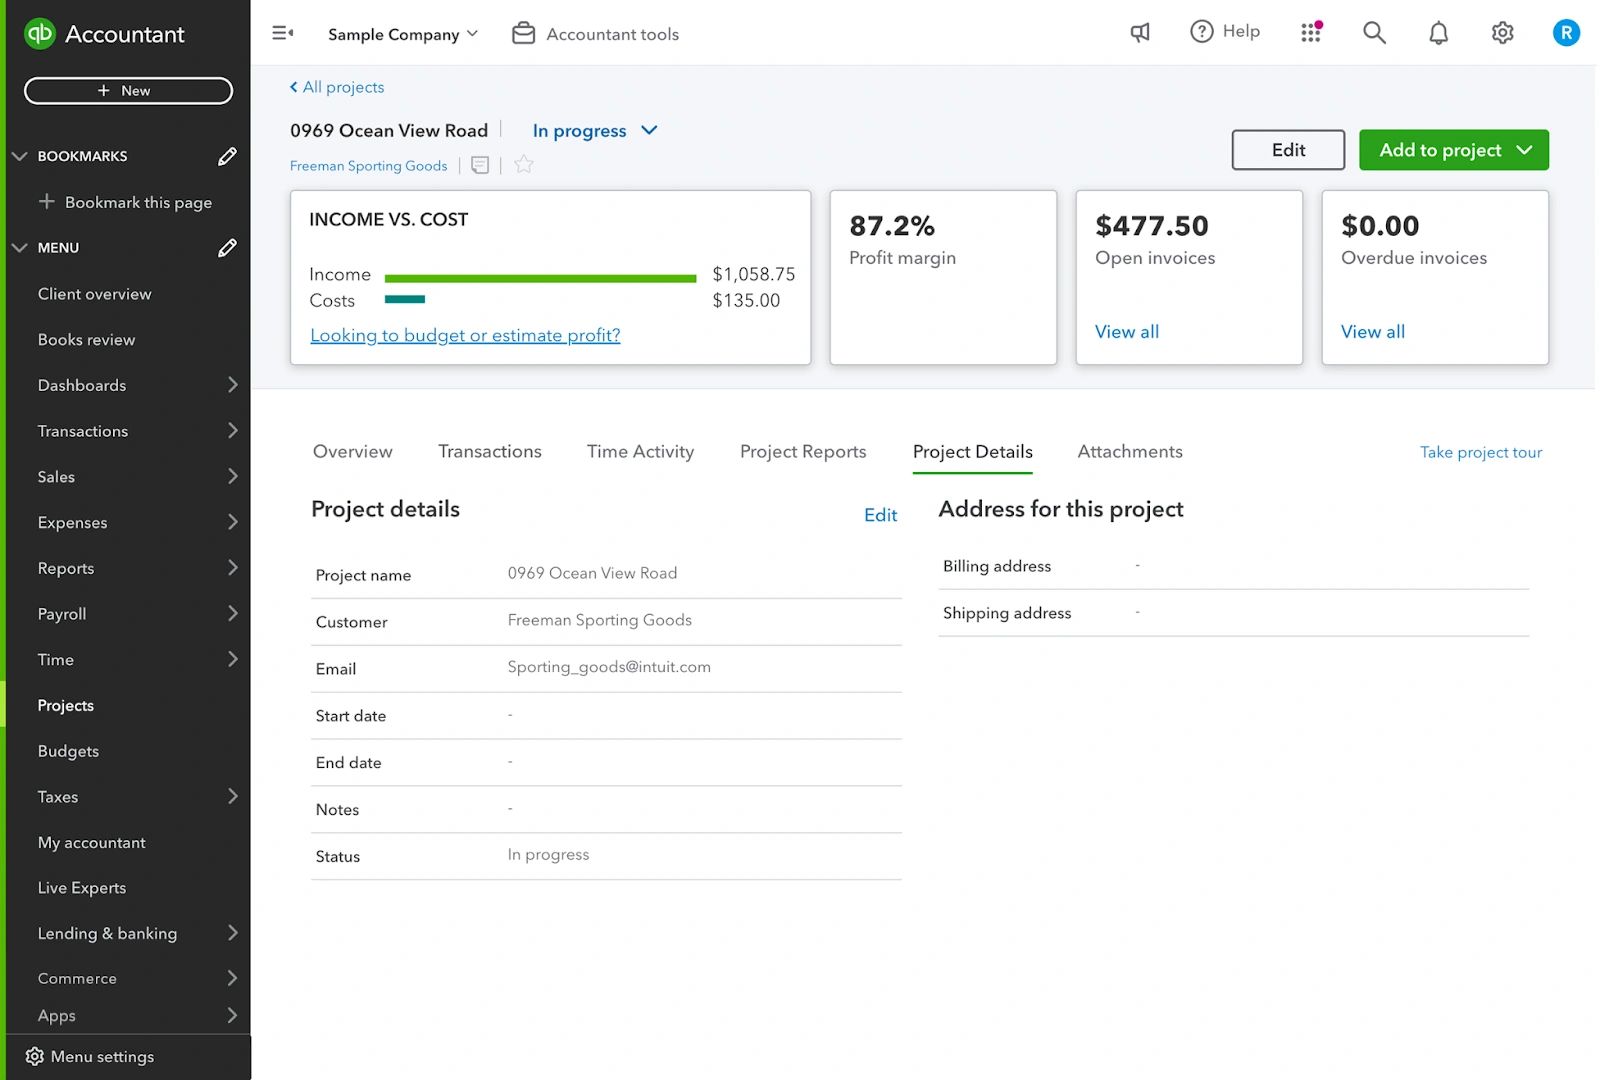
Step 8 : The Project Details tab is where you can view and edit any of the general information about the project.
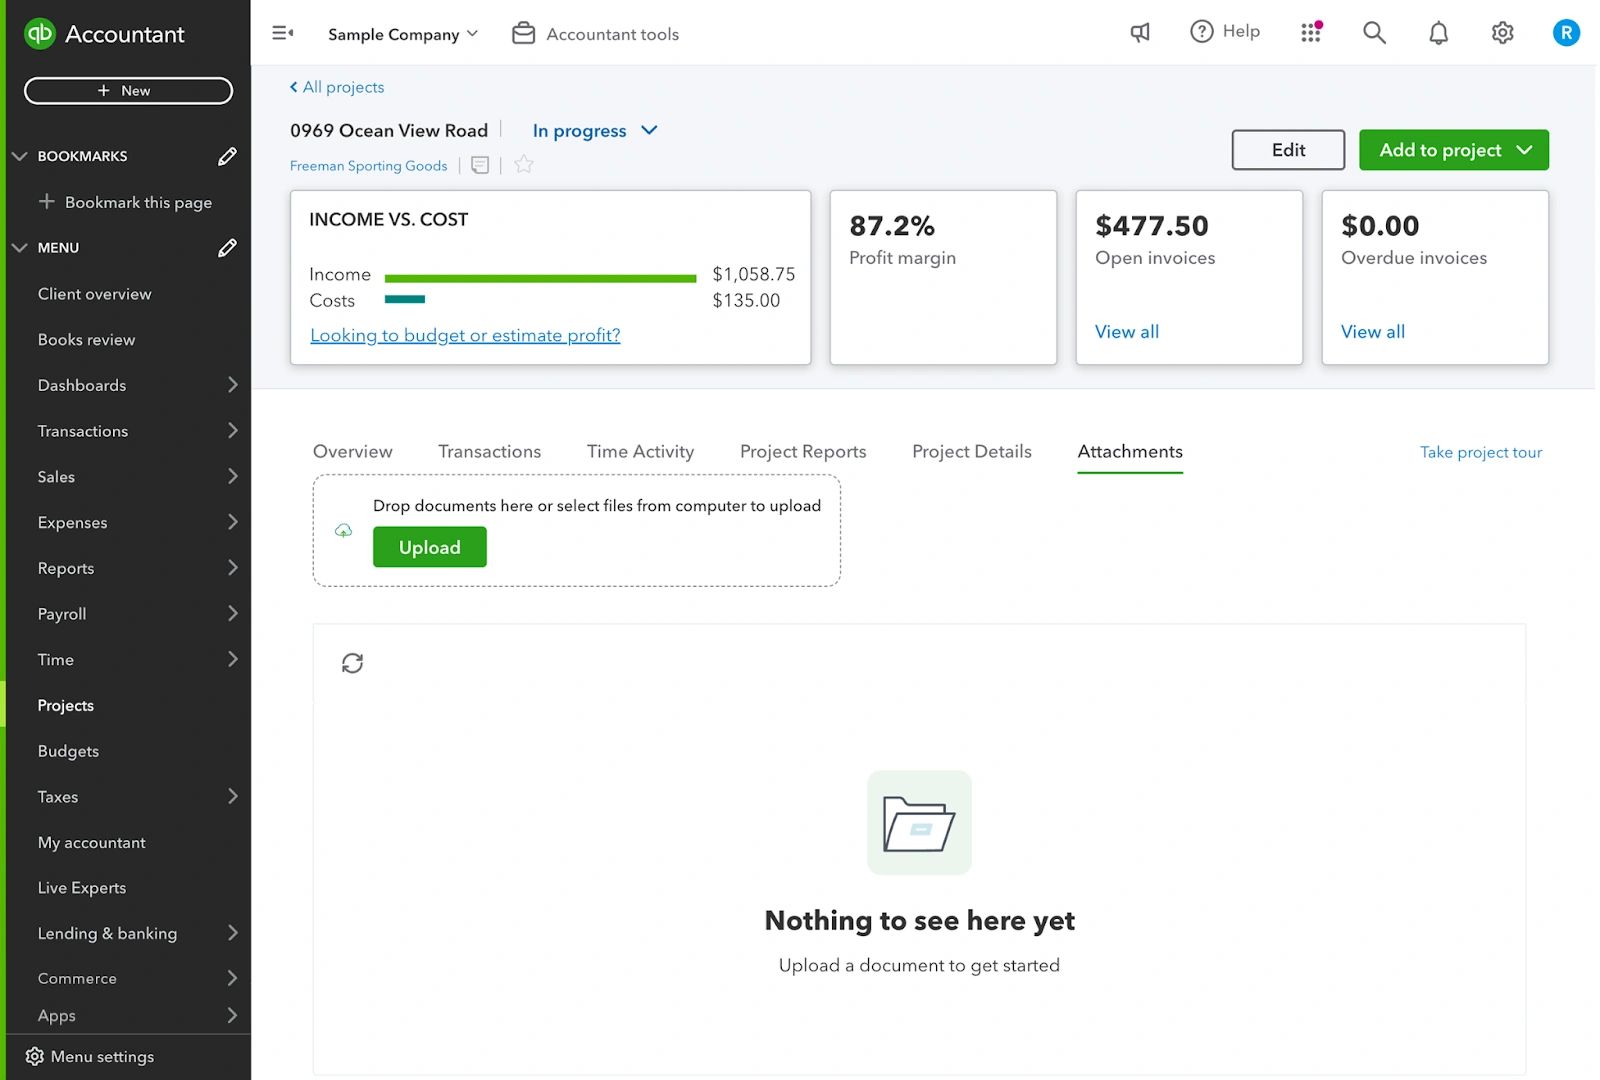
Step 9 : The Attachments tab enables you to store and upload attachments related to the project. Note that attachments related to individual transactions for the project don’t appear in this tab.
Conclusion : Deleting a project in QuickBooks effectively makes it inactive, rather than deleting it completely. The transactions attached to it remain and can still be seen on reports. To delete a project, select Delete from the Options dropdown in the Actions column.
Assigning income and costs in QuickBooks.
Three ways to add transactions
Once a project has been created, you can move on to the next task, which is to assign income and costs to that project. Doing this won’t change how the transactions are categorized or affect your accounts. They’re simply marking them as a part of the project so that they can be tracked for that project’s income and expenses.
There are three starting points to adding a transaction to a project.
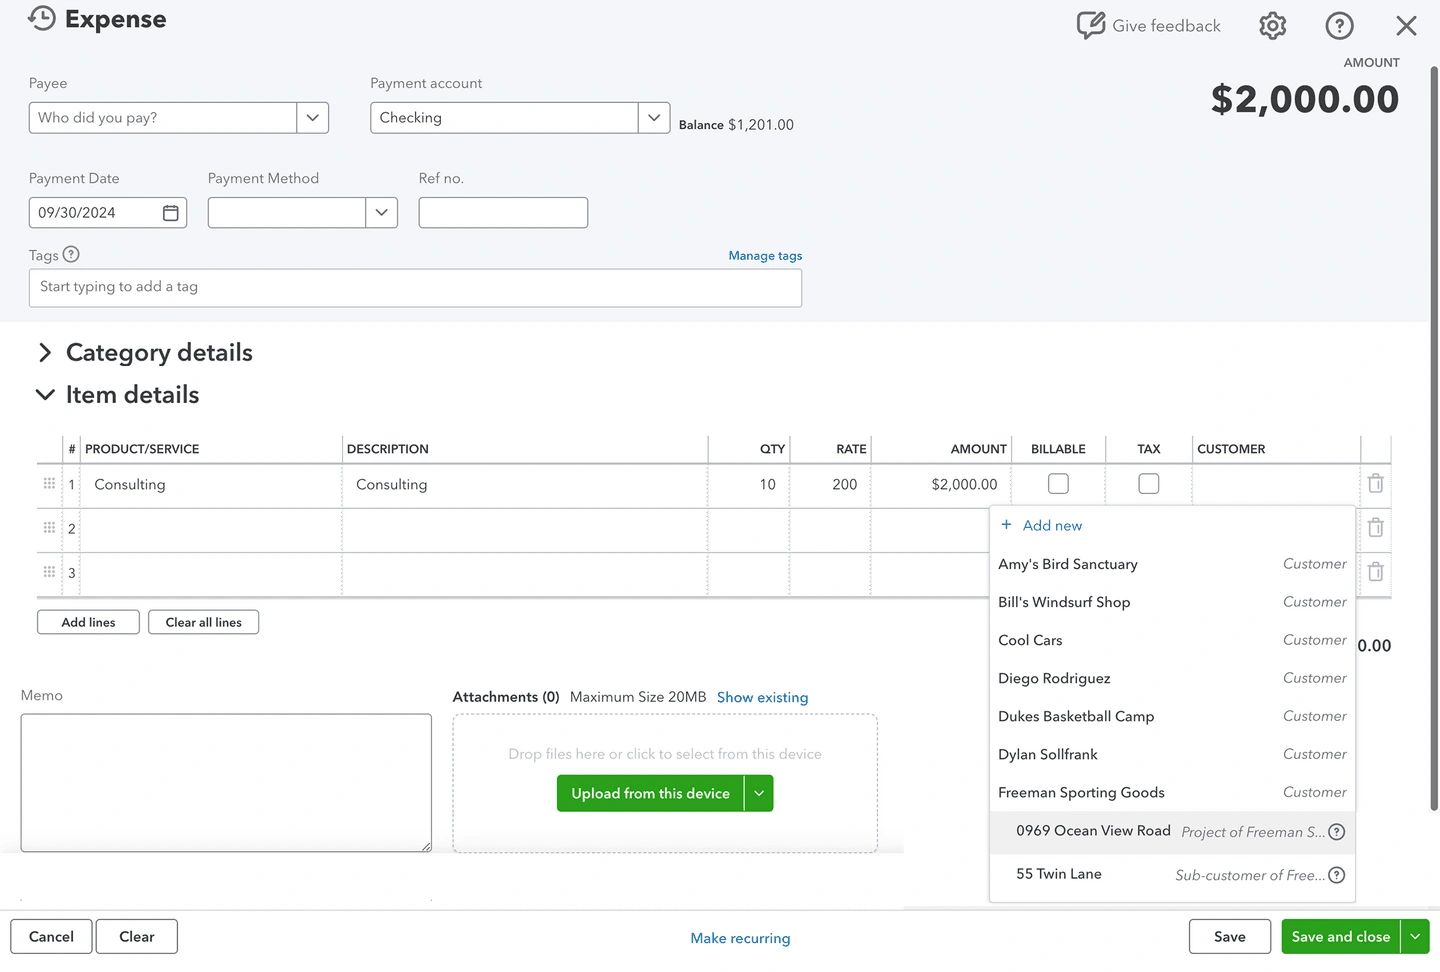
Selecting the project when entering the transaction into QuickBooks.
One way is to add the project when creating the transaction in QuickBooks. Just enter the project name in the Customer column for a purchase or sale transaction.
Creating a new transaction from the projects center
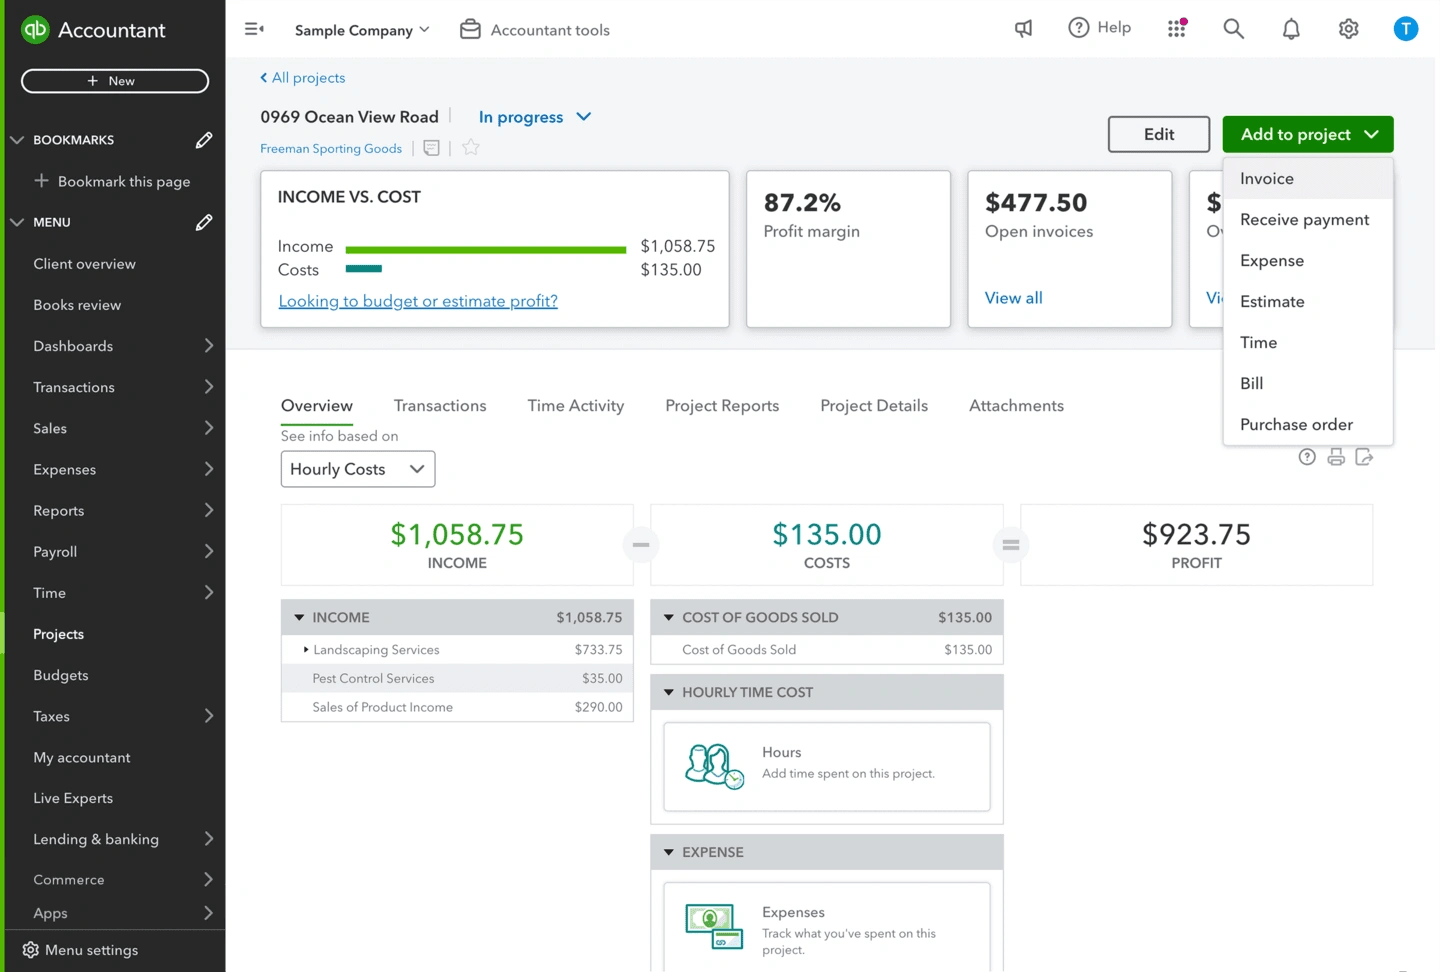
To create a new transaction from the Projects center, select Projects from the left-hand menu:
- Select the relevant project
- Then from the Add to project dropdown, select the right transaction type: invoice, receive payment, expense, estimate, time, or bill. If you are enabled purchase orders, this will also appear as an option
- Fill out the details for the transaction as normal
The advantage of adding a transaction from within the project is that QuickBooks automatically adds the project name. If you add a sales transaction, the name will be in the Customer dropdown. If it’s a purchase transaction, the name will be in the Customer/Project column in the Category details or the Item details grid.
Assigning a project when adding a transaction via the bank feed.
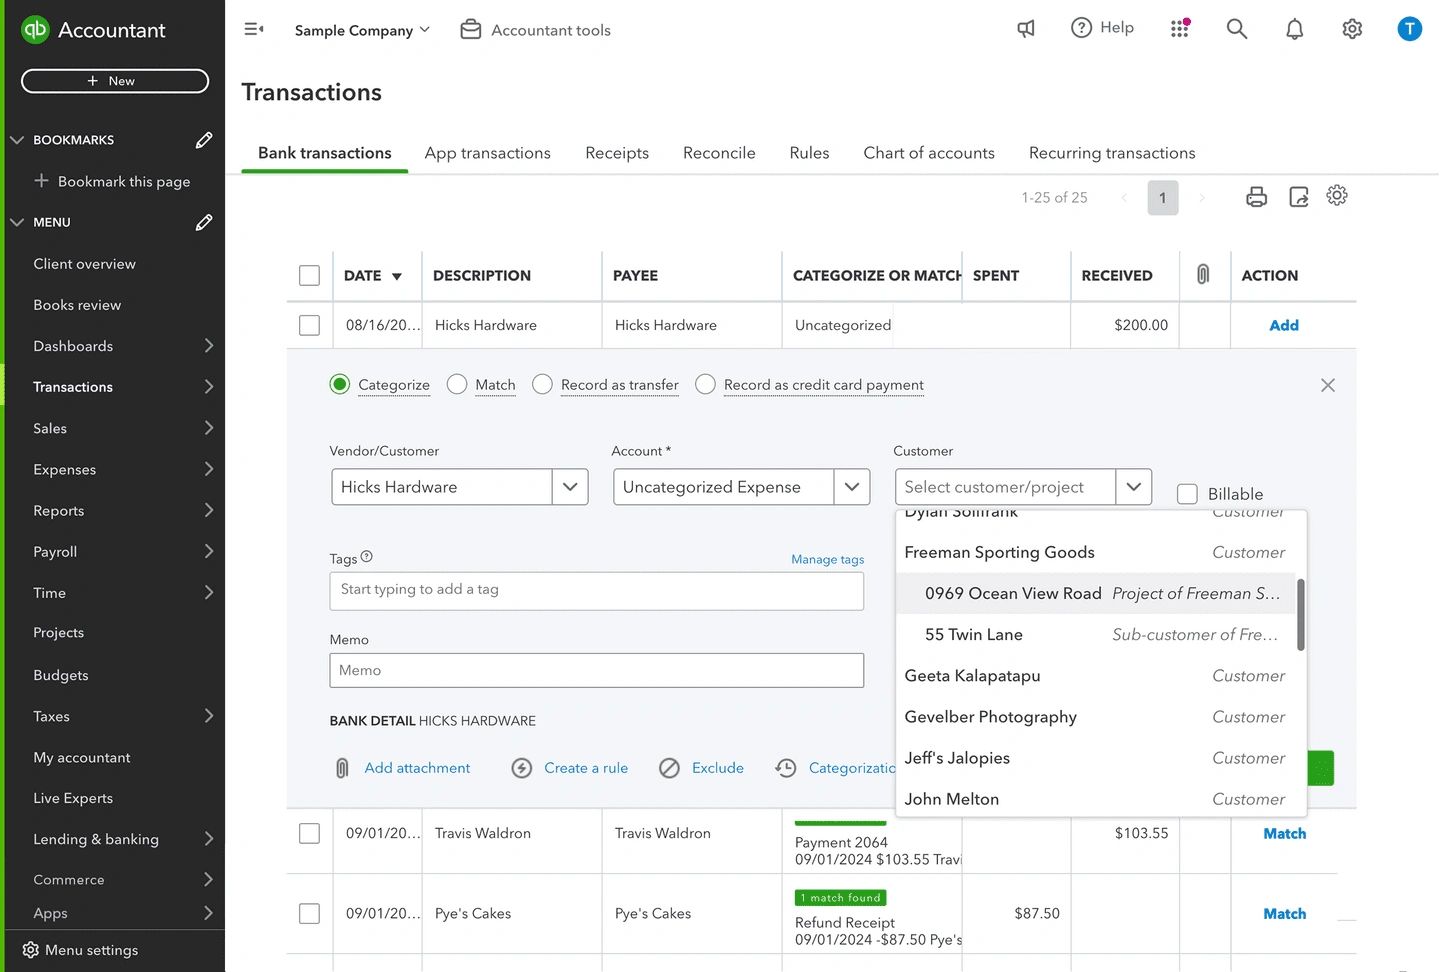
You can also assign projects when adding transactions in bank feeds. To do this, they choose the project name from the Customer dropdown. If the you wants to allocate an expense to multiple projects, they should select Split and divide the expense among the different projects.
Adding hourly labor costs to a project
Labor costs are often the biggest component of overall costs for businesses and so it’s very important to see how they contribute to profitability.
Projects enable labor costs to be linked to a specific project. To do this, cost rates need to be allocated to employees and you need to be using time tracking (assigning the project to the timesheet). It doesn’t matter whether they’re using basic time tracking in QuickBooks Online, QuickBooks Time, or a third-party time-tracking app that integrates with QuickBooks Online.
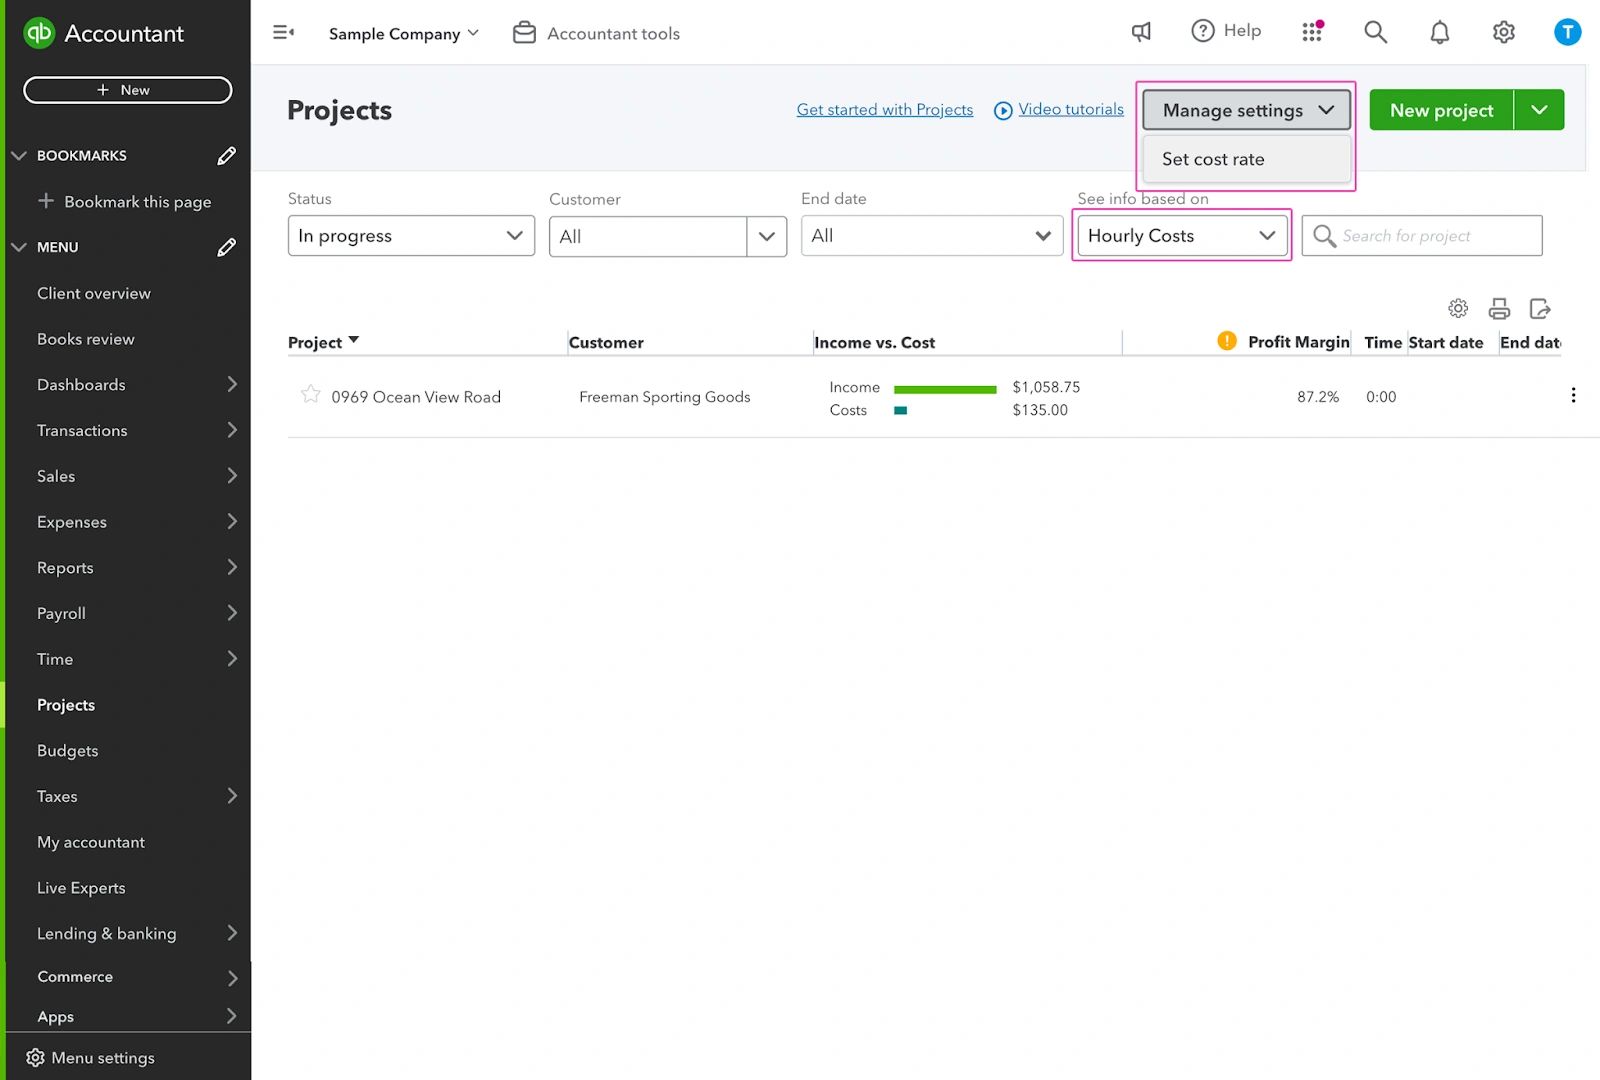
Step 1 : Start by setting the hourly cost rate for an employee. Go to the Projects center and select Hourly Cost Rate.
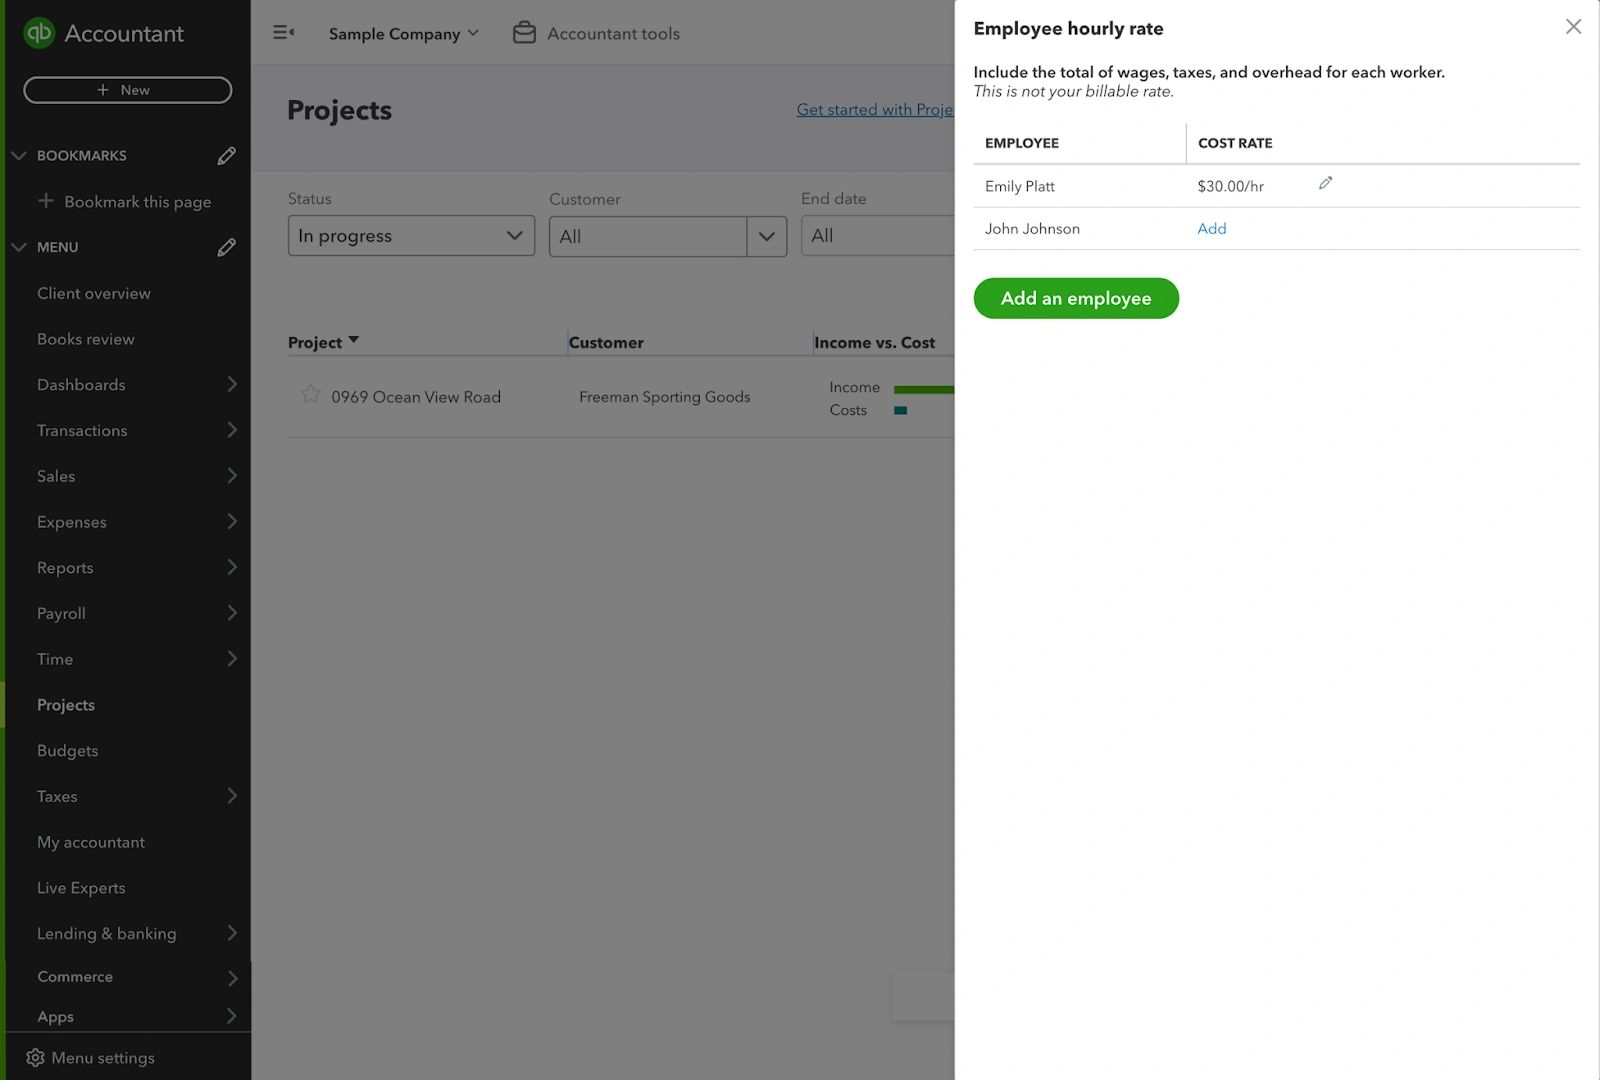
Step 2 : In the column, add or edit the labor cost for the employee(s).
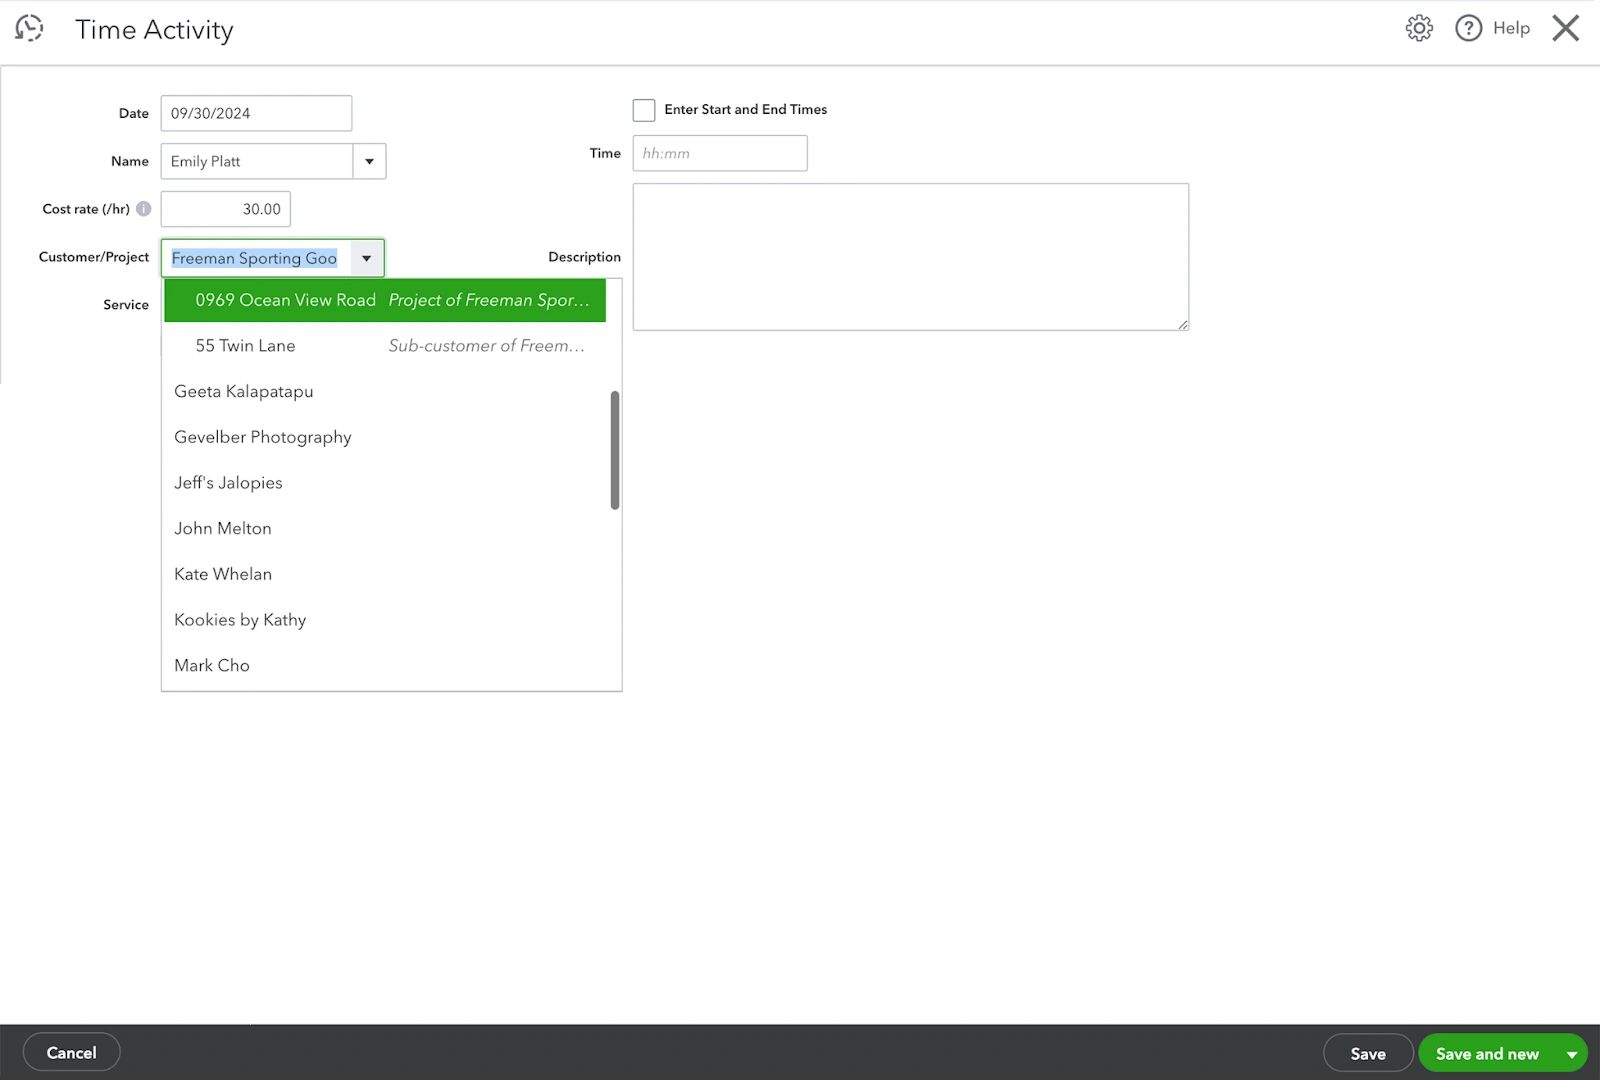
Step 3 : When an employee is adding time via a single time activity or weekly timesheet, they should select the project from the Customer dropdown field. They then fill in the other necessary details, and Save and Close.
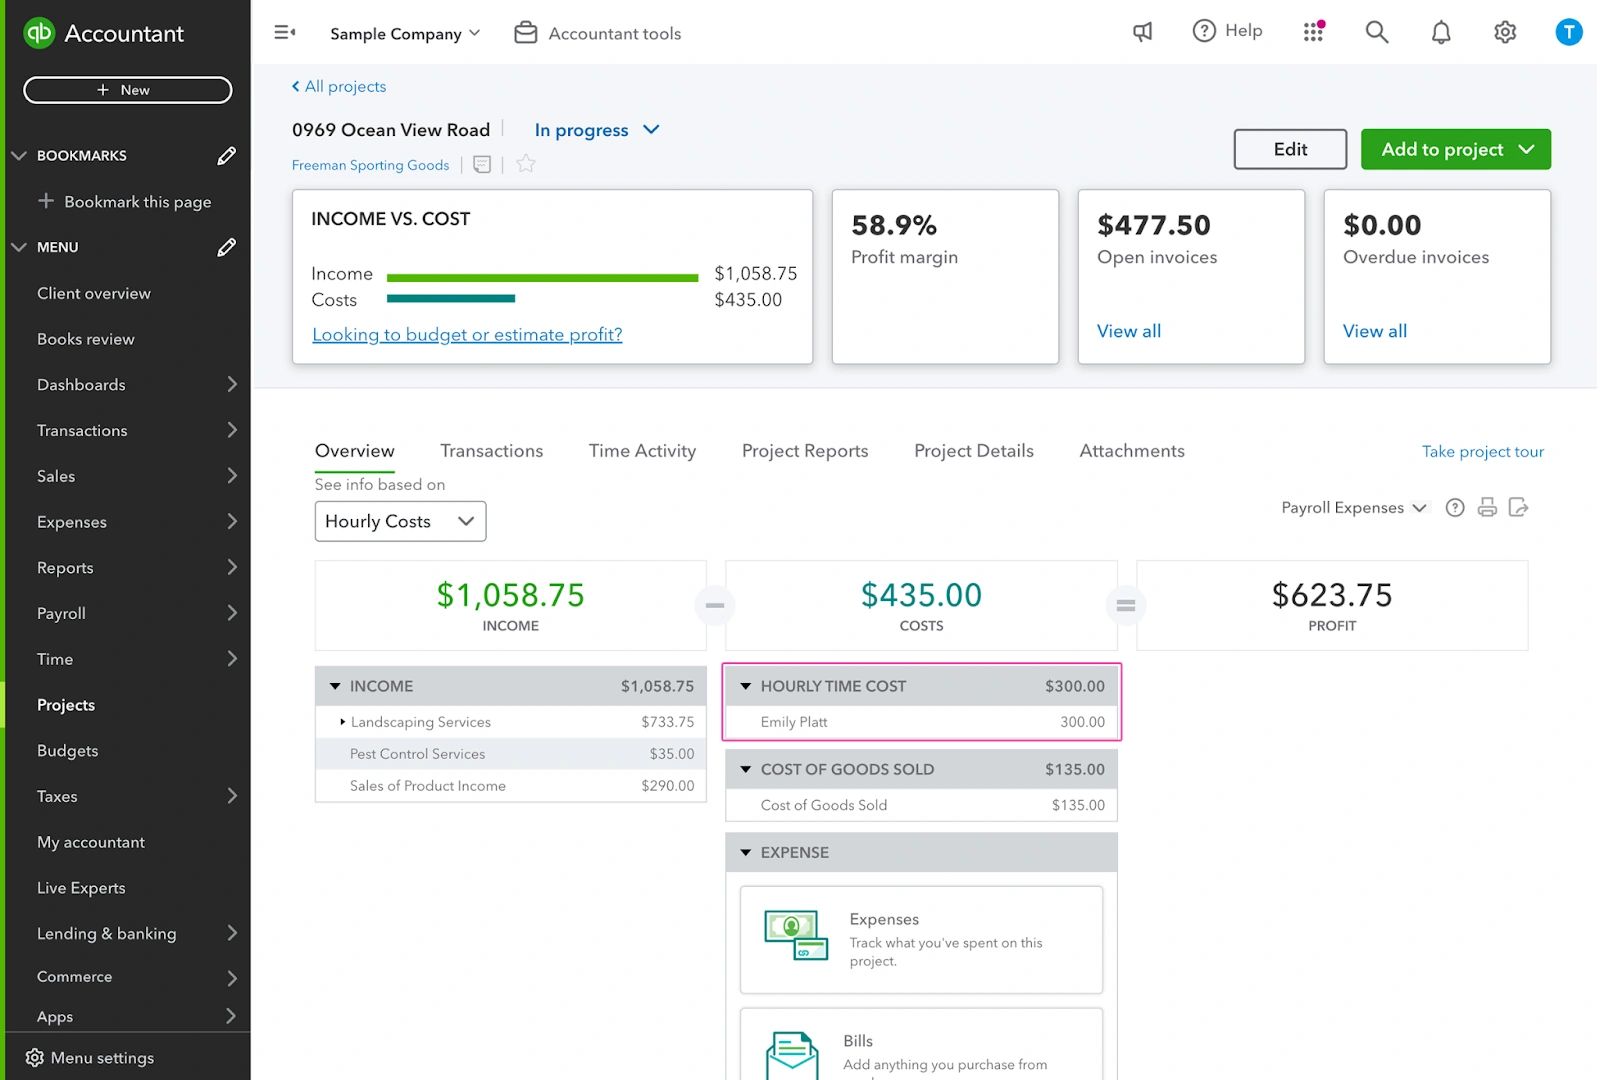
Step 4 : When you are using hourly cost rates, QuickBooks Online will multiply the cost rate entered by the number of hours from the timesheets. It will show those costs on the project Overview (provided that you have selected the Hourly Costs view) and any time reports.
Using Payroll expenses to track labor costs.
If you are using QuickBooks Payroll, time entered there will transfer to the paycheck and be allocated to the projects entered on the timesheet.
Once the paychecks are created, you can see the actual costs for earnings items and taxes by selecting Payroll Expenses on the Overview tab in the Projects center.
Reporting on a Project in QuickBooks Online.
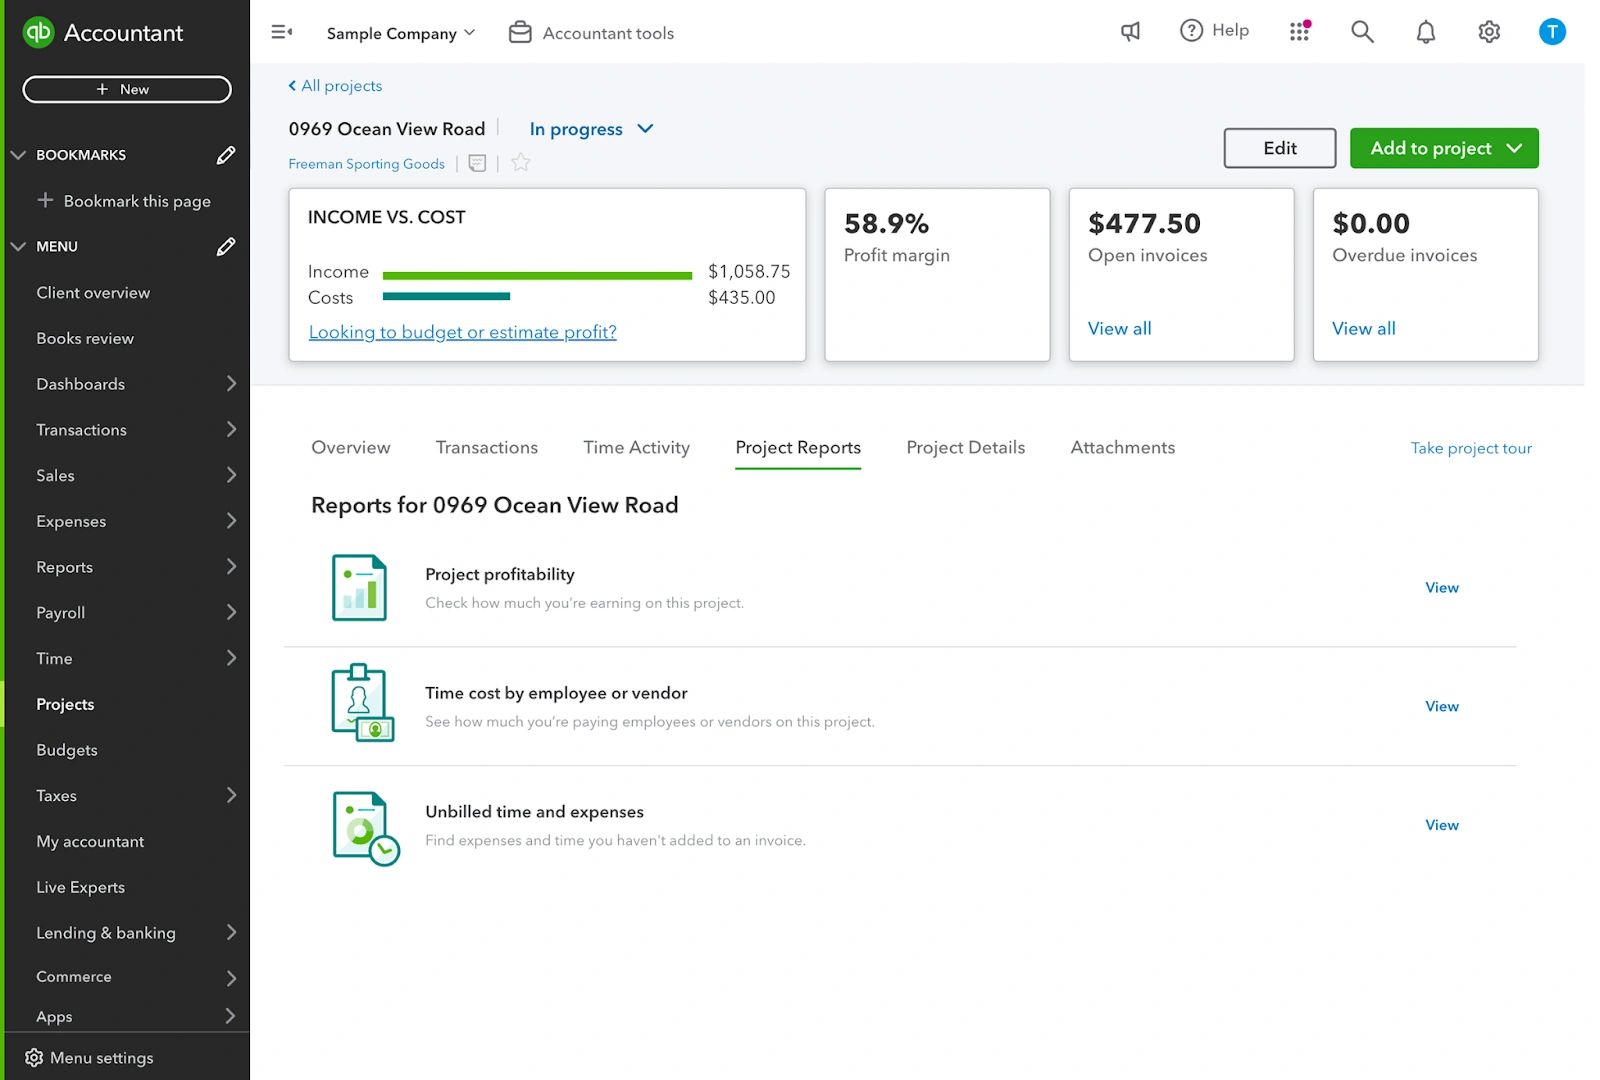
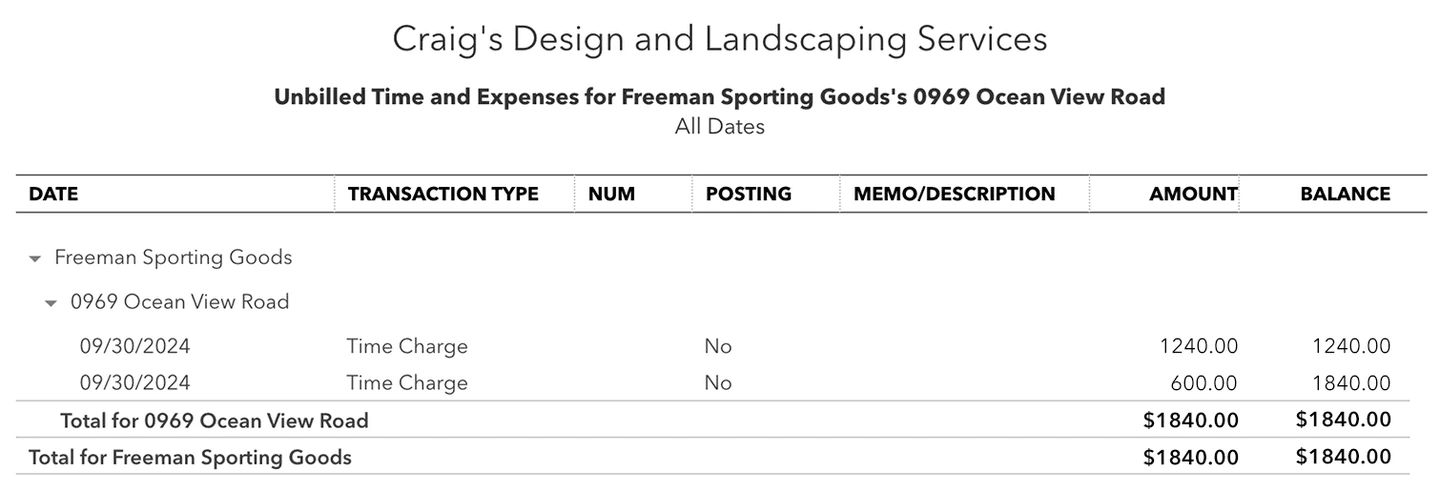
Let’s now look at the final task of projects, and that’s how to report on them. In the Project Reports tab, there are three reports listed for each project: Project profitability, Time cost by employee or vendor, and Unbilled time and expenses.
If you have the Advanced plan and are using Projects, there will also be an Estimates vs Actuals report, showing a project’s profitability by comparing the original estimated costs and income to the actual values.
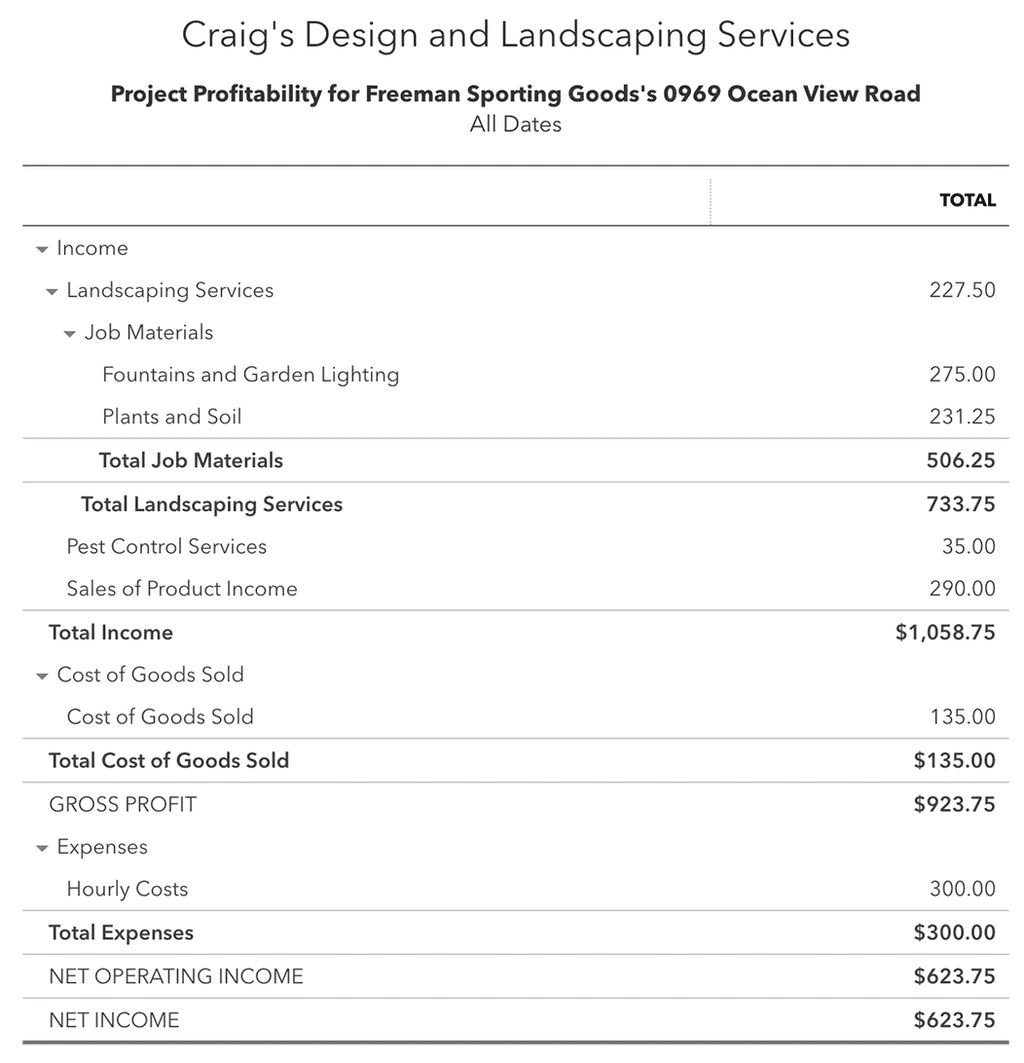
The Project profitability report provides the same details as a Profit and Loss by Customer report, filtered for the project and showing all dates. Note that it only shows income and expenses, not transactions on the balance sheet.
It only shows accounting transactions. So if you are using hourly costs and aren’t using QuickBooks Online Payroll, the Project profitability report won’t include the cost of the employees’ time because they are nonaccounting transactions.
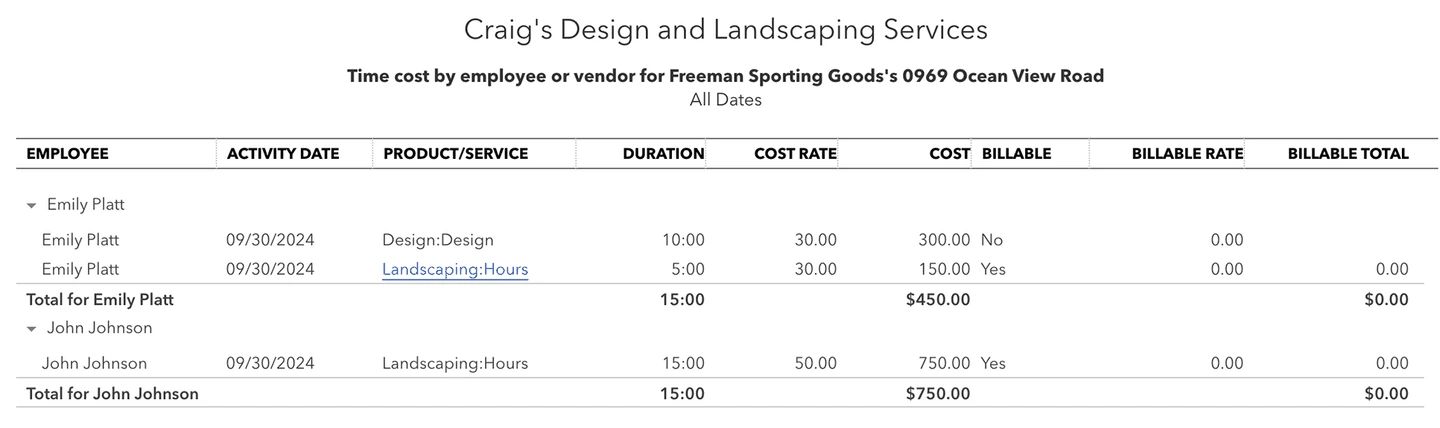
The Time cost by employee or vendor report breaks down all costs associated with every employee who has worked on the project.
This report only contains data if you are using time tracking and the Hourly Cost Rates feature. Hourly costs need to have been set up before the time was entered, otherwise this report will show $0 cost.
The Unbilled Time and Expenses report lists all time and expenses that still need to be invoiced.
Check out our Free Additional Articles