

Keywords: Expenses, Billable, Tracking, Markup, Income, Quickbooks
Credit: Intuit- Quickbooks Online Photo By: FP
Struggling to Keep Your Books in Order? 📊📅
Let us handle the numbers while you focus on growing your business! Get expert bookkeeping support tailored to your needs.
👉 Click Here for a Free Consultation!
Switching on the Billable Expense feature
A billable expense is a non-accounting (or non-posting) transaction. You can use them to track expenses you plan to bill a customer in the future, but haven’t yet included on an invoice.
To track billable expenses you need to enable the feature. Go to the Gene ral settings gear and select Account and settings. From the Expenses tab, expand Bills and expenses. To use the billable expenses feature, first you must ensure it’s switched on in the company’s settings. Then you record the expense to be billed and finally you create an invoice that includes the billable expense.
There are two settings to switch on.
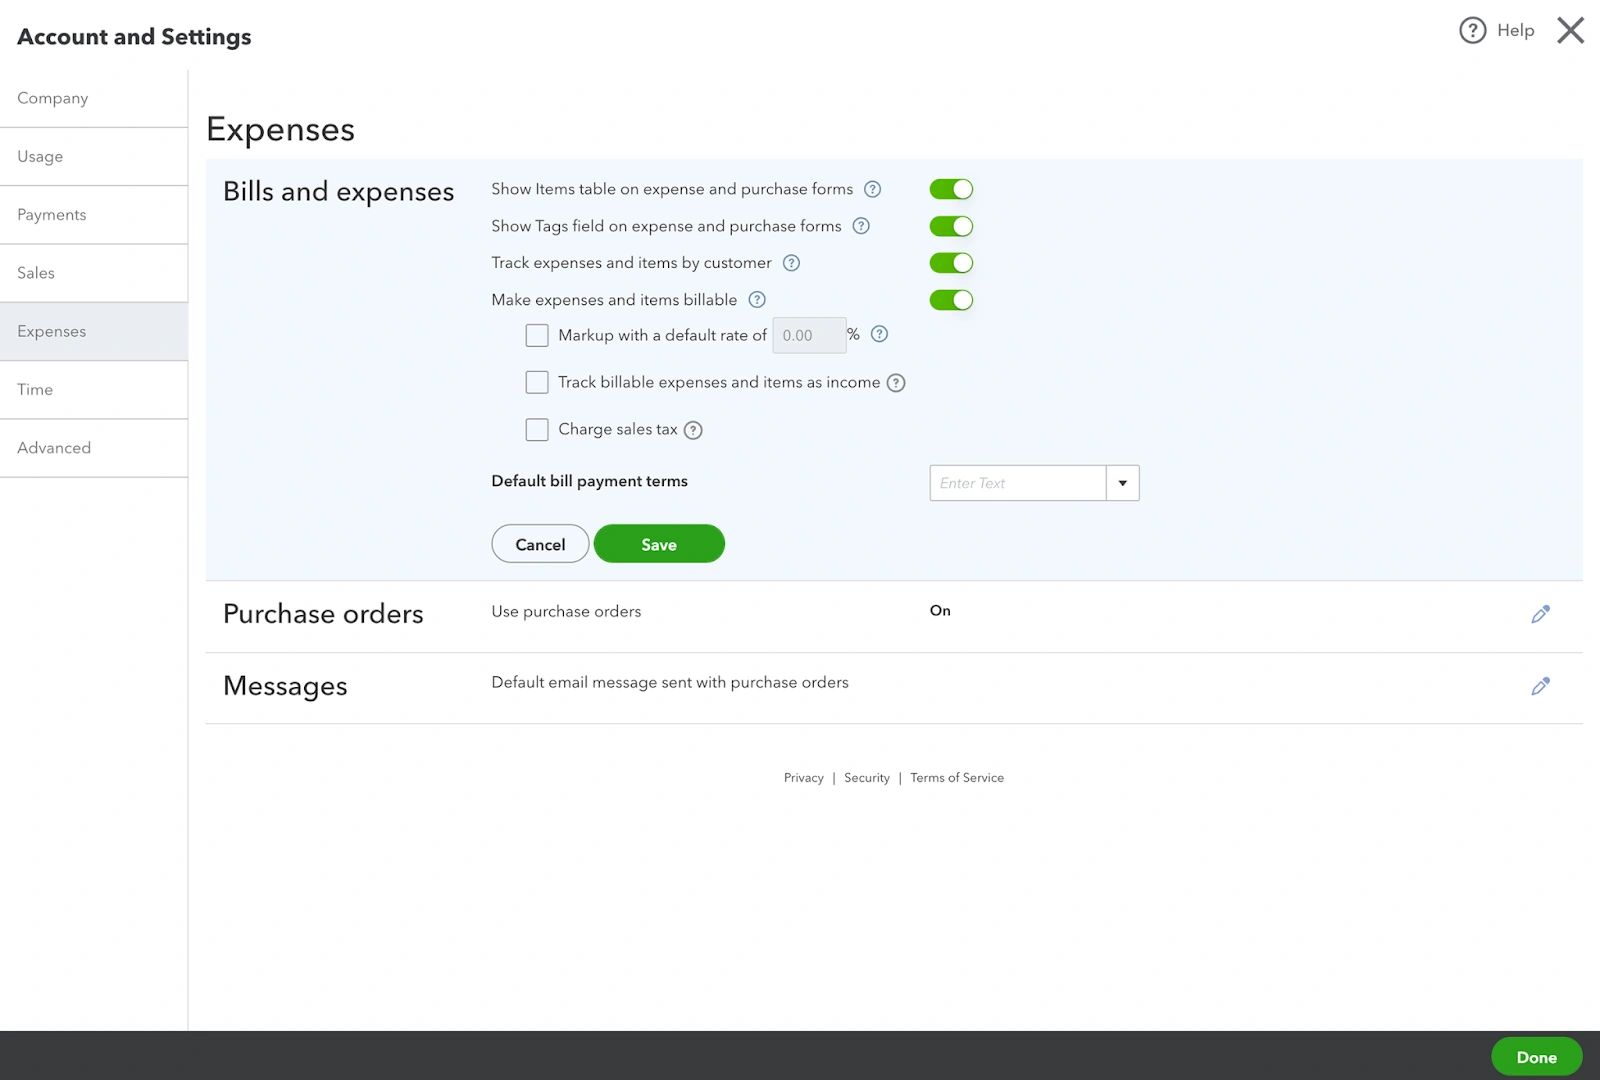
Make sure that Track expenses and items by customer are switched on. This adds a customer column to the expense transactions you need to record in order to assign the expense to a customer’s account.
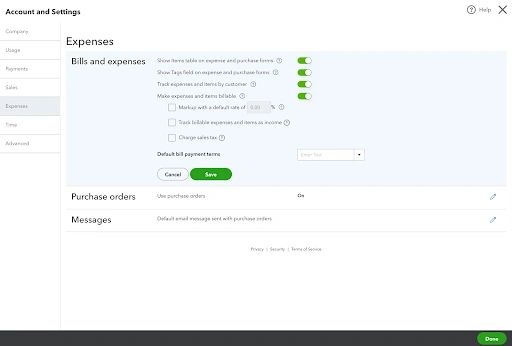
To add a billable checkbox to expense transactions, switch on Make expenses and items billable. Doing this means you can add billable expenses and items to sales transactions.
Creating a billable expense
Now that the billable expenses settings are switched on, take a look at how this appears on an expense transaction.
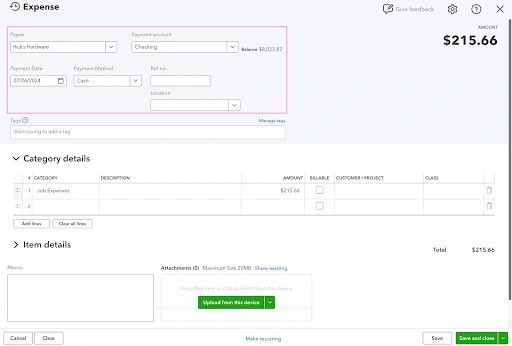
Open a new expense and enter the details of the payee, payment account, payment date and payment method.
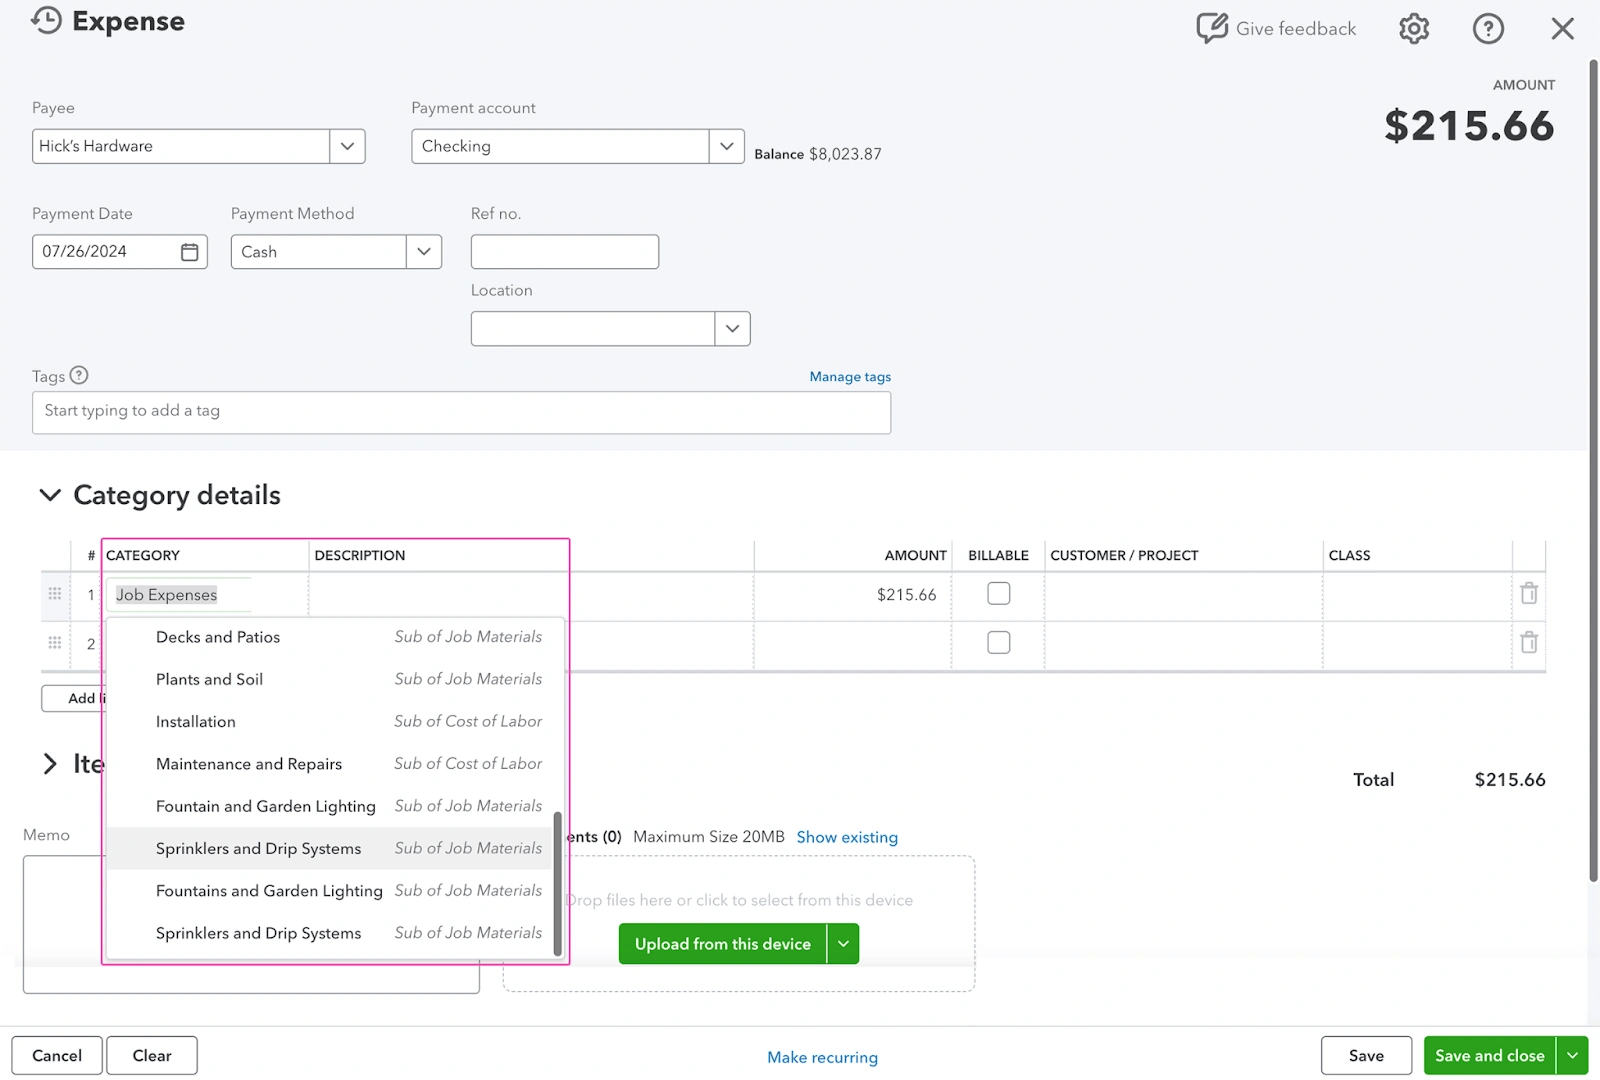
Next-if you want to record an expense using category-select the category from the dropdown If an expense transaction is going to be marked billable, be sure to only use expense, other expense, other current liabilities, other current assets, other assets, fixed assets or cost of goods sold account types.
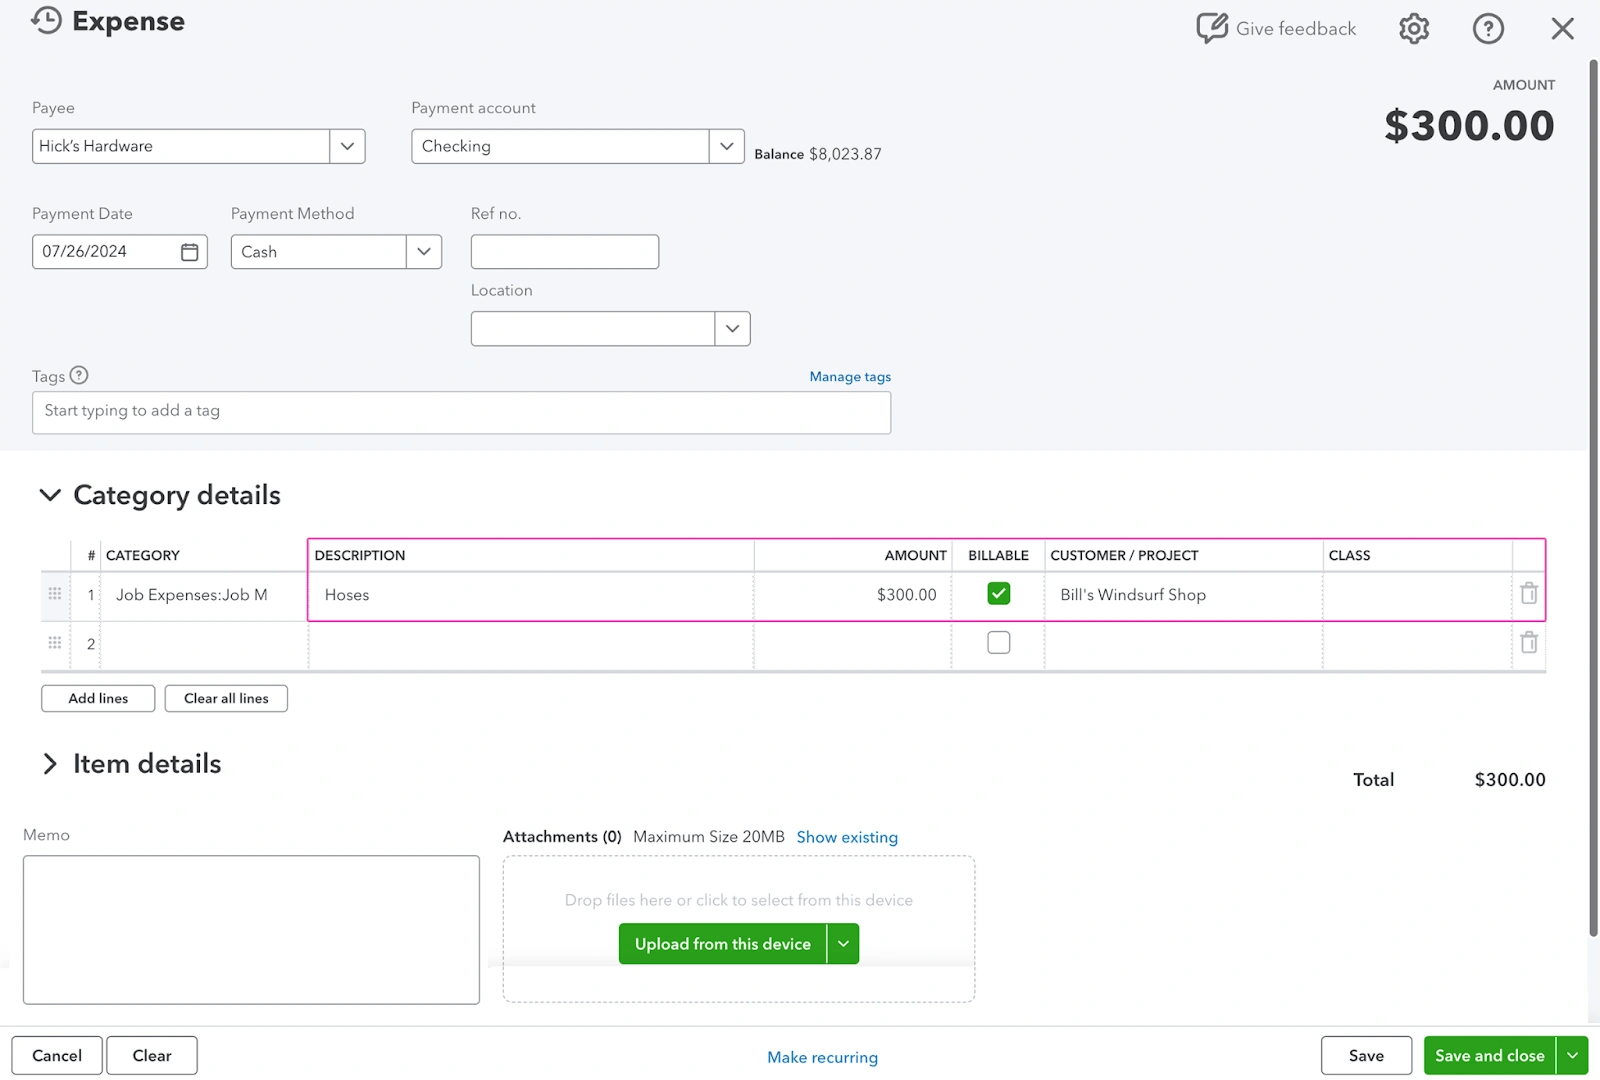
Now fill in the description and amount. Check the box in the Billable column and choose the customer to be billed. This is where you specify the customer, sub-customer, or project to bill the expenses against.
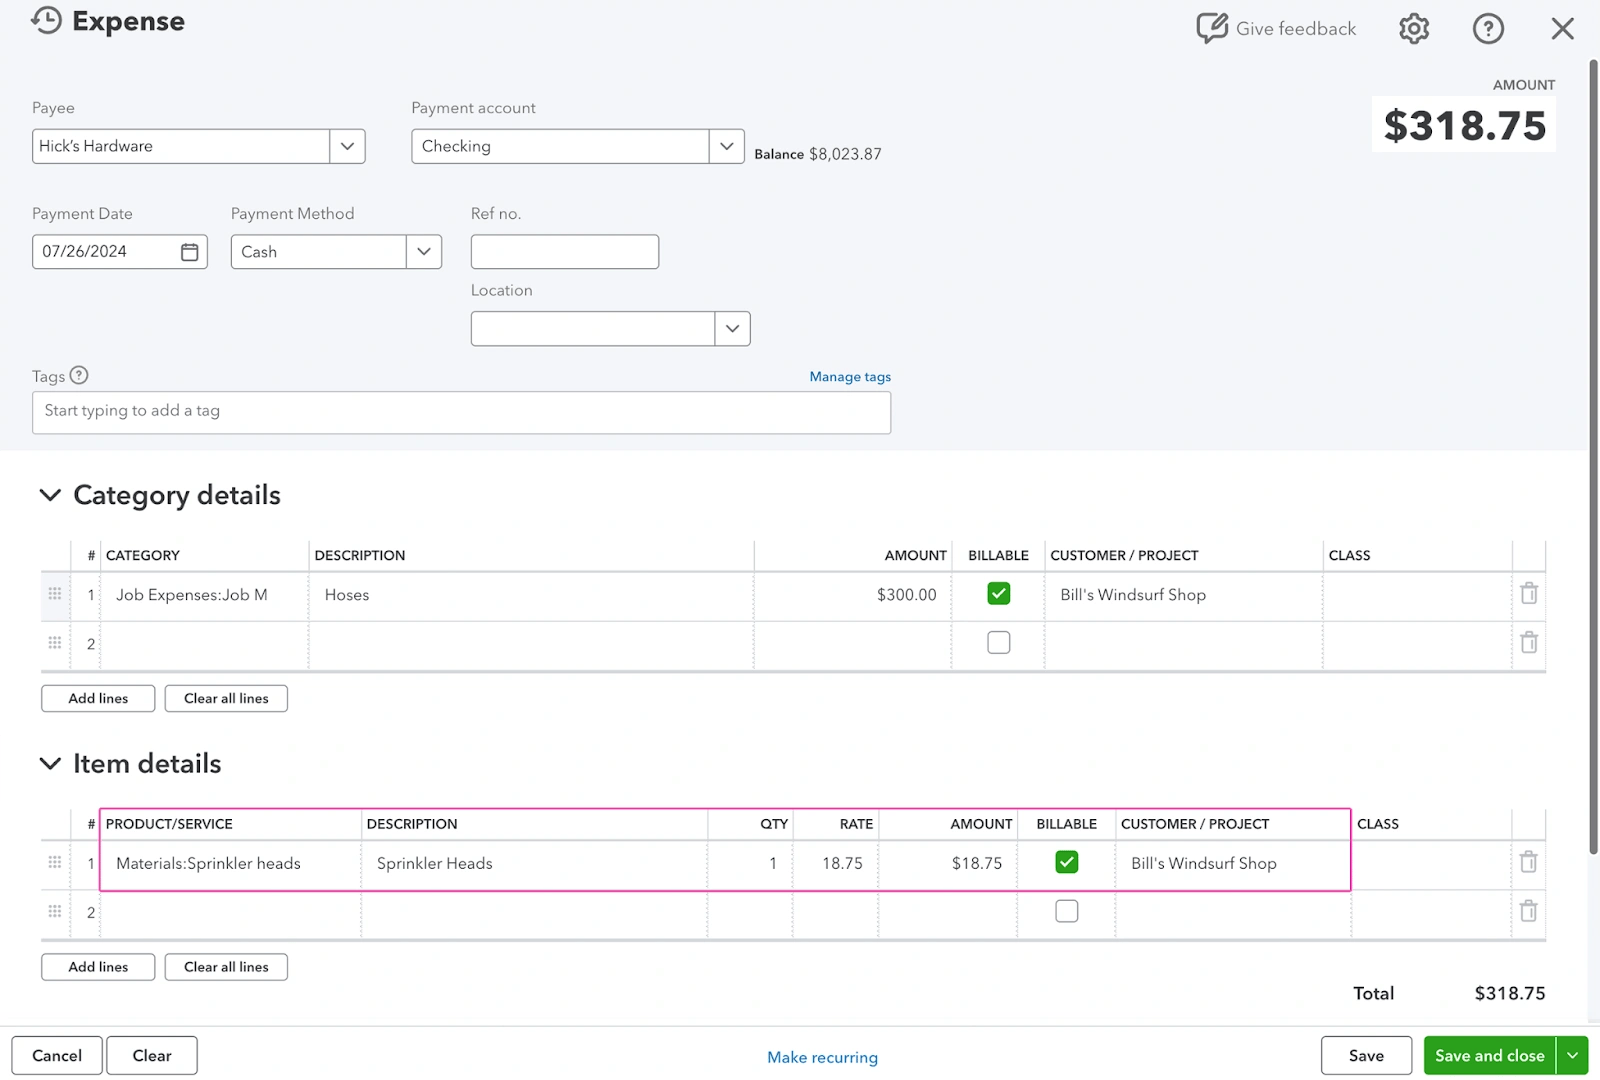
If you want to record an expense using items, move on to the item details section. In the Product/service column, choose the item. Next, enter the quantity of the item. Check the Billable check box. In the Customer/Project box , choose the customer again. Finally, select Save and Close. Note that each line is a separate billable expense charge.
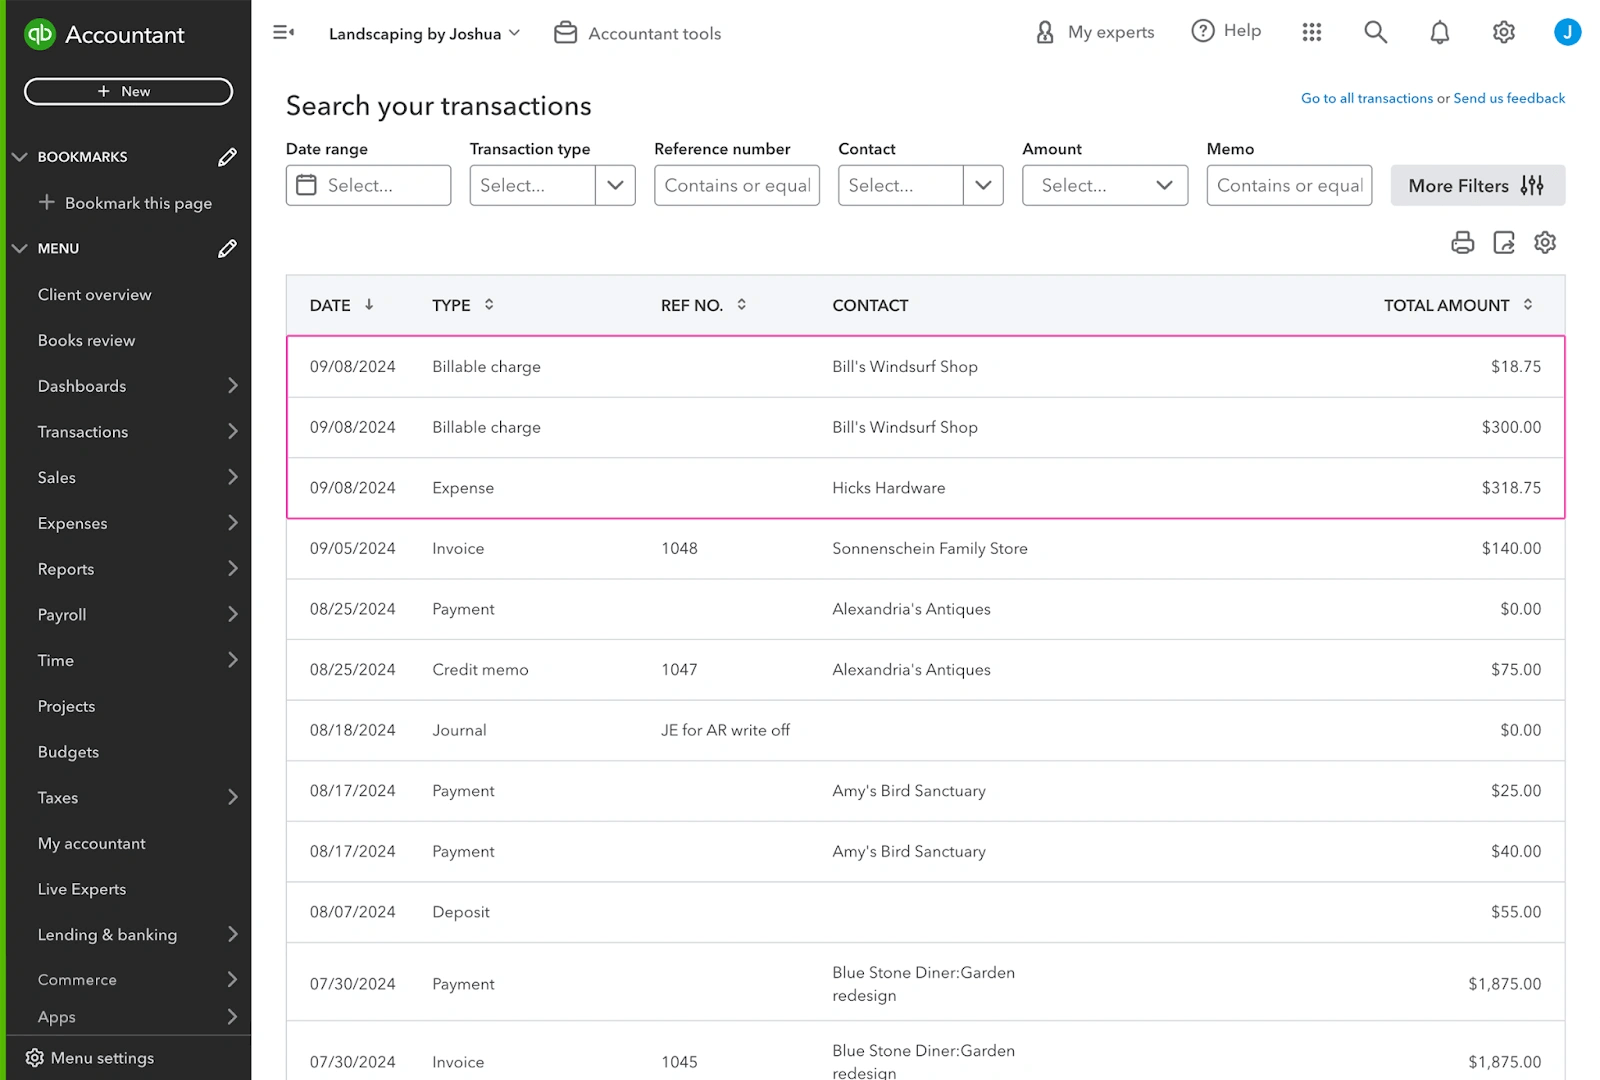
QuickBooks has created two billable expense charges(non accounting transactions) and one expense(an accounting transaction) from the expense form submitted. The accounting transaction will credit accounts payable if it’s a bill, or a payment account if it’s a check or expense transaction. It will then also debit the general ledger account specified on the category details line and cost account mapped to the product or service on the item detail line.
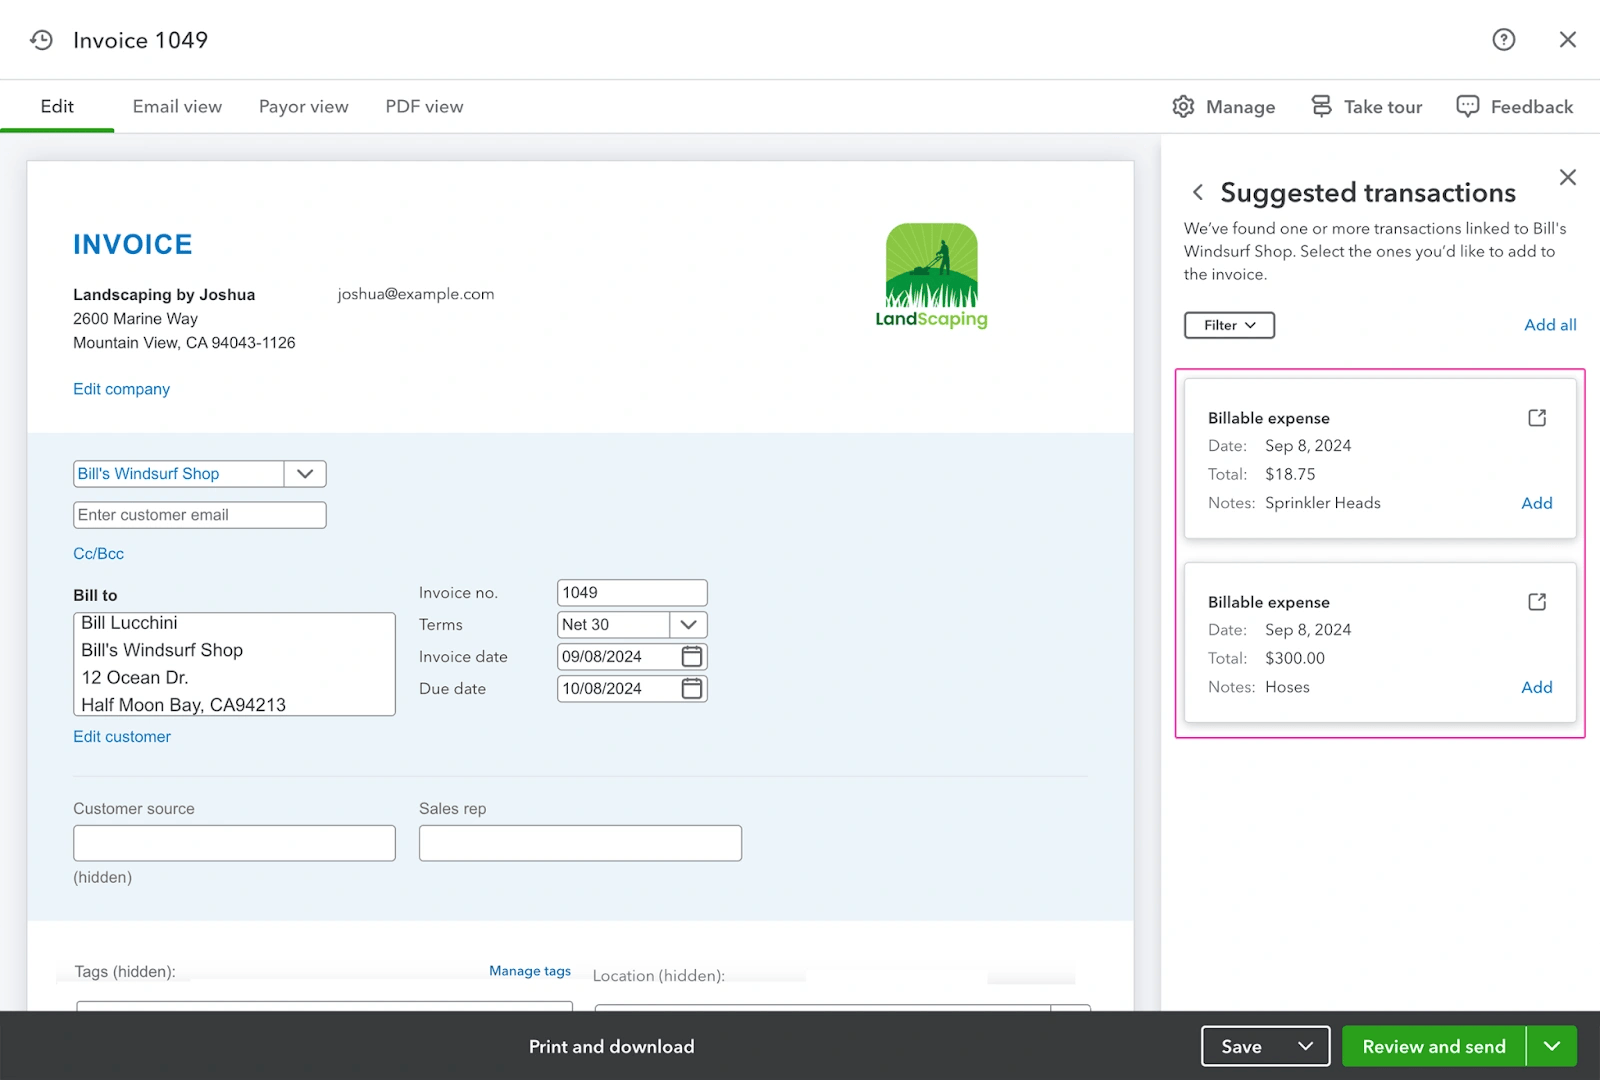
To invoice the billable expense, create a new invoice and select the customer. On the right side of the screen, the charges are listed and can be added to the invoice.
Marking up a billable expense
With the billable expenses feature, it’s possible for you to charge your customers a percentage markup on the expense you incurred on their behalf.
Let’s move on to the second task, and look at how to add a markup to billable expenses.
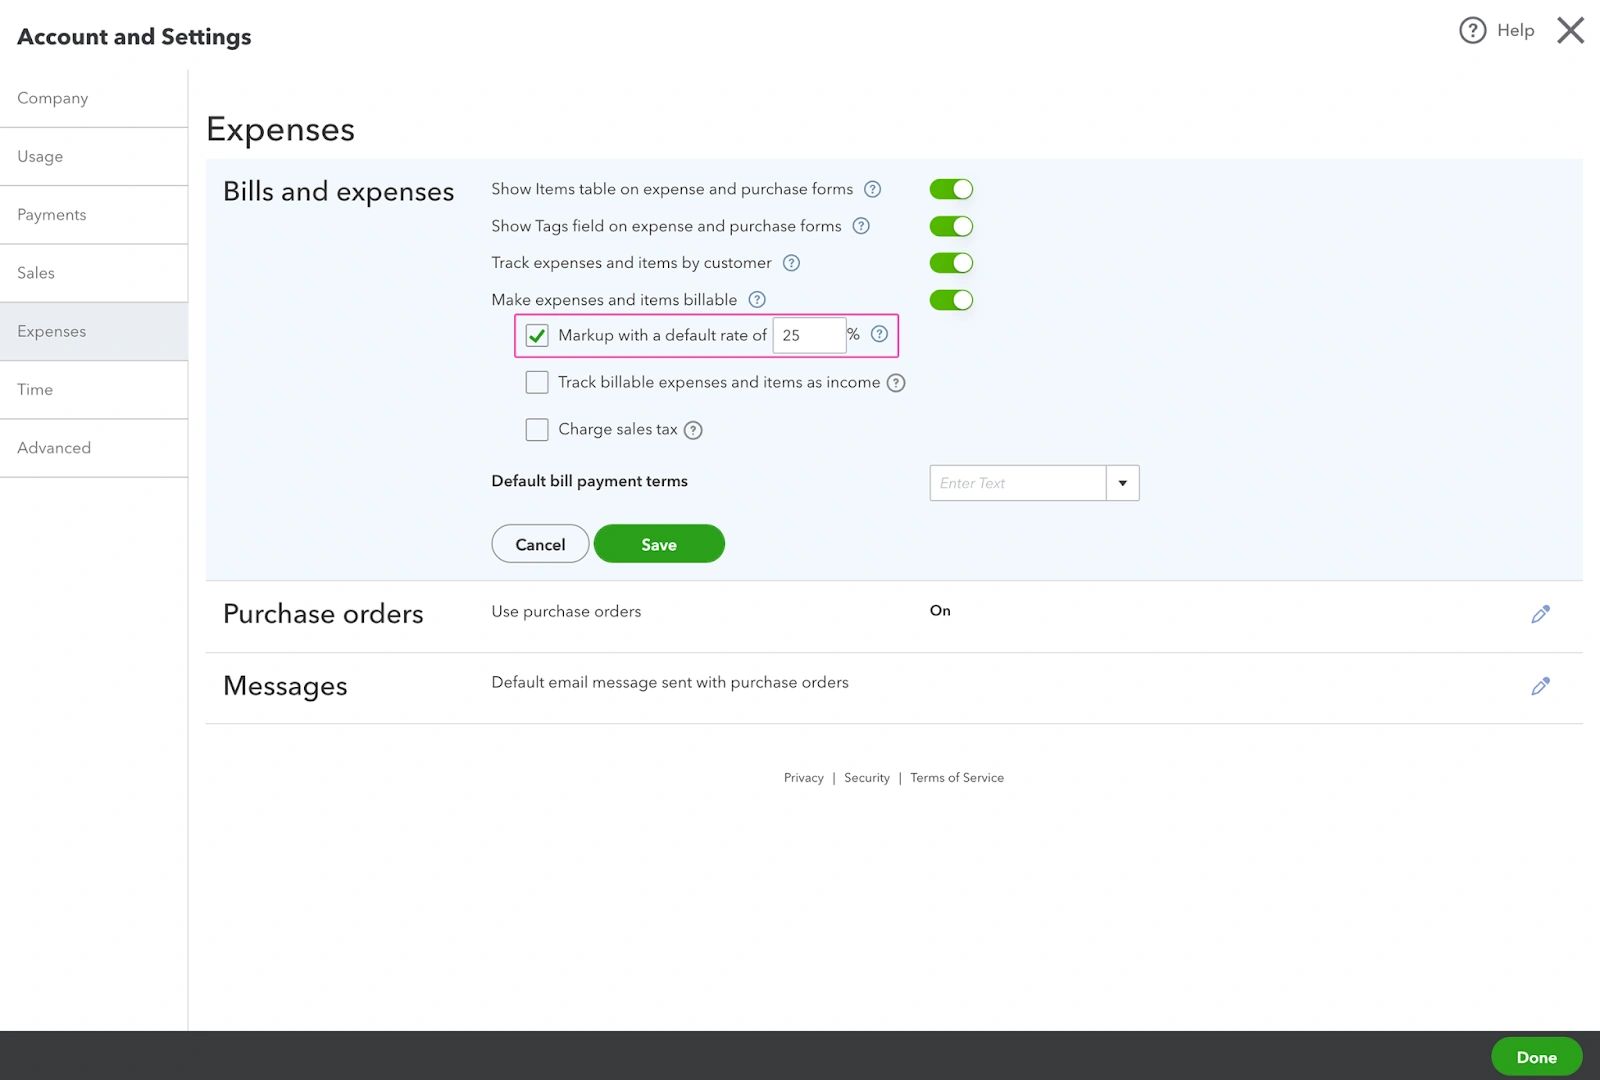
Go back to the General settings gear and select Account and Settings. From the Expenses tab, expand Bills and Expenses. Check Markup with a default rate of to switch on the feature and a percentage in the box.
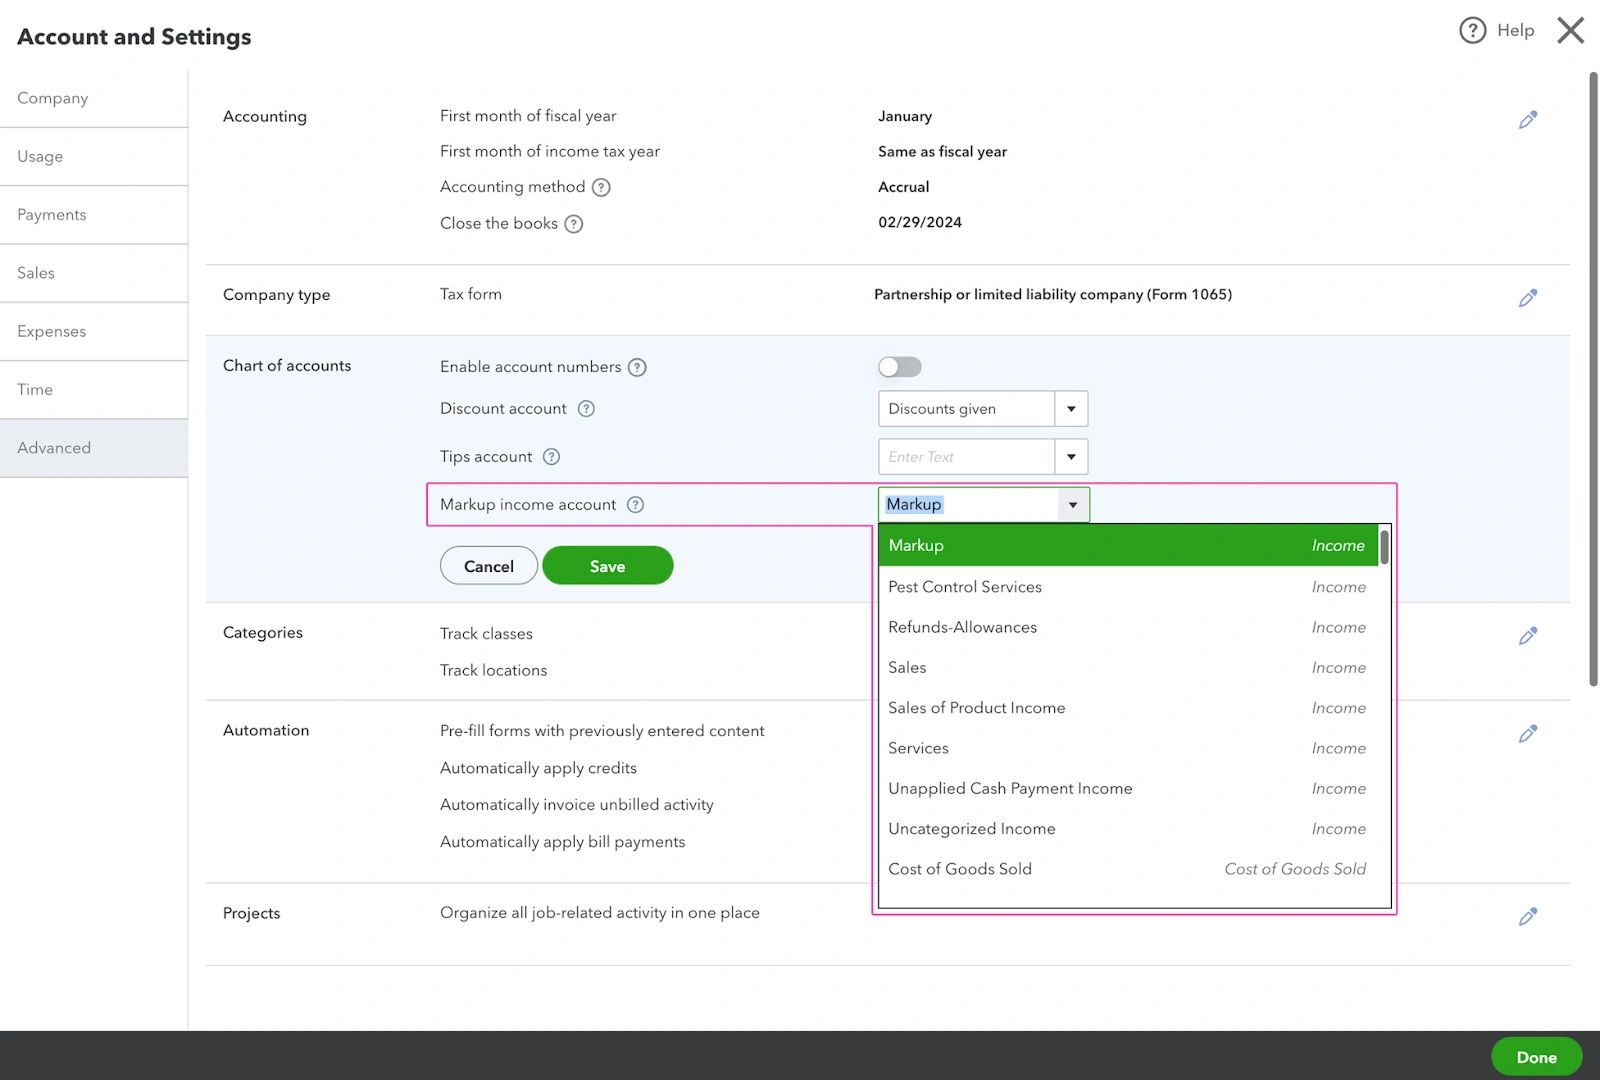
The markup is recorded in its own separate account called Markup. QuickBooks automatically sets up a default markup income account when a billable expense with a markup is first invoiced. If you want to change where the markup is recorded, go to the Account and settings and select the Advanced tab. In the chart of accounts section, select the desired account from the Markup Income account dropdown.
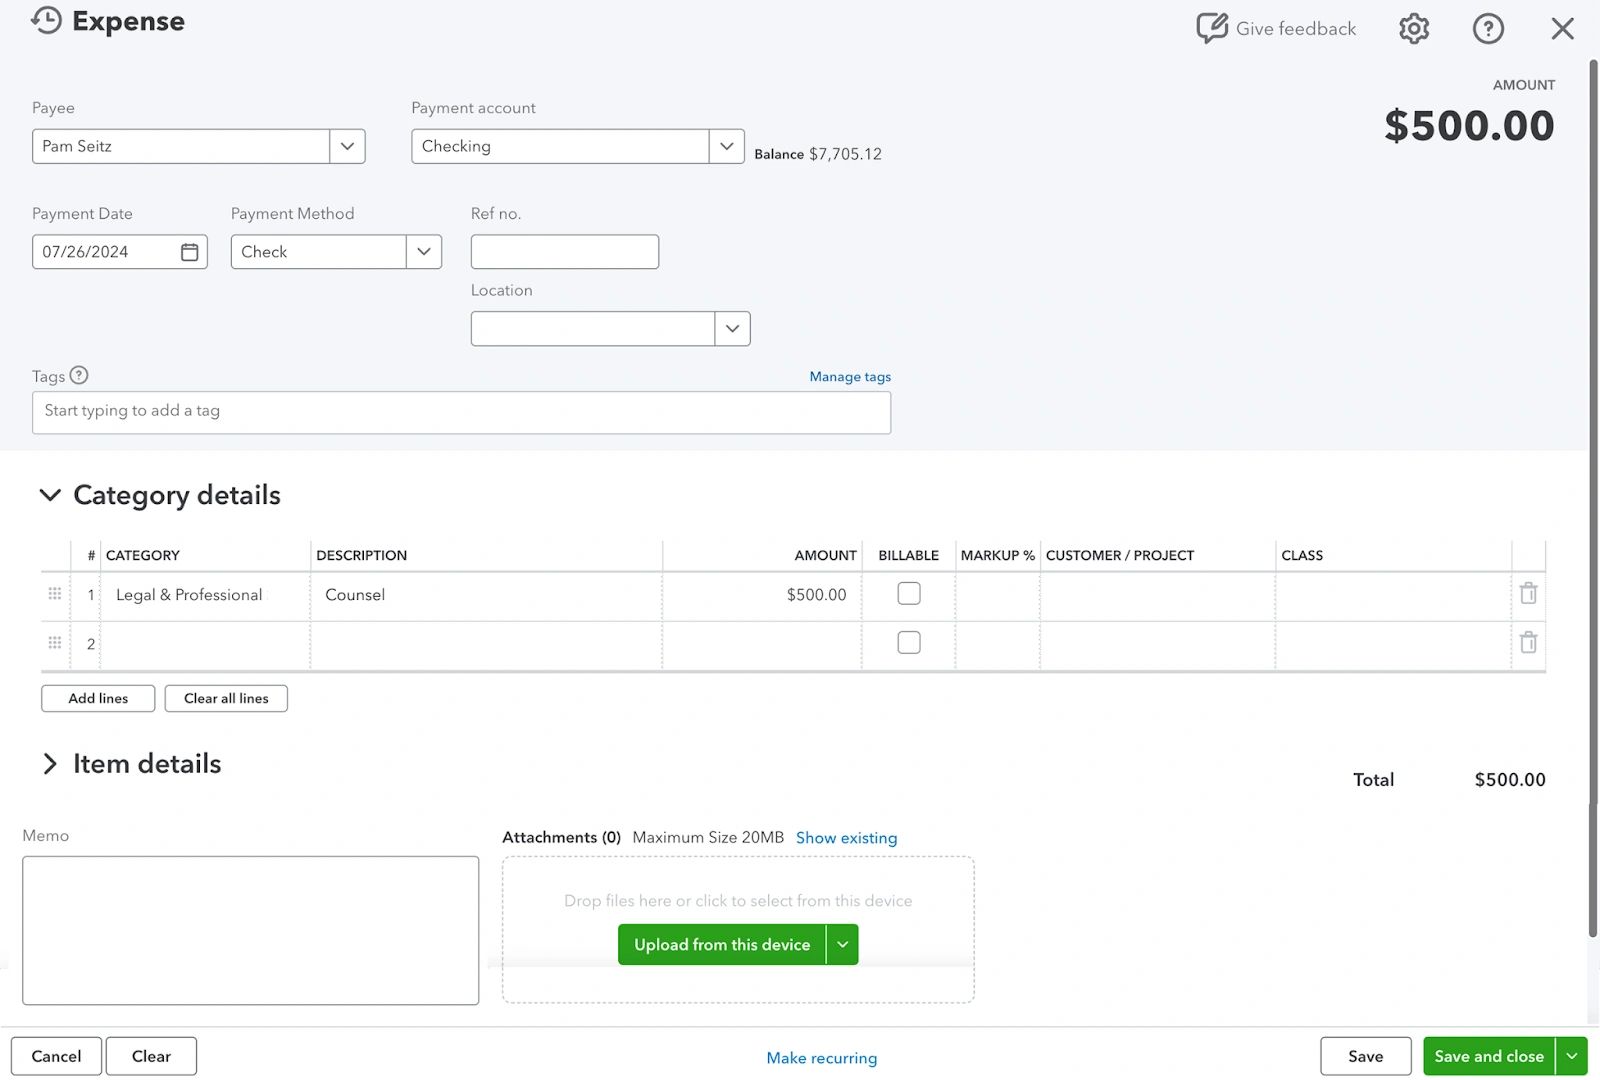
Now that the Markup settings are enabled, take a look at how this appears on an expense transaction. Open a new expense and enter the details of the payee, payment account, payment date and payment method. If you’re using it to record an expense, start to populate the details of the transaction under Category details.
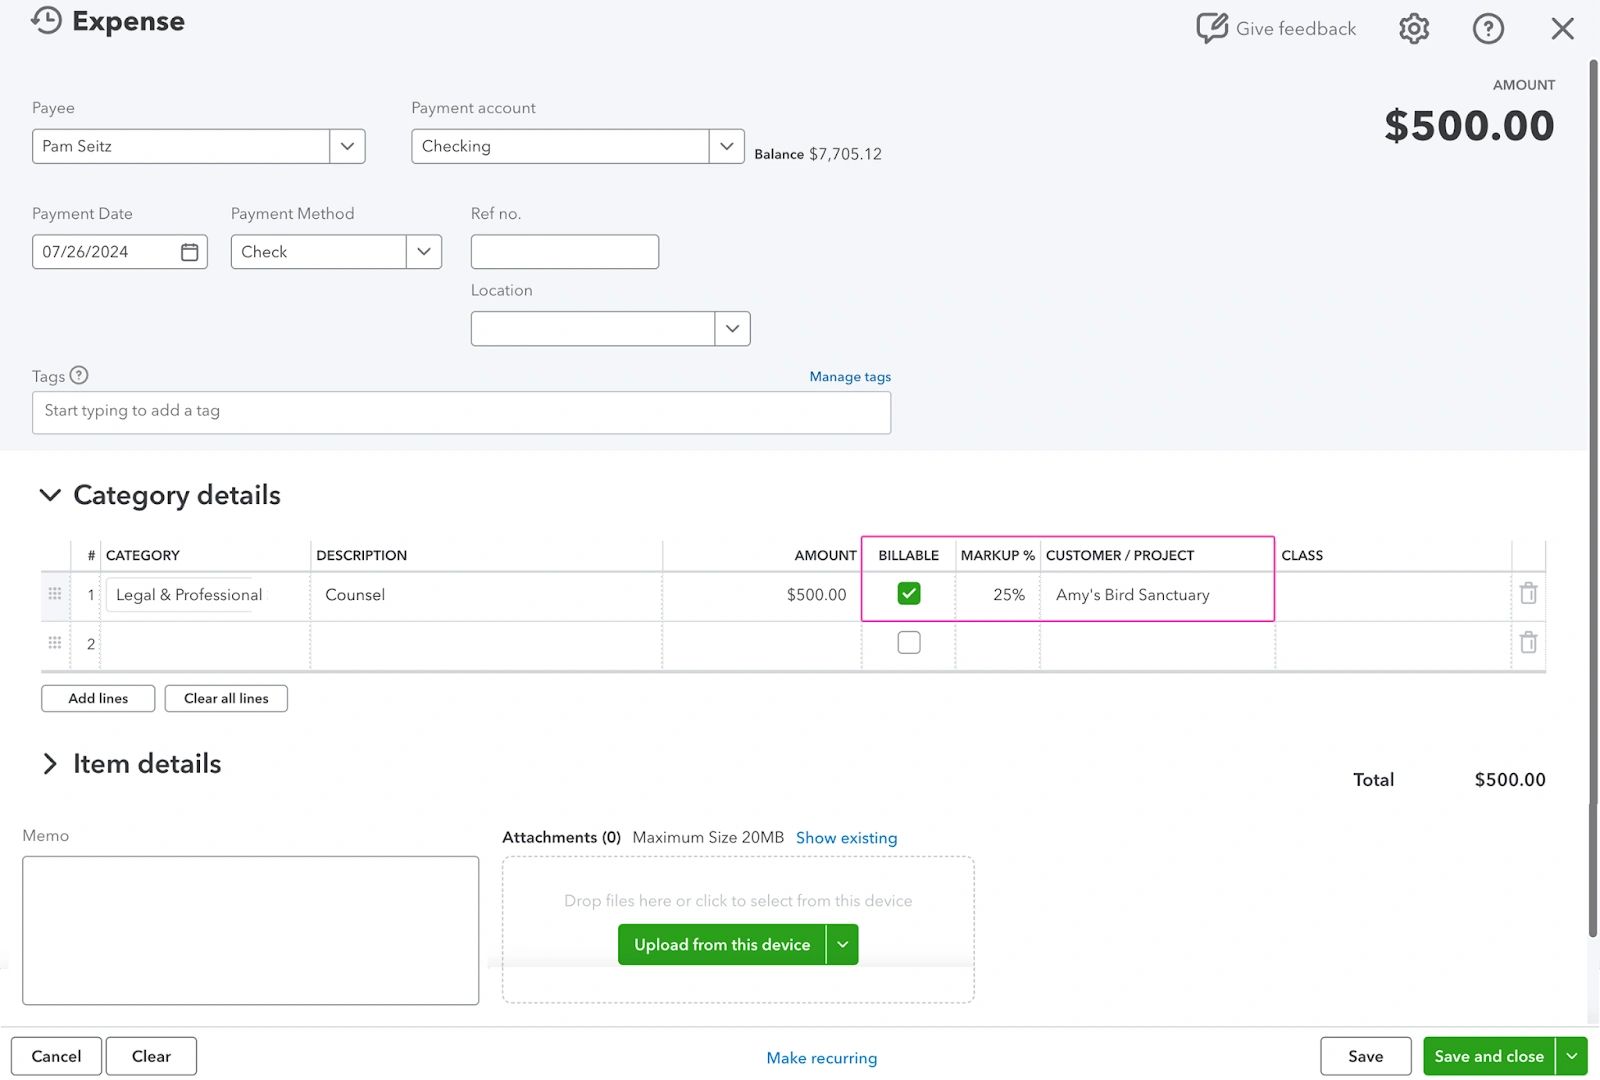
When you check the Billable box, the percentage you entered earlier appears in the markup for this expense. You can overtype it, if you want to charge a different percentage markup in this instance.
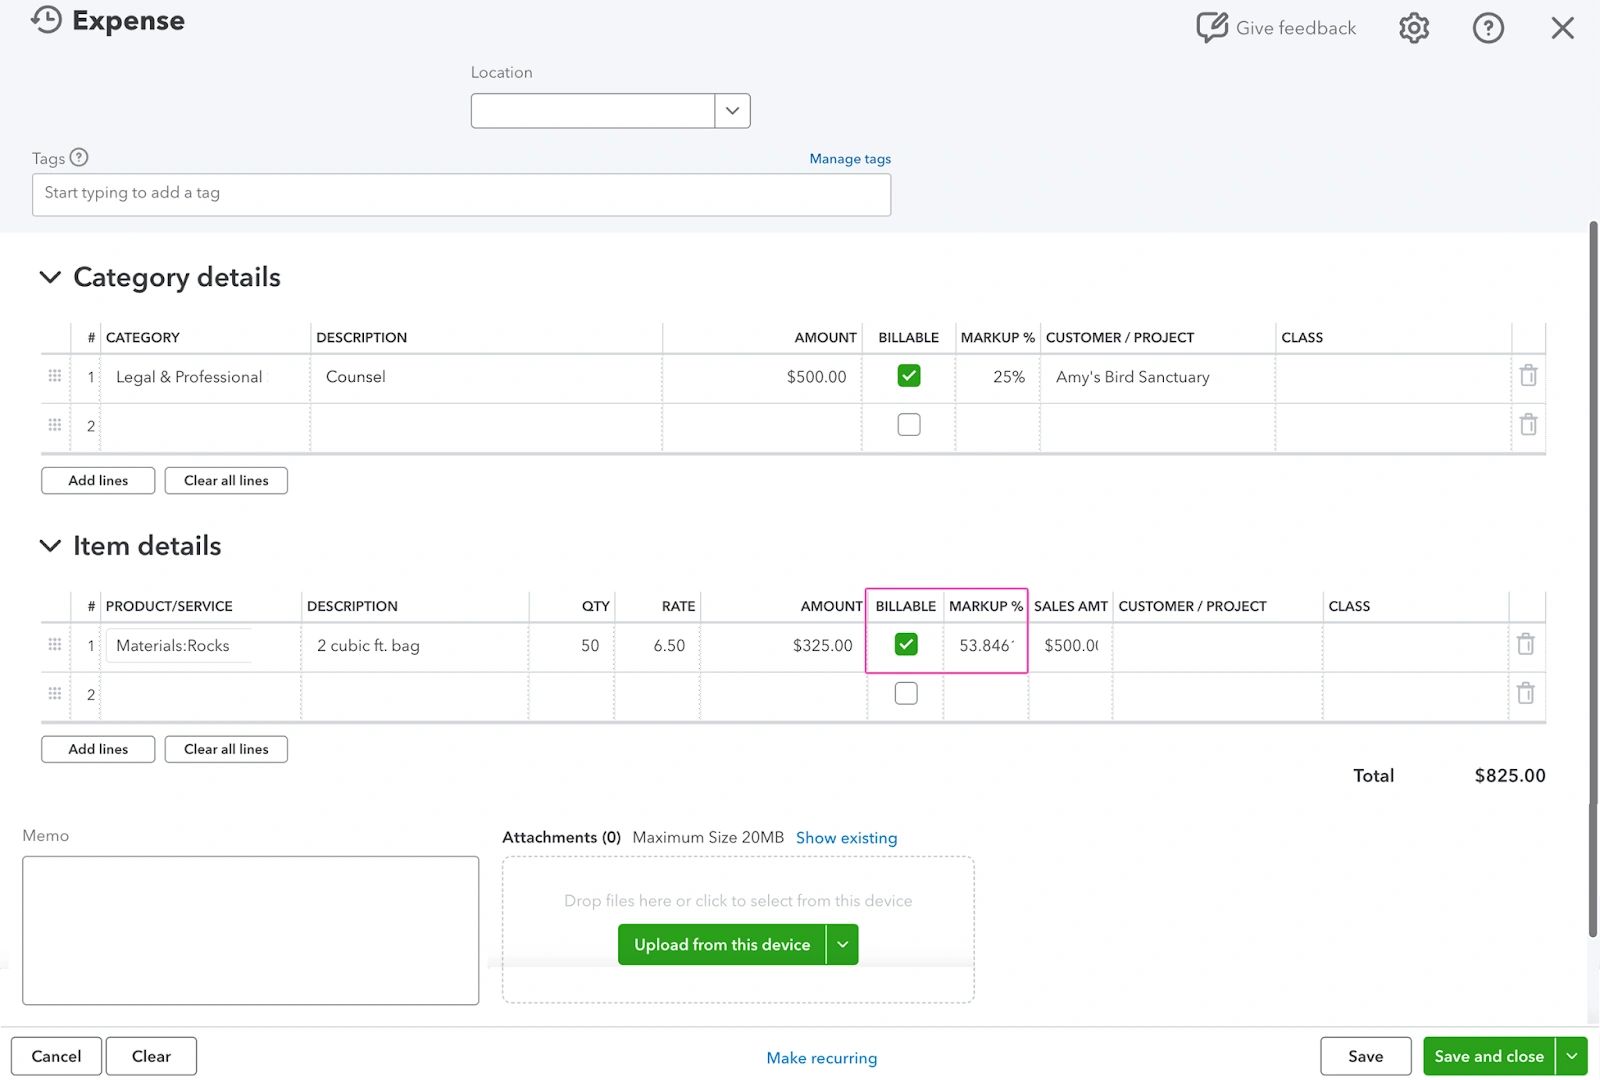
If you’re using an item to record an expense, fill in the Item details section and check the Billable box. Notice here how the default markup is different. This is the difference between the cost and the sales price in the item setup, converted to a percentage.
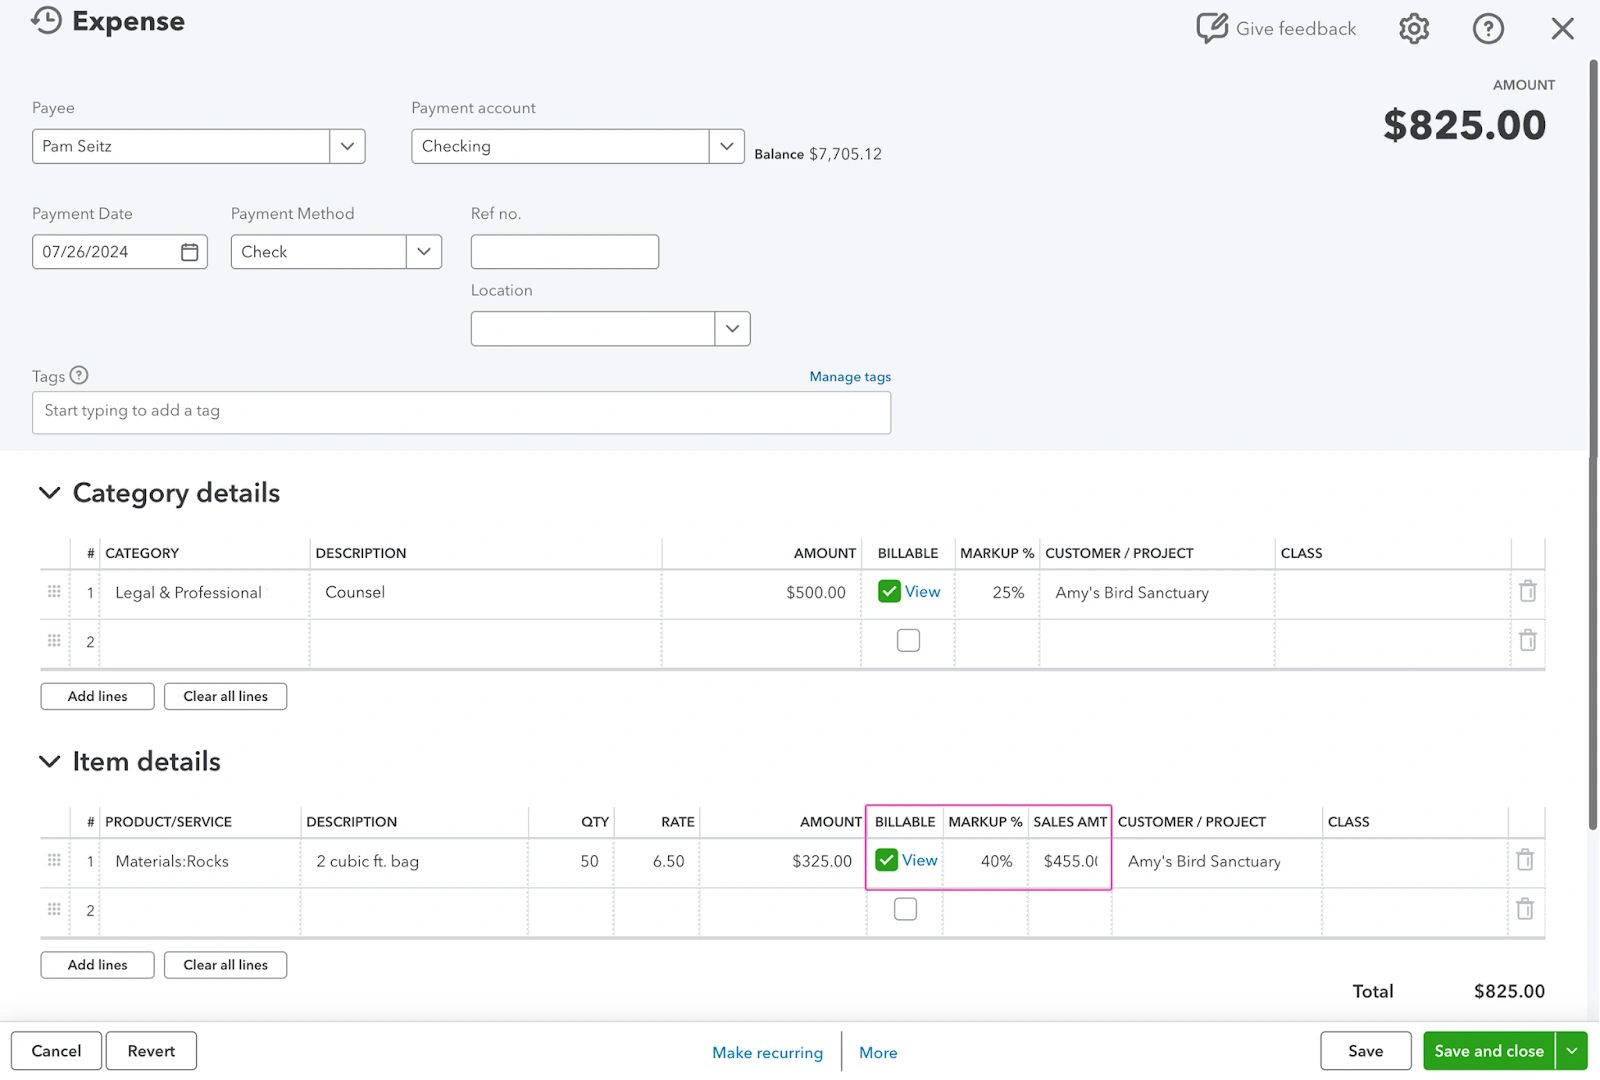
You can overwrite it to change it. Once you’ve assigned this expense to a customer and selected Save, an option is to View the details of the nonaccounting transaction that’s been recorded is shown in the Billable column.
Invoicing a marked-up billable expense
Let’s take a look at an invoice with a marked-up billable expense.
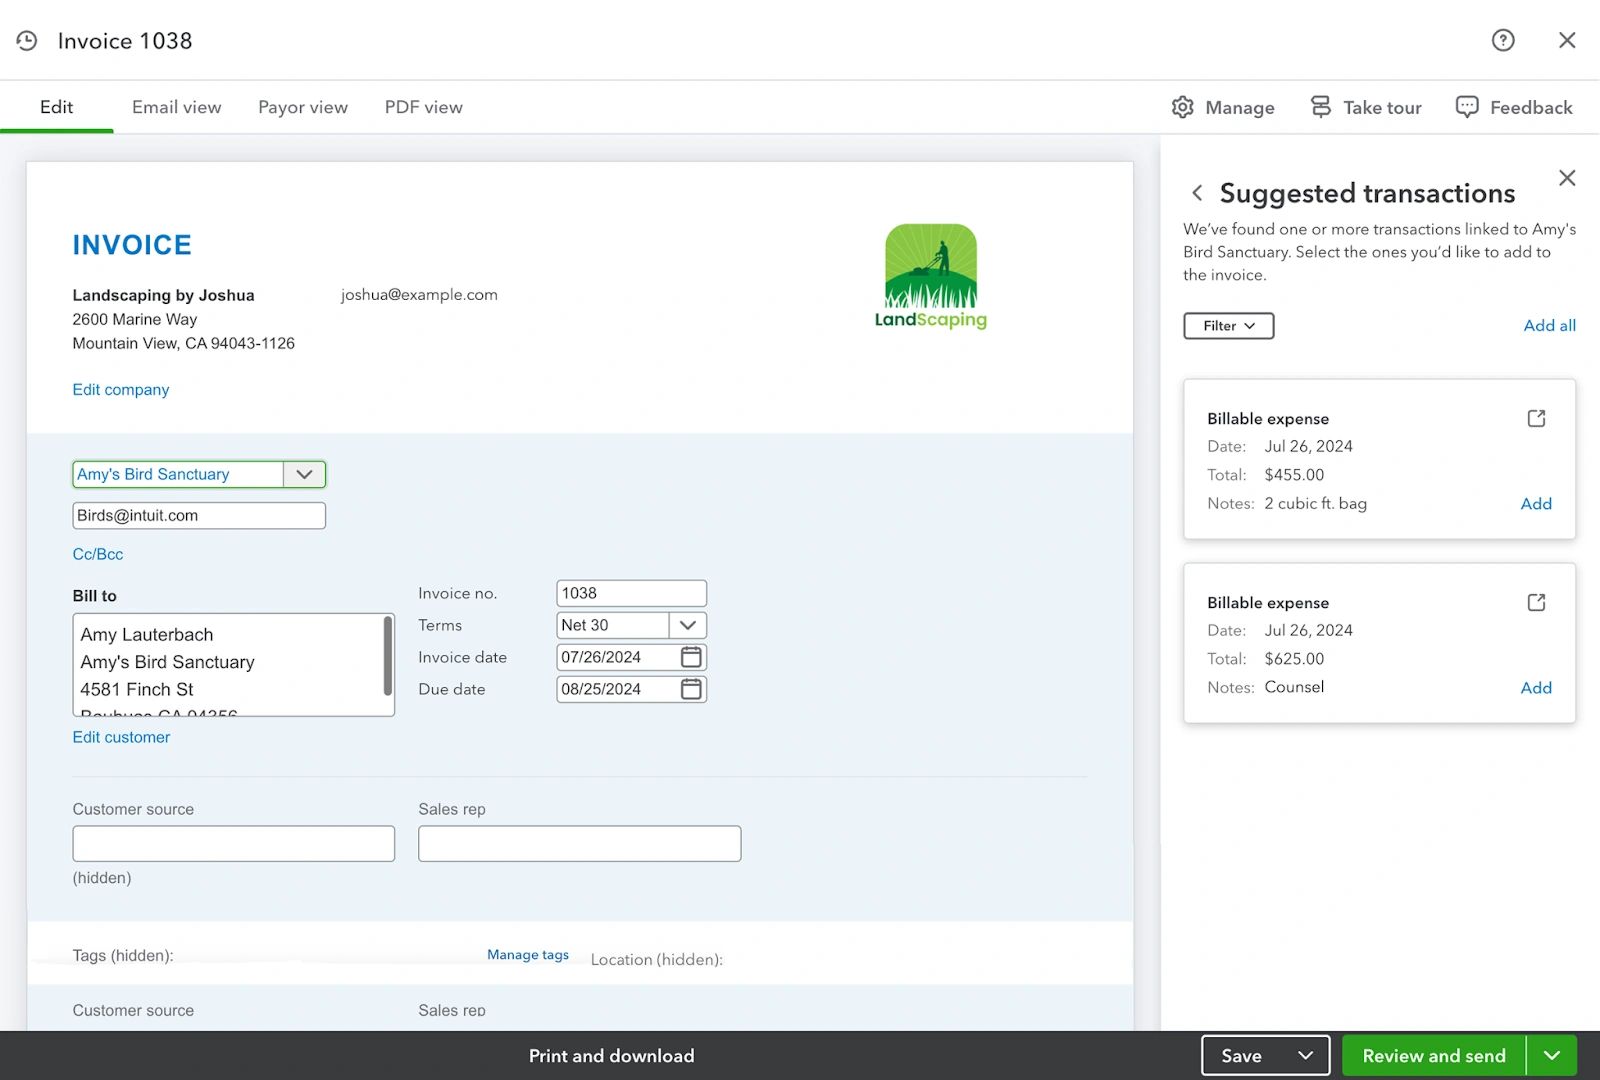
Open a new invoice and enter the customer and date. From the side panel, select the billable expenses to include them on the invoice.
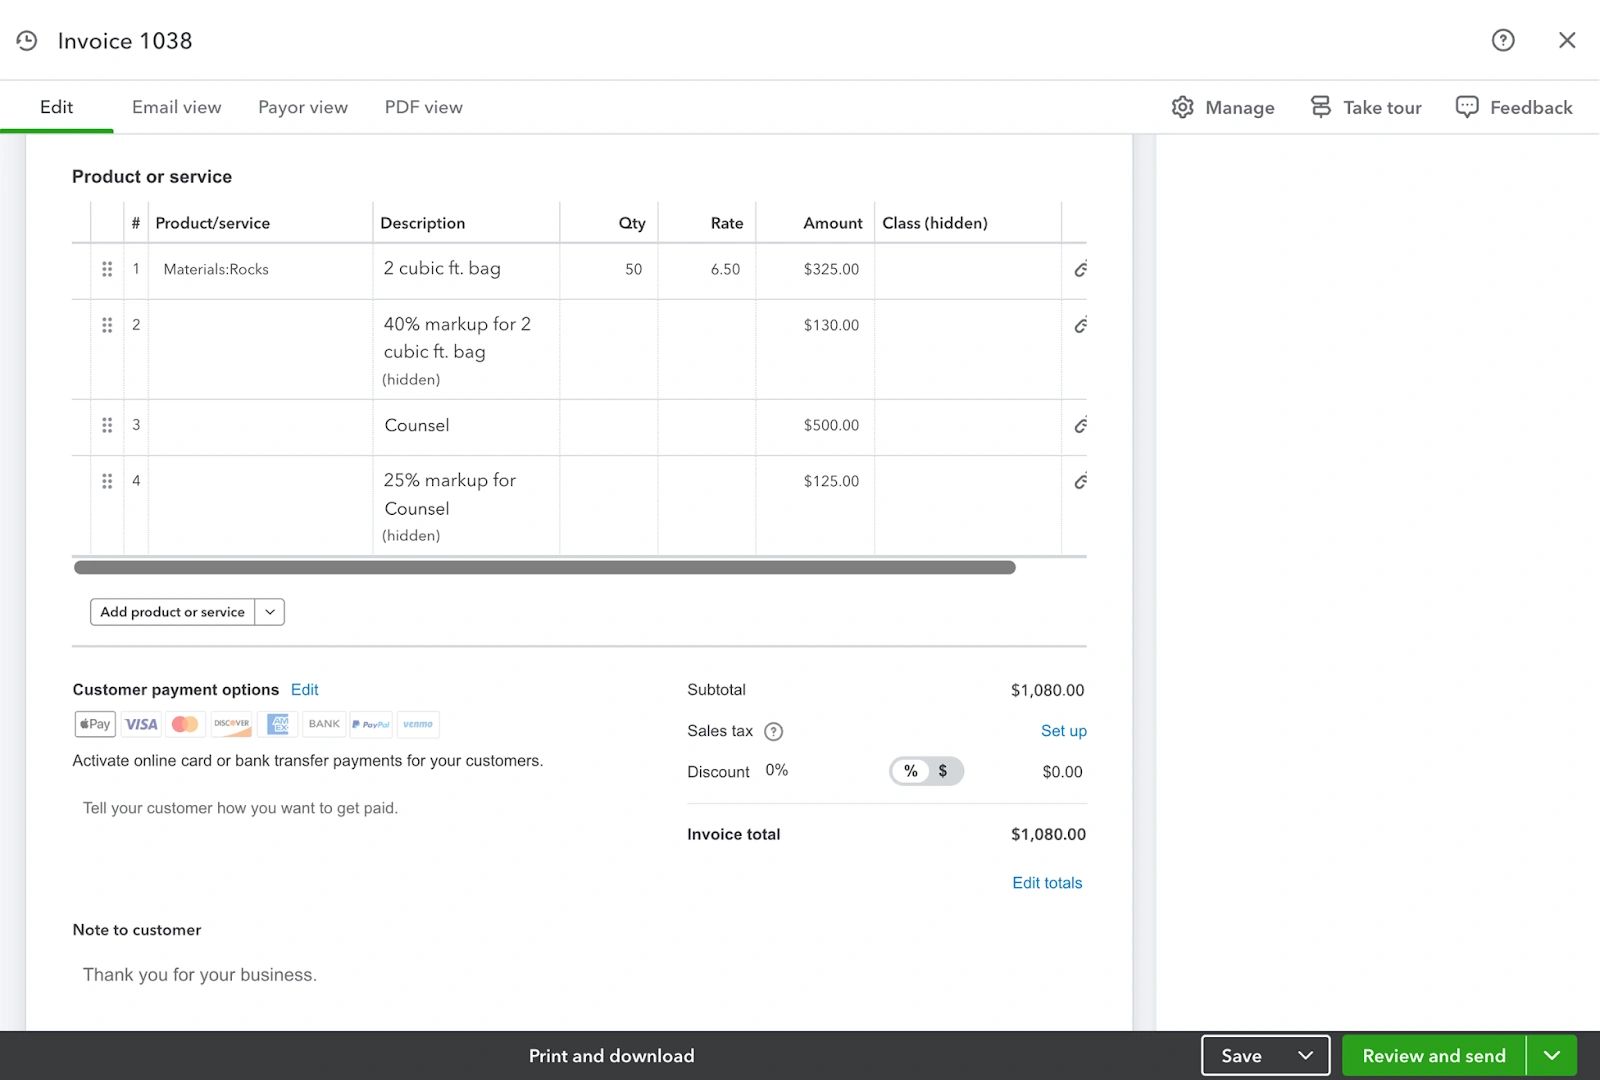
As you can see, QuickBooks adds the markup on separate lines.
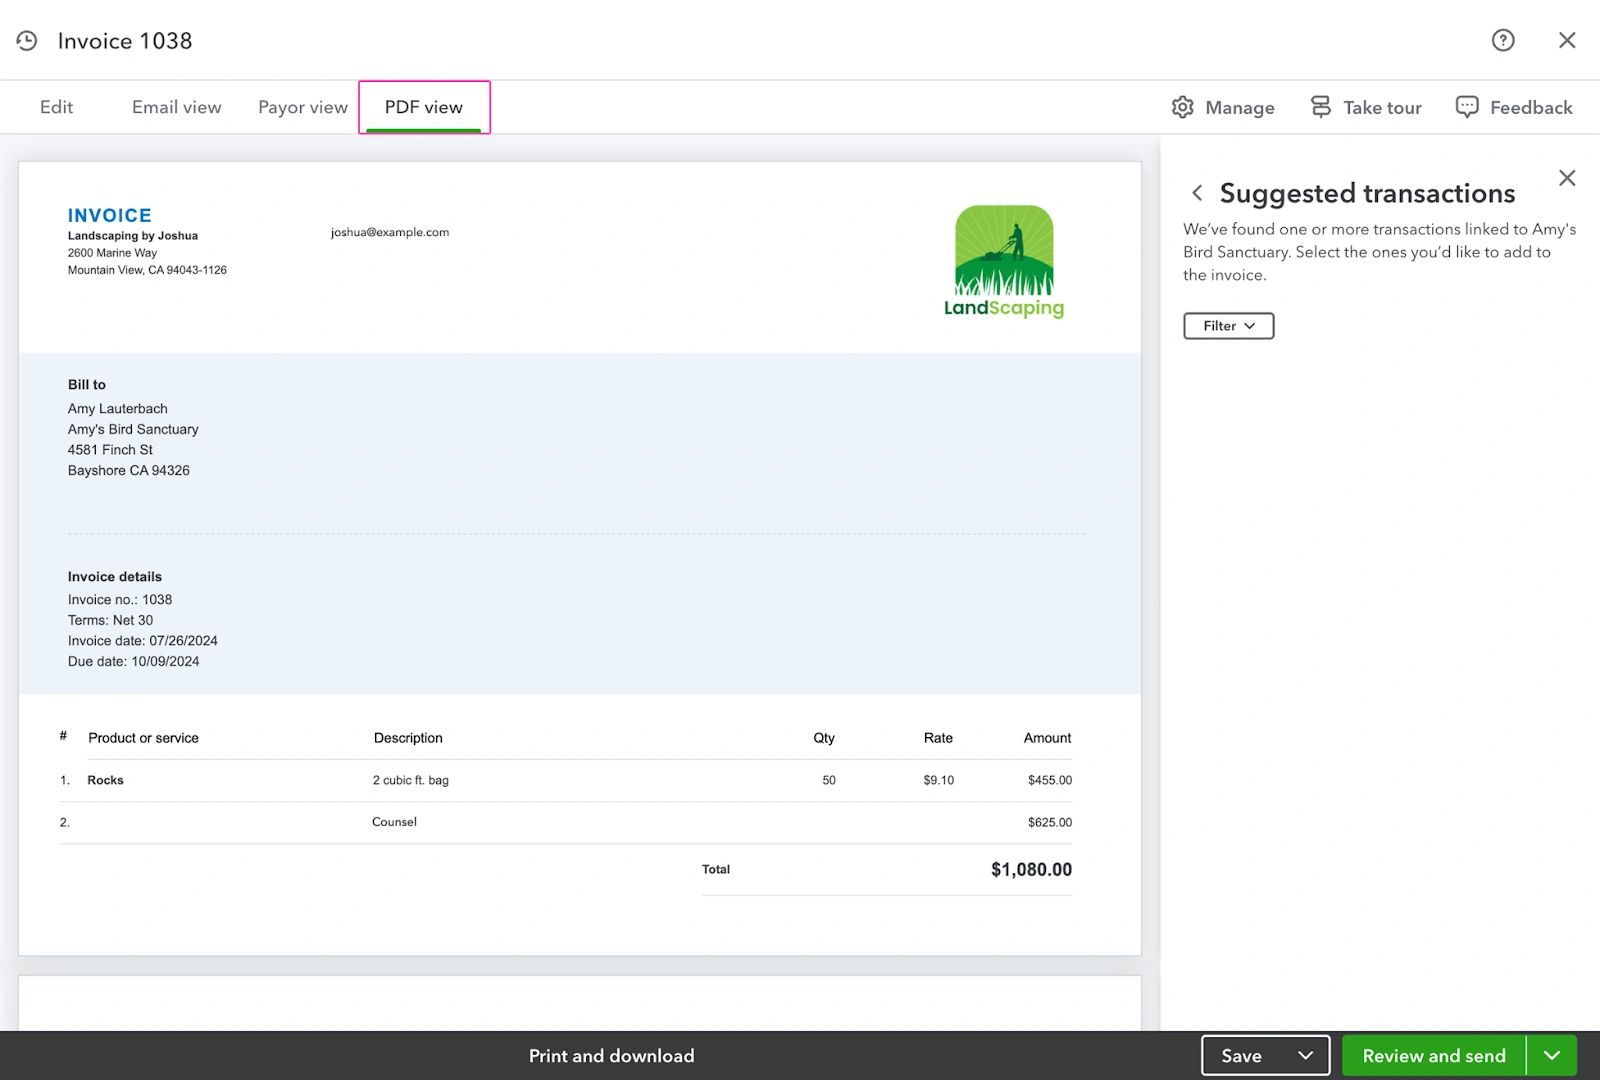
Select PDF View to see what the customer sees, which is the full amount of expense with the markup included, but not the markup itself. Select Save when you’re done.
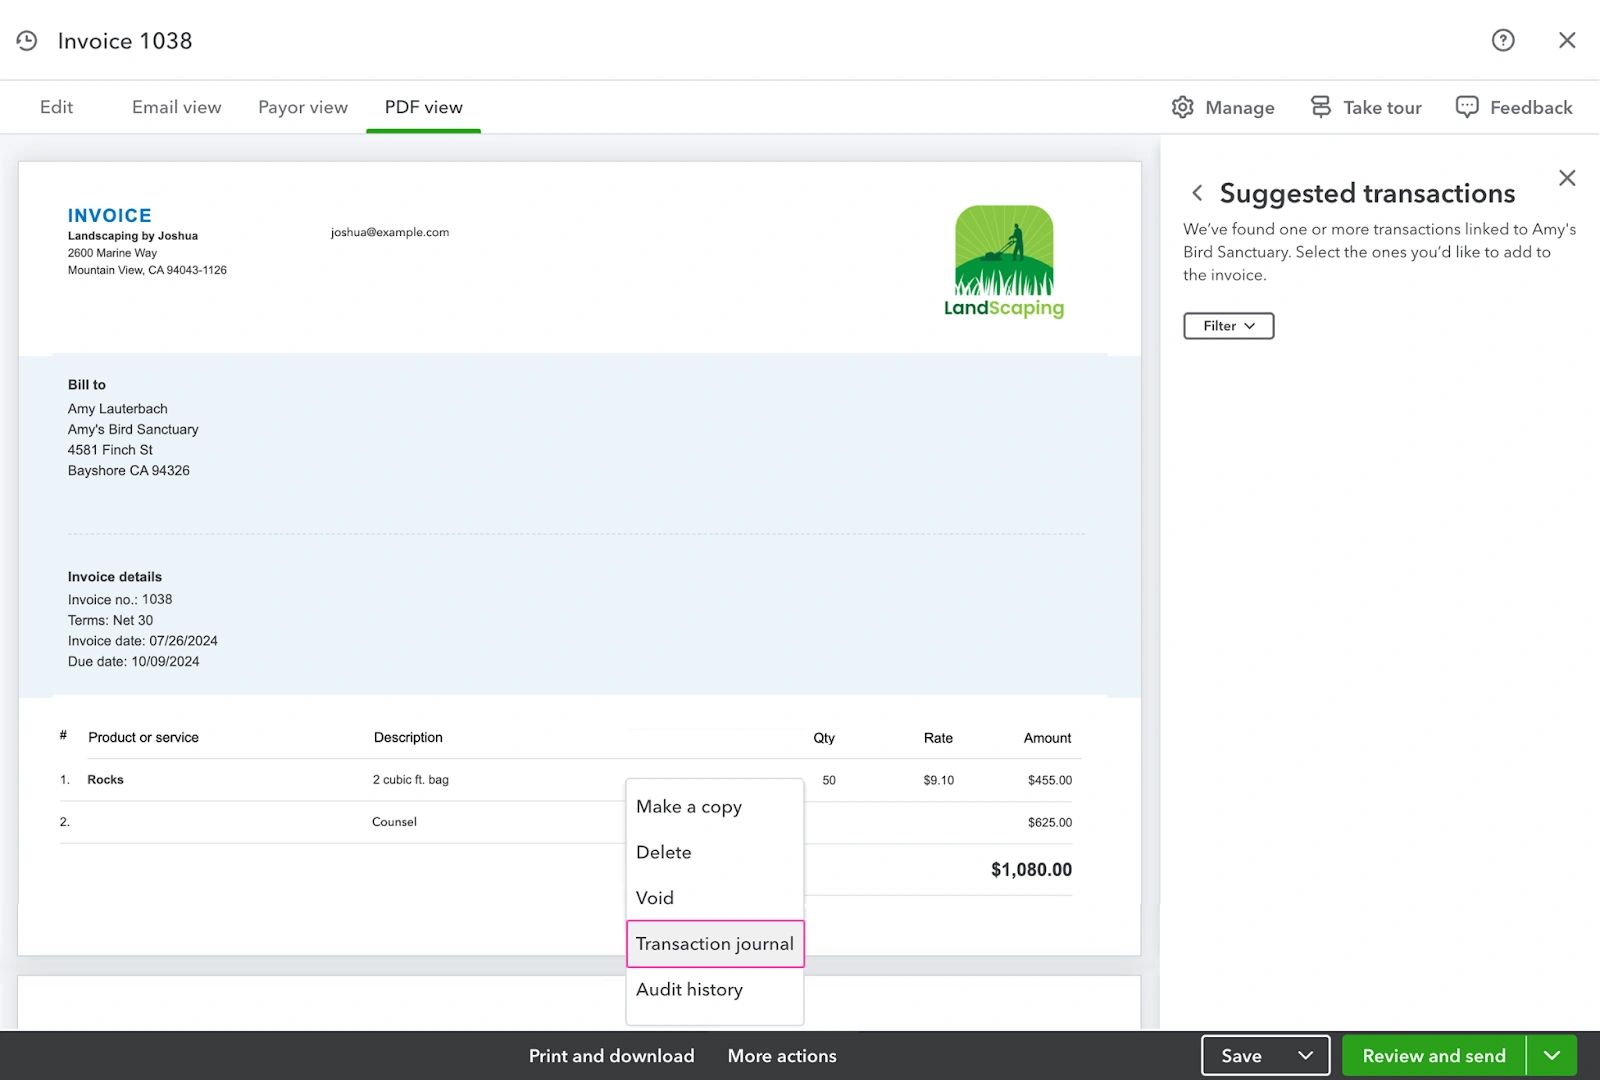
From the bottom of the screen, select More actions and then Transaction journal.
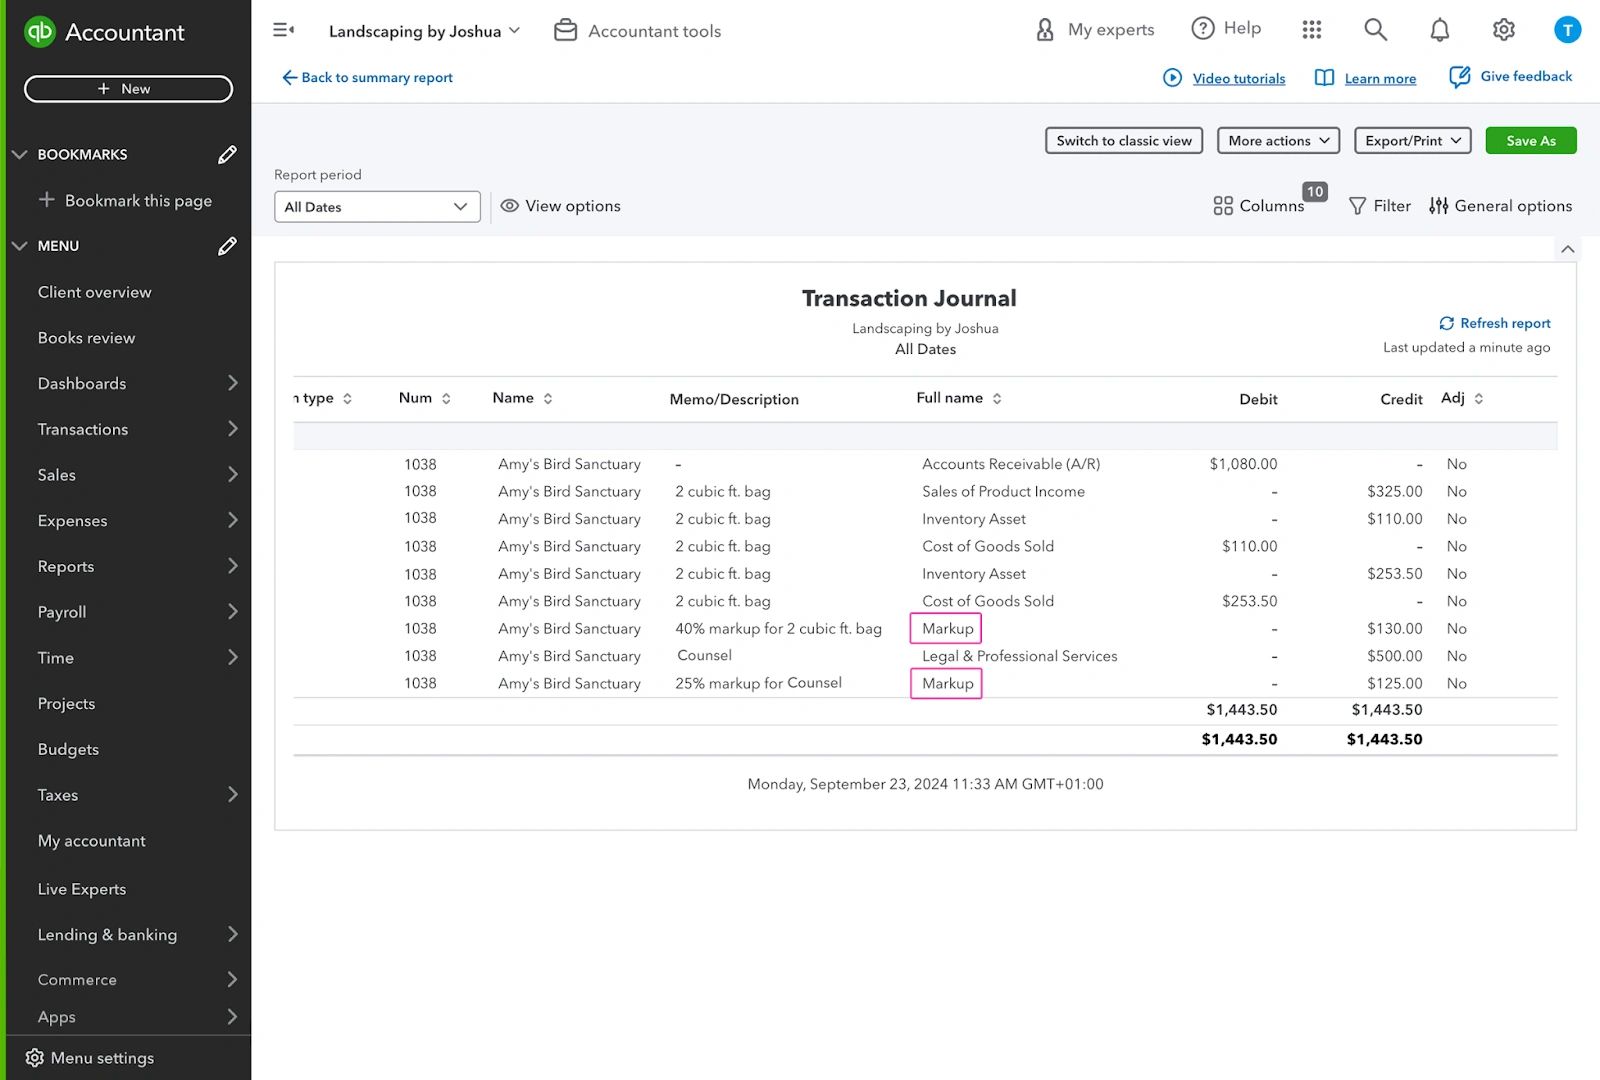
The transaction journal shows that the markup has been recorded in its own separate account called Markup, unless that account has been changed, as shown in the previous walkthrough.
Tracking billable expenses as income in QuickBooks.
If you want to, you can record billable expenses to an income account without affecting the expenses account.
Let’s look at the final task—tracking billable expenses as income. If you want to, all income, including expense reimbursements from customers, can be recorded to an income account without affecting the expenses account.
How to track billable expenses as income
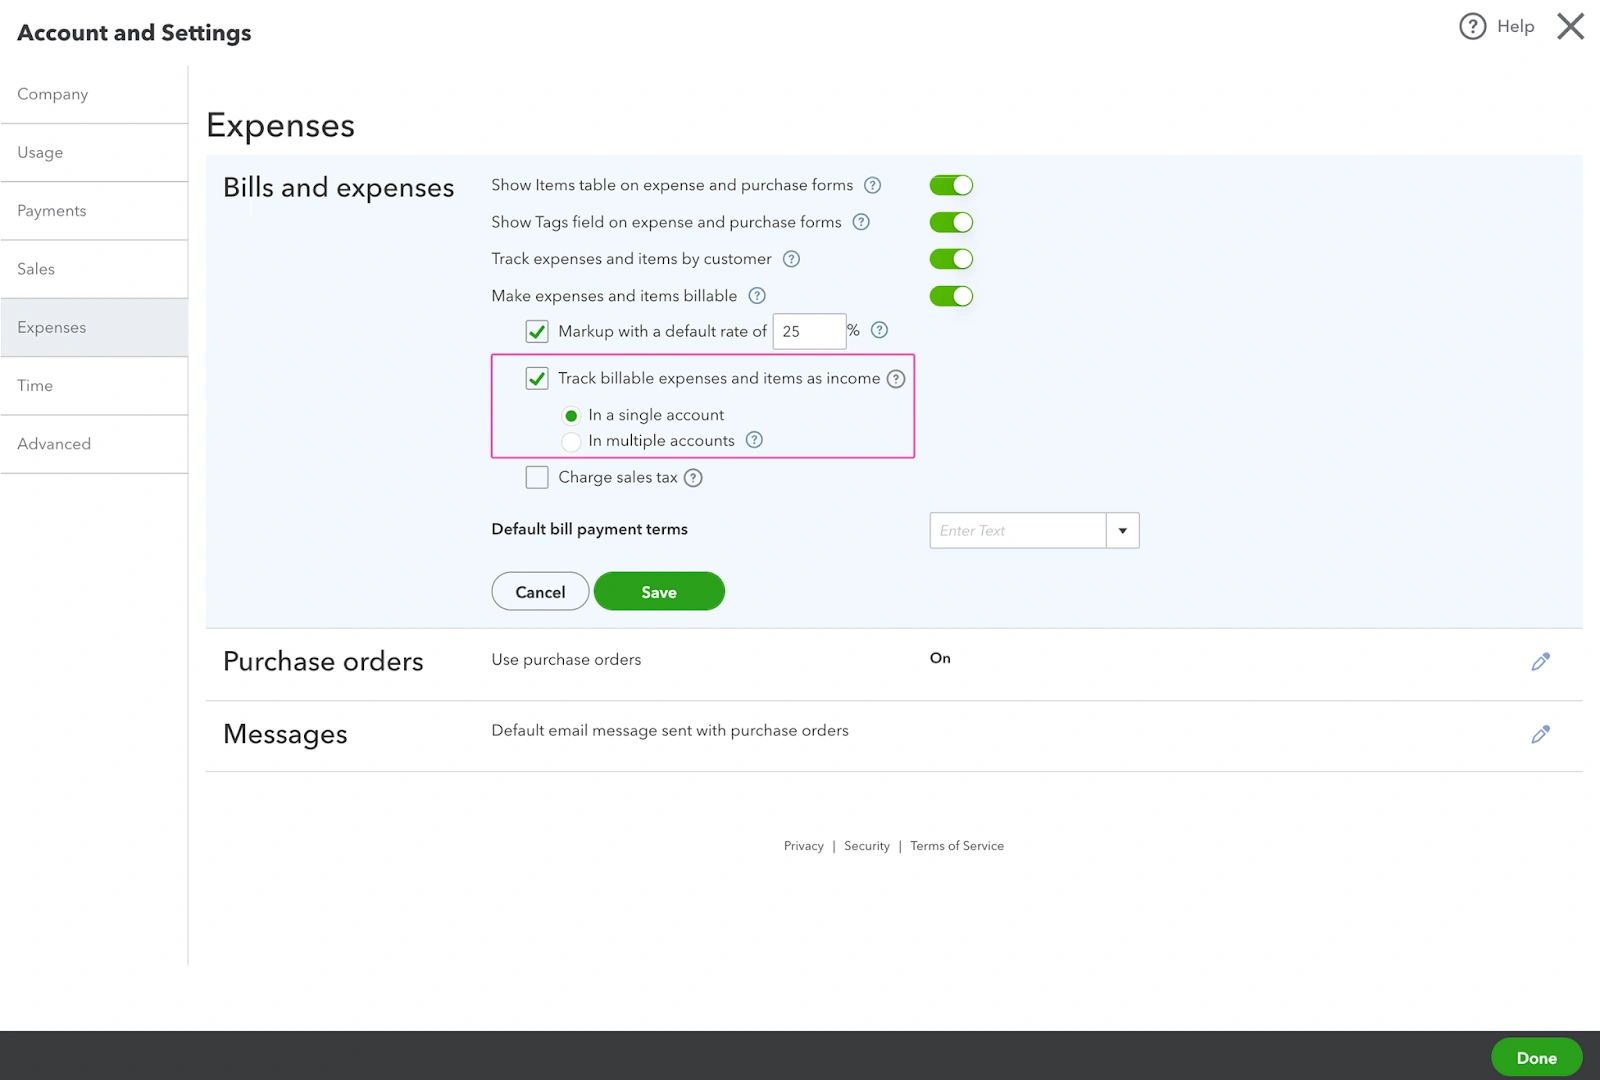
Go to the General settings gear and select Account and settings once again. From the Expenses tab, expand Bills and expenses. Check the Track billable expenses and items as income box. Next, select either the In a single account or the In multiple accounts option. If you choose In multiple accounts, you would have to edit each general ledger account that would be used for billable expenses-this is covered in a moment. Select Save.

The final step when choosing a single account is to specify the billable expense income account. To do this, go to the Advanced tab. In the Chart of accounts section, you’ll see that QuickBooks has already set up a Billable Expenses Income account. To change it, select another account from the Billable expense income account dropdown.
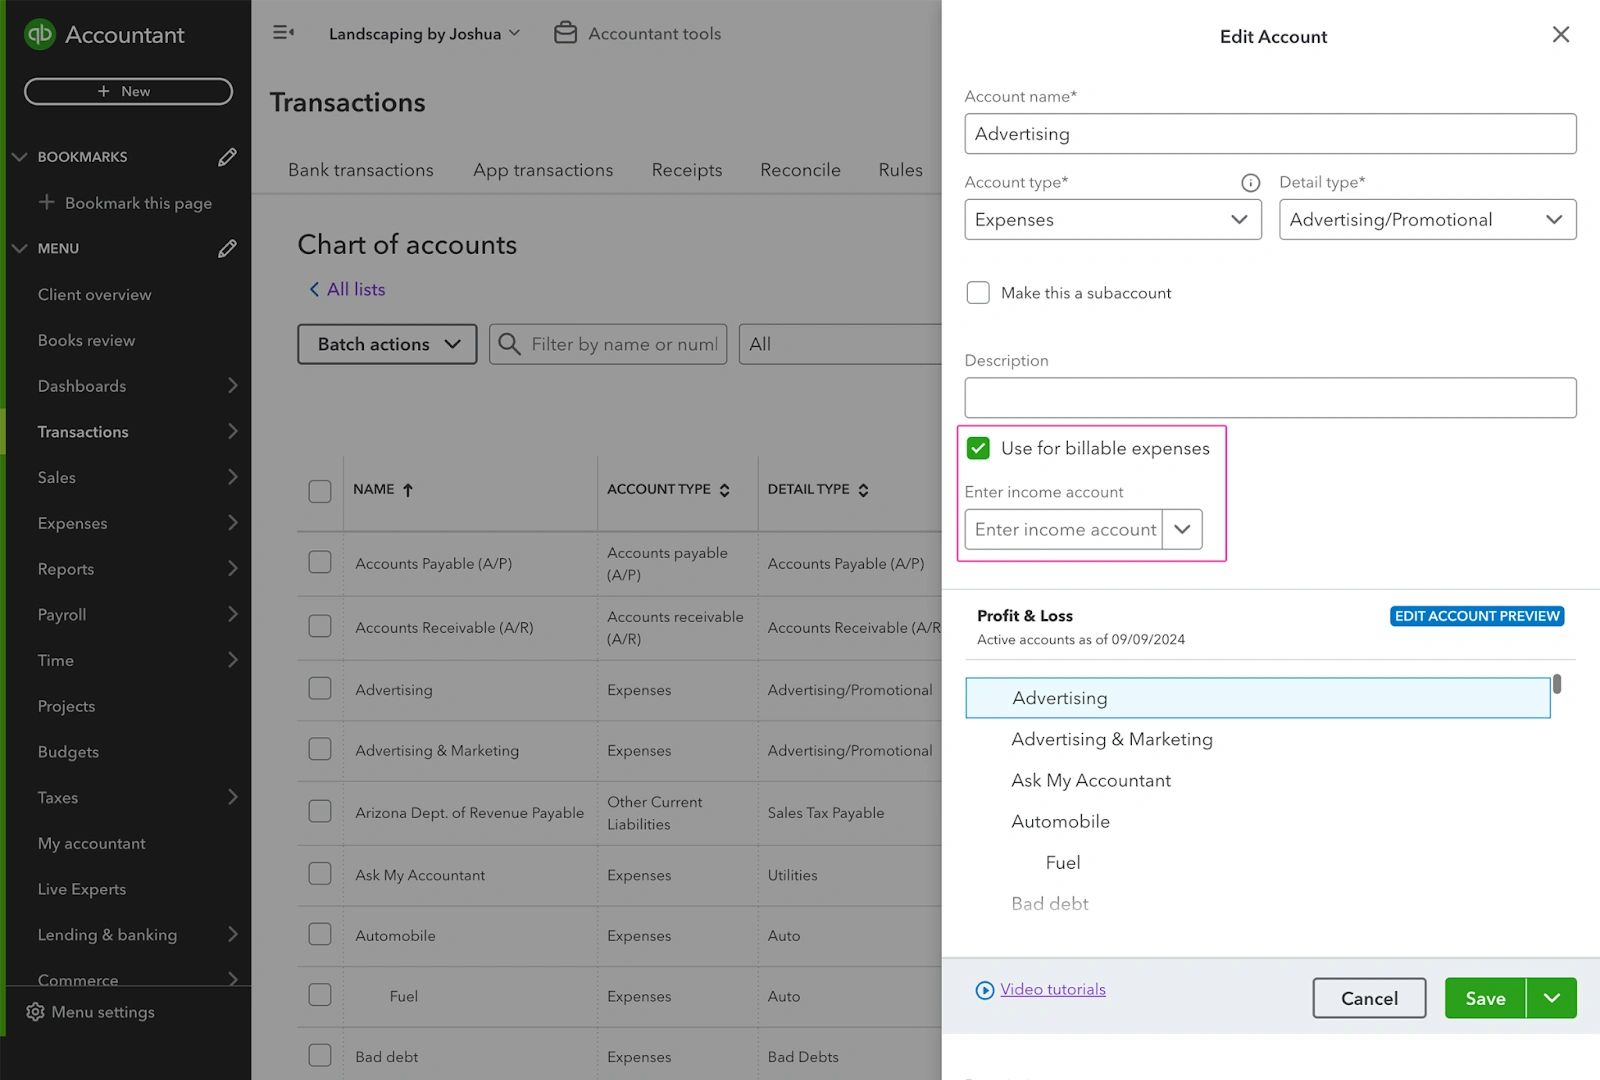
If you selected the In multiple accounts option in Account and settings, this creates a checkbox called Use for billable expenses in an account’s edit screen in the chart of accounts. Any general ledger account that could be used for billable expenses must have an income account set up. If it hasn’t, there’ll be an error when trying to save that billable expense.
When to track billable expenses as income.
There are times when you will use an income account to reflect the reimbursement of the expenses and an income account to show the total amount of expenses. They may reference them both as part of a checks and balance process to ensure the expense account should be zero once it’s billed to the customer.
Also, billable expenses are not always treated the same way as regular income in every state, so tracking expenses as income can allow you to reflect the total balance appropriately.
Check out our Free Additional Articles